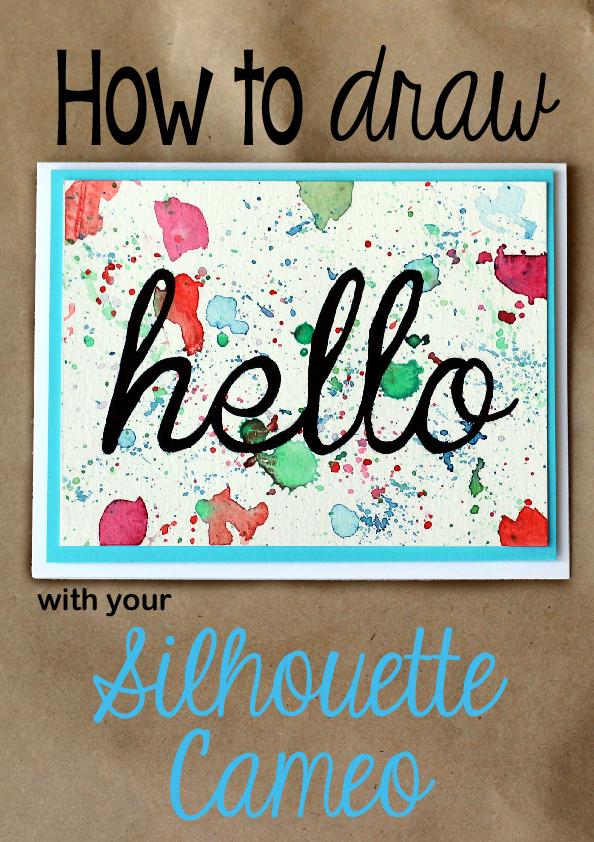
How to draw with your Silhouette Cameo
I wanted to make a simple card just to say hello, so I used my Silhouette Cameo with an adjustable marker holder to sketch instead of cut and created these lovely “hello” watercolor cards!

It might look like you need awesome calligraphy skills to pull this off, but it’s really simplified once you use the right tools. Let me show you how!
To make these cards, you will need some watercolor paper. You may be wondering if you REALLY have to get watercolor paper or if you can just use regular paper. I had the same thought so I tried a simple watercolor experiment on regular paper. Unfortunately the paper got all wrinkled and the paint wouldn’t “move” like I thought it should. Watercolor paper is an investment, but it really is necessary!

To make these cards I first used a paper trimmer to cut my paper down to the size I wanted the final piece to be. Next I took a lot of different colors from my new watercolor set and made splatters. I decided to add in a few large blobs of colors to give more interest. I experimented with adding different amounts of water here. Adding a lot of water makes it easier to make splotches and gives a softer look. Sadly I didn’t take any photos of this process because I was just experimenting, but this is a great project to have your kids get in on the action with or just have some fun learning how much water you need to use with your paints.

Once I let my card bases all dry, I decided to add “hello” in large letters on the front of my card. I tried using vinyl as a stencil (as I have in the past with acrylic paint on wood), but the watercolor paper is really fibrous and it was sticking and pulling up my little paint spots. Instead I decided to use my Silhouette Cameo to draw the outlines of the words so I could go in and paint the letters by hand.
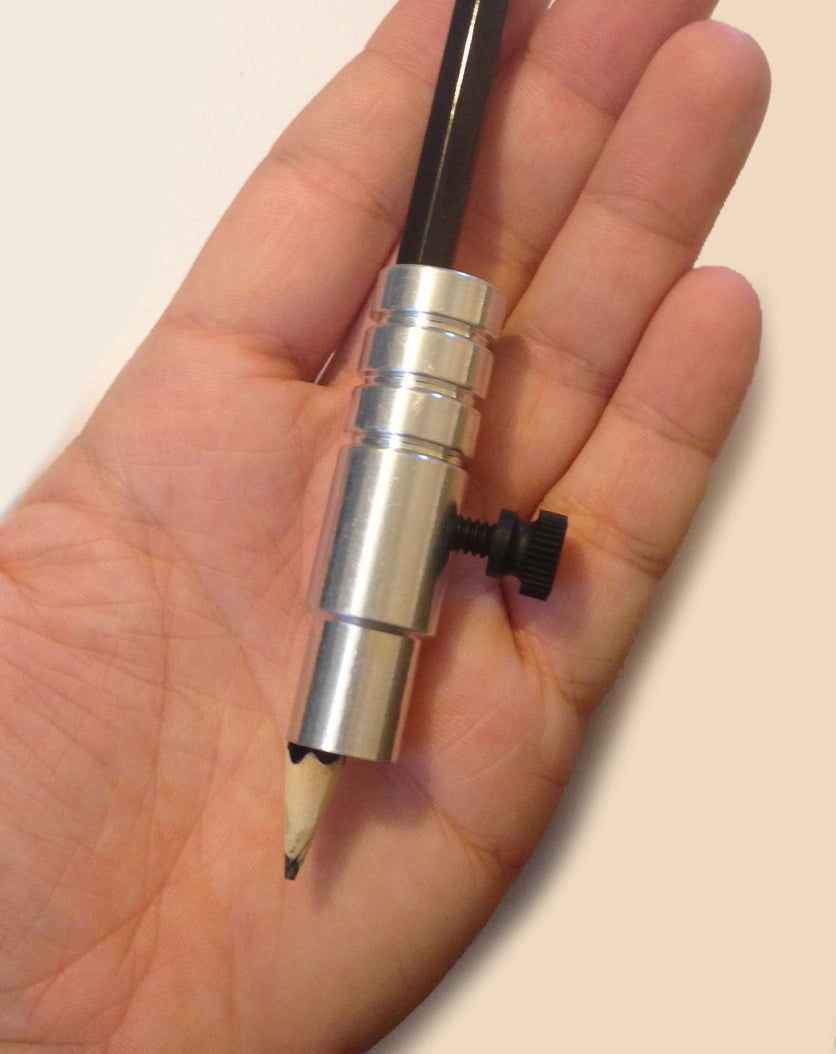
To have your Cameo sketch instead of cut, try out this adjustable marker holder:

The adjustable marker holder comes in a baggie with some instructions, the marker holder and a Popsicle stick. You’ll need the Popsicle stick to ensure you have the correct depth with your writing utensil. There is also an adjustable pen holder that you may wish to pick up instead (I think it would give you more precision on where your Cameo sketches (you can see that the pencil is off center in the marker holder in the photo below)).
To begin, put your writing utensil in the holder (in this case, I am using the pencil that came with the watercolor set). Tighten the screw on the side until your pencil is held in place, but not so tight that you can’t make slight adjustments.
Take your blade out of your Cameo and pop in the marker holder. It will sit right in the carriage where the blade normally goes.

Next, slide the Popsicle stick under the tip of your pencil. This is hard to get a photo of, but just put the stick flat on the base of your machine, right behind the roller bar. Slide the stick under the tip of your pencil. Move the pencil down until it is just touching the Popsicle stick. This will ensure you have your pencil at the correct height.
If you skip this step, your pencil may end up too far down and your machine will draw “drag lines” where you don’t want it to. If you’re too high up, you won’t make contact with the paper.
TIP: If you loose your Popsicle stick, you can use a U.S. nickel in a pinch!
I typed out the word “hello” in my Silhouette Cameo Studio software. I created a box in the upper left hand corner of my work space that was the same size as my card front. Next I centered the text inside that box. Before sketching, I welded my letters (learn how to weld here) and then deleted the outside box because I didn’t need it to be drawn out.

Next I stuck my watercolor square to my cutting mat and loaded the mat. I didn’t change my pen settings, I left it on “blade” and then clicked “Send to Silhouette.” The Cameo then lightly drew out my letters (you may be able to see them faintly in the photo below):

You may need to play with the settings depending on how dark you want the lines to be. Experiment with a piece of scratch paper first. I wanted to have very light lines for watercoloring.
Next I took the fine tipped brush that came with my watercolor set and painted in my letters with black watercolor. For this step, I kept my watercolor paint a little thicker because I wanted good coverage.

If you don’t have a steady hand, you could try putting in a Sharpie or other marker instead of the pencil and have the Cameo draw the actual words out.
The good news is the adjustable marker holder and it’s Popsicle stick fit right into the accessories drawer on the side of your machine for easy storage.

In case you were curious, the adjustable marker holder holds anything up to just about a half of an inch. The screw goes almost all the way to the inside of the barrel when fully tightened, so it can hold thinner things like my pencil too. If your marker isn’t round, no problem, they’ll fit right in there too! Just tighten the screw and you’re secure.
 Also, it holds your utensil in there really tight. Even a smooth sided marker will stay right in place. No sliding around here!
I hope you enjoyed this post and that you have found some inspiration to play with watercolors and your Cameo to create beautiful cards too! These cards are the perfect thing to send to someone just because. Who doesn’t love getting something other than bills in the mail?
Who would you send a lovely “hello” to? Comment below!

You may also like
EASY DIY ENVELOPES! QUICKLY TURN ANY PAPER PACK INTO HAND MADE ENVELOPES USING THE WE R MEMORY KEEPERS ENVELOPE PUNCH BOARD!
DIY PERSONALIZED LUNCH BAGS WITH THE SILHOUETTE CAMEO & SKETCH PENS

Like this post? Make sure to share it, save it and Pin it!
FEATURED SALES