Design #11: Kitchen Utensils! Personalized Glass Cutting Board
Have you ever needed to make a quick and inexpensive gift for someone? Maybe Mother’s Day is coming up quicker than you thought, or you have a last minute bridal shower to attend?

Split images with writing in them (like this design) are very trendy right now, and who doesn’t love something personalized? I decided to make some split utensils to add to a glass kitchen cutting board, click below and let me show you how easy it is to create a personalized gift.
This design is #11 out of the 12 exclusive Craft-e-Corner Vinyl Designs.
>>CLICK HERE TO BUY ALL 12 VINYL DESIGNS<<

I bought the glass cutting board at a discount store. The top of the cutting board has some texture to it and there are clear little rubber feet on the bottom. When I measured the design space, I measured between the feet on the back of the board.
I want to add the vinyl to the back of the cutting board for several reasons. Vinyl should never come in direct contact with food, it is made out of the same materials as PVC and you don’t want that touching anything you eat (or drink). Plus, if you were to put the vinyl on the top of the cutting board, you’d end up wrecking the design from cutting on top of it. Even if you were just going to use it as a display piece, the top has texture to it and the vinyl just won’t stick. Putting the vinyl on the back of the cutting board solves all these problems. Plus, most vinyl is the same color whether you are looking at the top of it or the sticky side, meaning you can put it on glass and it will look the same from either side of the glass.
Once I decided on the size of my design, I added in a text box and typed out my words and sized them to fit between the utensils. Note the bars included on either side of the design:

These bars are here to help align the layers, we’ll get to them in a moment. Once you have your design ready, select everything and right click on the design. Next click “Flip Horizontally.”

This will flip your design so it appears backwards in your work space:

This step is important because we are going to be putting the vinyl on the back of the cutting board. You want to reverse the image so when you look at it from the top of the cutting board, it appears the right way up.
Once you have flipped your design, you can cut the utensil layer out and transfer it to your cutting board.
Tip: place your cutting board face down on your cutting mat. Since you can see right through the cutting board, this will help you align the design between the feet and make sure it is straight:

Once you have the utensils on, you can cut your words and the two side bars. Here is where those side bars come in handy- they are spacers to ensure that your design lines up how you planned.
Tip: Hold the cutting board up to a light and use the spacer bars to align your design before pressing your vinyl to the cutting board. With the help from the light, you can see right where your spacer bars line up:

Next peel off the transfer paper, remove the spacer bars and you are all done! If you happen to have any air bubbles, you can work them to the edges of the design using a Silhouette scraper tool. Let the vinyl cure (sit) for at least 72 hours before doing anything with it.
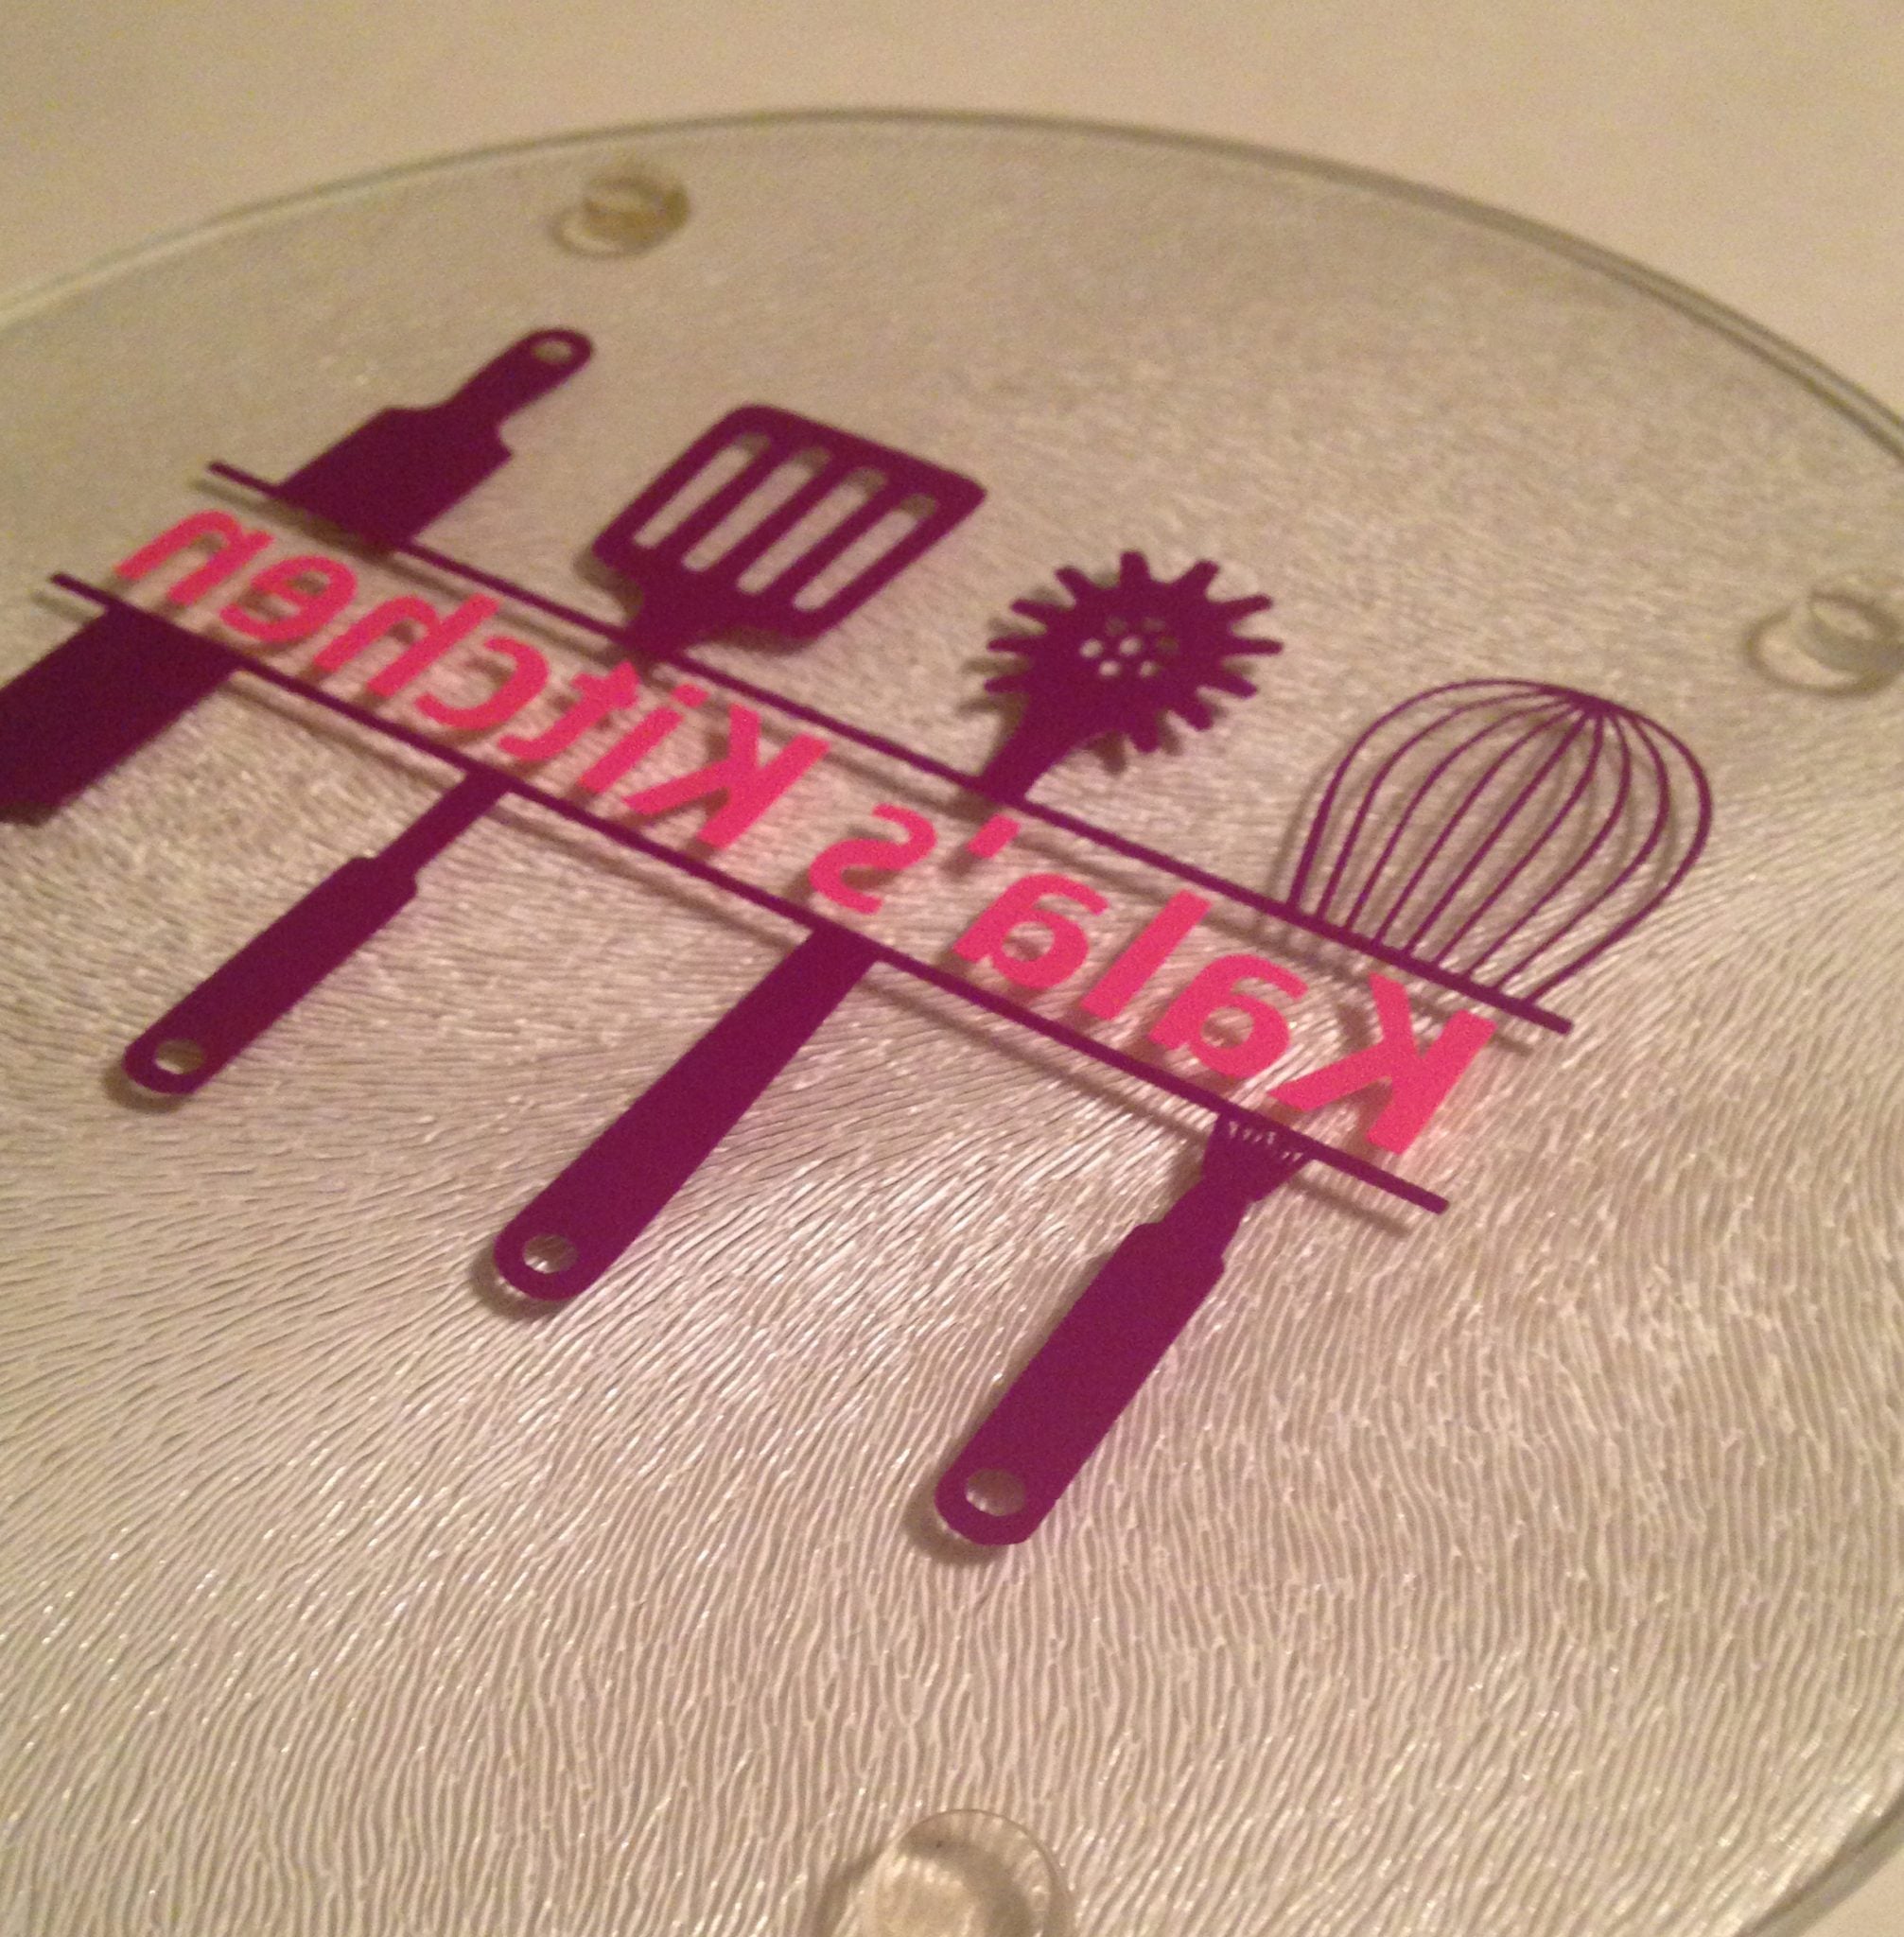
Here is the completed design from the back of the cutting board:
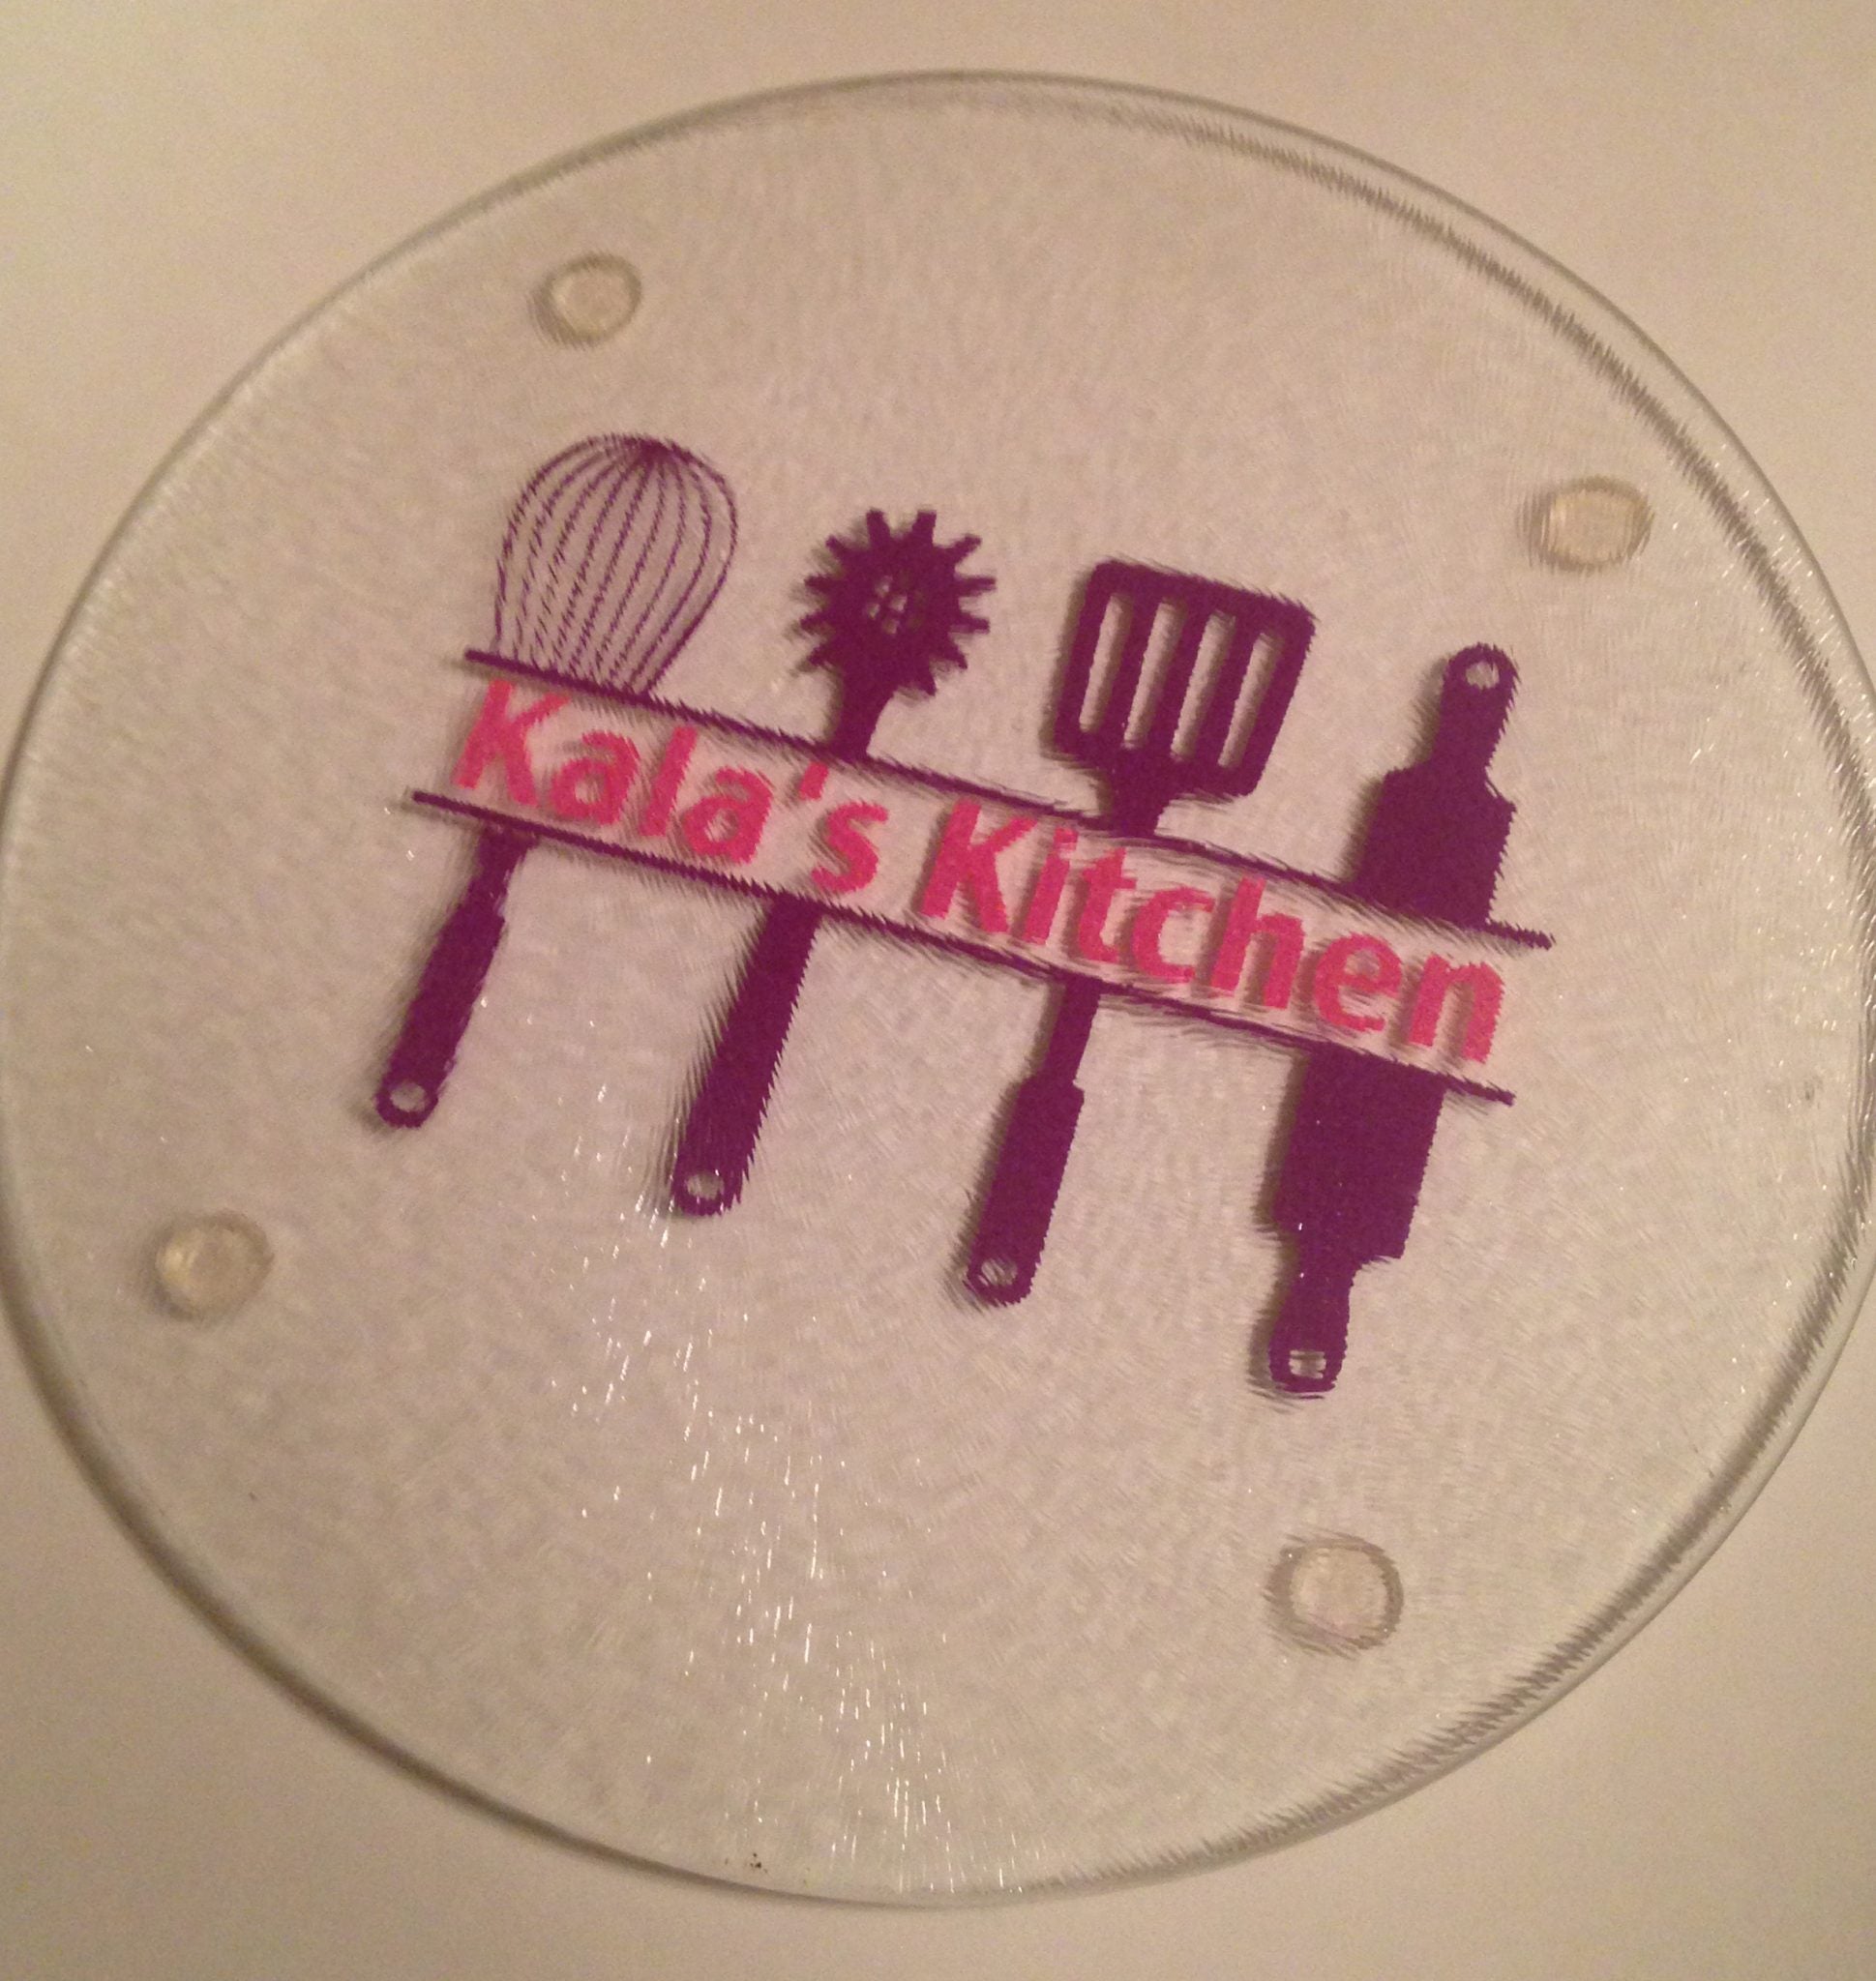
And here it is when you turn it the right way up!
A few tips for anything you add vinyl to that is food related:
1) Don’t put vinyl on a surface that your food will touch. This design is on the bottom of the glass cutting board so the food won’t ever touch the vinyl. This goes for plates or cups as well.
2) Don’t soak anything that has vinyl on it. If you soak vinyl designs, it can peel right off the project surface.
3) Use a dishwasher sparingly. I always say that if it was hand made, it should be hand washed. I know a lot of people who have vinyled mugs and use the dish washer to clean them with no problems at all, but I would hand wash anything that has vinyl on it, just to be safe.
4) Don’t microwave or bake anything with vinyl on it. Vinyl is made out of the same stuff as PVC. You don’t want to heat that up in a microwave or oven as it may release fumes. Plus, vinyl can melt if you heat it up and that can ruin your design or even start a fire.

A few other ideas you could use this design for include using heat transfer vinyl to an apron or hand towels.

Maybe you could add it to a wooden sign or as a decal on the wall? There are a lot of places you could use this design, I hope you enjoyed this project!
See more about my 12 Exclusive Craft-e-Corner Vinyl Designs here. >>CLICK HERE TO BUY ALL 12 VINYL DESIGNS<<

FEATURED SALES