Design #5: Dream Catcher! (One Cut- Two Projects!) Using Vinyl as a Stencil (Project #2)
I love using a design in two ways to help prevent wasting my vinyl. Using both the positive and the negative of the same design is a great way to use your vinyl and reduce waste. Here is my second project using the Dream Catcher Design:

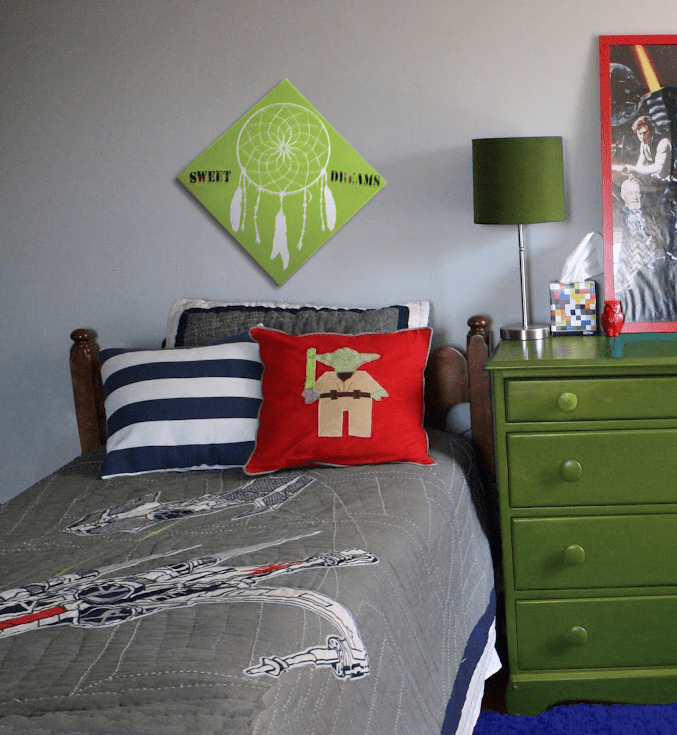
The first project I did with this design, I used the negative of the design to create a sweet dream catcher canvas for my daughter. Now I am going to use the positive of the design to create a dream catcher for my son!
Both of these projects were done with just one cut from one piece of vinyl. This dream catcher is design #5 from our 12 exclusive designs. >>CLICK HERE TO BUY ALL 12 VINYL DESIGNS<<
For this project, I used the positive of the vinyl:

I carefully peeled the dream catcher off of the vinyl backing sheet. It is all one continuous piece so I could remove it without using transfer paper. This allowed me to use the negative of the design for my first project. When removing the design, use caution: vinyl seems to naturally have static and it will stick to itself. It’s really hard to get it unstuck and it can potentially ruin the delicate deign. To help minimize any static, I wiped the vinyl and my hand with a baby wipe before transferring the design to the canvas.
I stuck the positive of the design to a 12×12 inch canvas. I added a piece of wood to the inside back of my canvas to give it a hard backing and then used my embossing gun to GENTLY heat the design, pressing it into the canvas as I went:
Next, I painted some random colors on the side of the canvas. I wasn’t going for anything specific, just splotches of colors to go with the room decor:

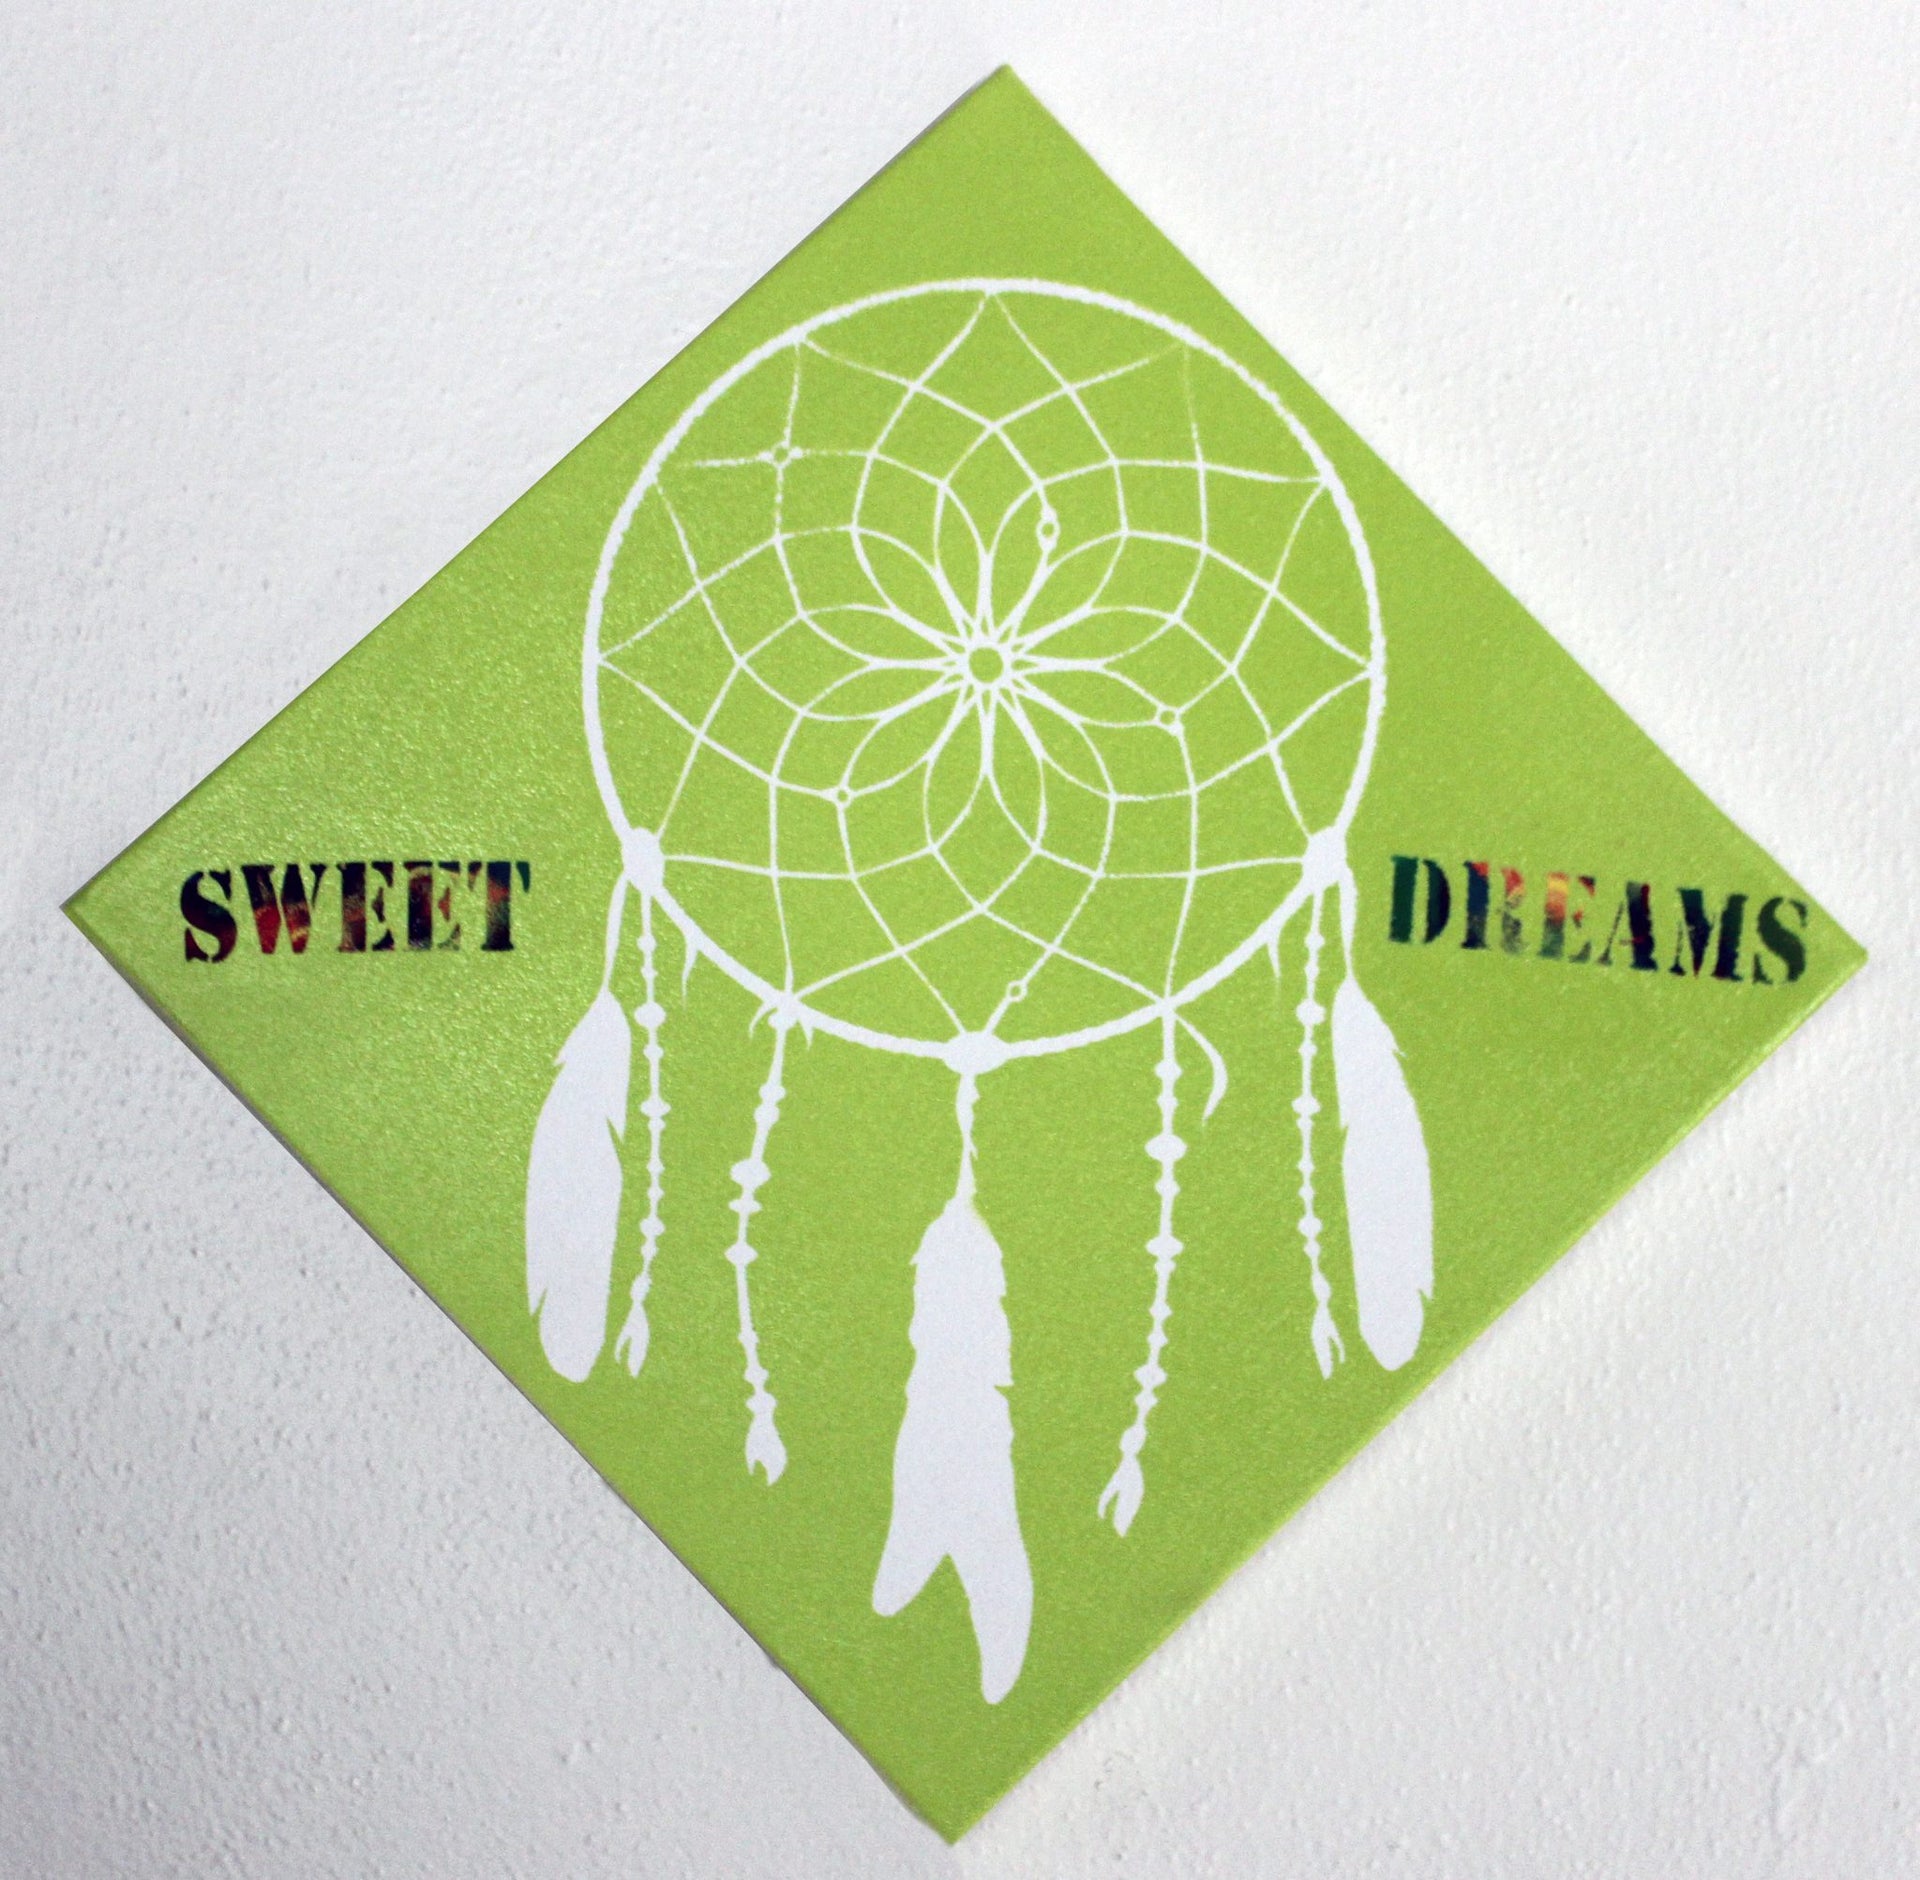
Once the paint dried, I cut out the words “Sweet Dreams” out of vinyl in a type writer font and added it to the corners of the design over the painted areas:

Finally, I spray painted the whole thing with a lime green spray paint:

Once the paint was dry, I peeled off the vinyl with a pair of tweezers. This revealed the white canvas where the dream catcher was and the colorful words:
This project was a little simpler than the first project, but my son loves it.
I hope you enjoyed this second way to use vinyl as a stencil!
See more about my 12 Exclusive Craft-e-Corner Vinyl Designs here. >>CLICK HERE TO BUY ALL 12 VINYL DESIGNS<<

FEATURED SALES