
Adding HTV To Wood (How & Why)

I read somewhere that you can use heat transfer vinyl on wood. This is supposed to make it so it’s less obvious that it’s vinyl because the heat transfer vinyl melts into the surface and it looks a little more like it’s painted on instead of being vinyl. I was intrigued to try this technique out and wanted to see how it would work.
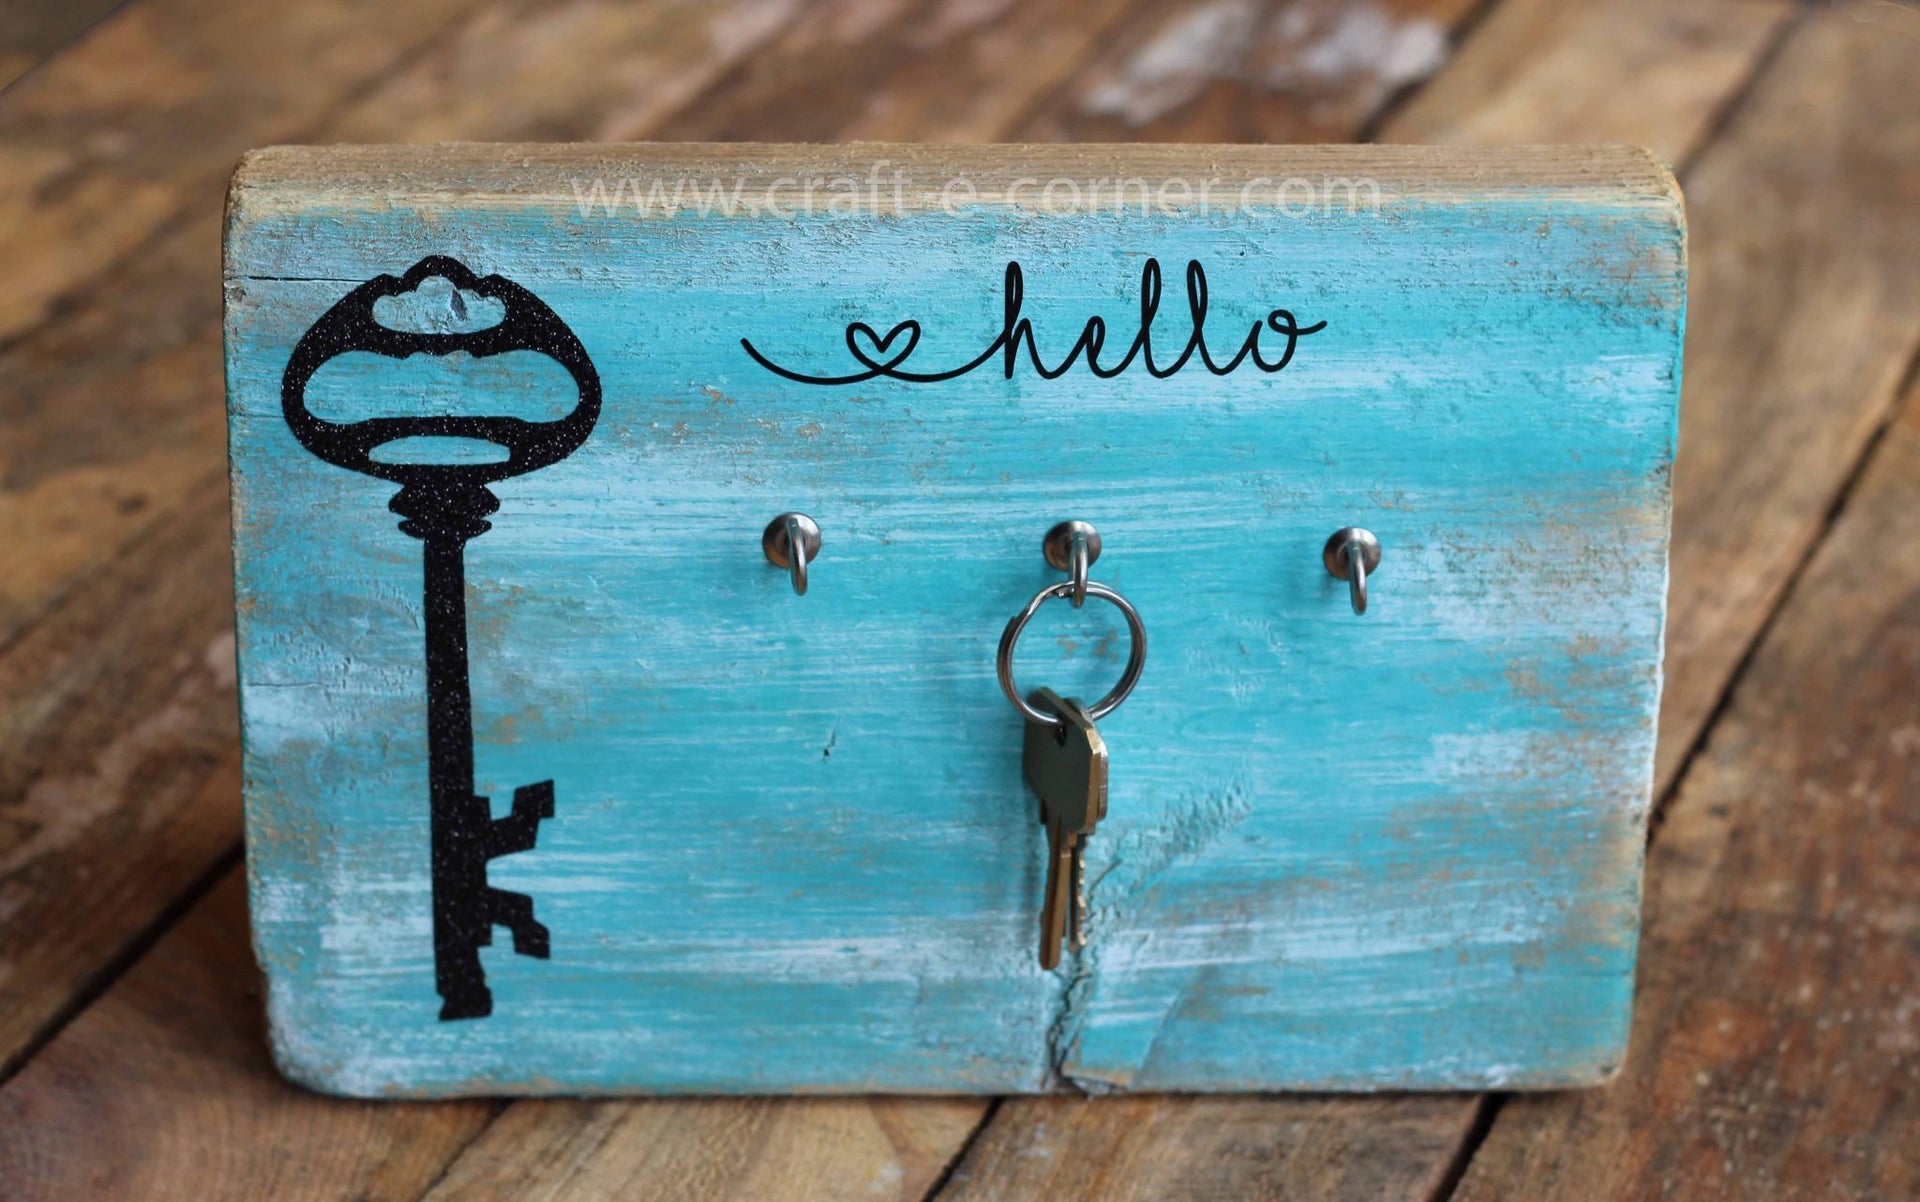
Here’s a sneak peak at the finished project that I made while testing this technique:

I found this chunk of wood floating around in the lake and fished it out. You never know when you might come up with a good project for beat up wood!
I painted the wood with teal and white acrylic paint. I used light coats and sanded it once the paint dried to make the wood show through more.
Normally I would use adhesive backed vinyl for this type of project, but I wanted to test out the heat transfer vinyl and see how it would work. There are a few reasons why I could see using heat transfer vinyl over adhesive backed vinyl… mostly if you had a color in heat transfer vinyl (HTV) that you did not have with regular vinyl, I could completely understand using what you already have on hand. Having never put HTV on wood, I was curious to see how it would work. I grabbed a scrap of wood and used some scrap vinyl I had around to test it out:
I tested adhesive backed vinyl (regular vinyl) with heat, adhesive backed vinyl without heat, glitter heat transfer vinyl and smooth heat transfer vinyl. Here are my results!
The adhesive backed vinyl with heat is the method I would probably recommend if you want to add vinyl to a wood project. For the best results, lightly heat up the vinyl with an embossing heat tool (or blow dryer) and press the vinyl into the wood as you go. Heating the vinyl will slightly melt it and allow you to see the the wood grain resulting in a painted on look. You might think it was painted on if you didn’t know any better:

Next I wanted to show what just adhesive backed vinyl (no heat) would look like on wood. This worked, but it really looked like a sticker. If you were working with very smooth wood, this would be fine, but if you have grain in your wood, the vinyl might have trouble sticking with all the grooves.
Next I moved into heat transfer vinyl. I tried glitter heat transfer first and it worked wonderfully. I could see using this if you wanted to add some real sparkle to your project without making a mess with glue and glitter. The glitter heat transfer really adhered well to the wood. It is thicker so you cannot see the wood grain through the design. While this didn’t make it look painted on, it gave a nice solid glitter shape without the mess. It worked better than I expected it to.
Smooth heat transfer vinyl was my final test. This is what the person in the post that I read used, and she really liked the results, but this would probably be my least recommend method on something with wood grain. For my experiment, the smooth heat transfer just did not give a nice result. You can see the one corner kind of melted… this could have been a fluke and it might work well if you want to try it out, but I would skip it in this case. The end result also kind of looks like melted plastic. On super smooth wood, it would probably work well, but then why not just use regular vinyl (unless you didn’t have that color)?
I decided to use glitter heat transfer vinyl for my project. The design I am using was created as part of our 12 exclusive Heat Transfer Designs. When you first open the file, you will see:
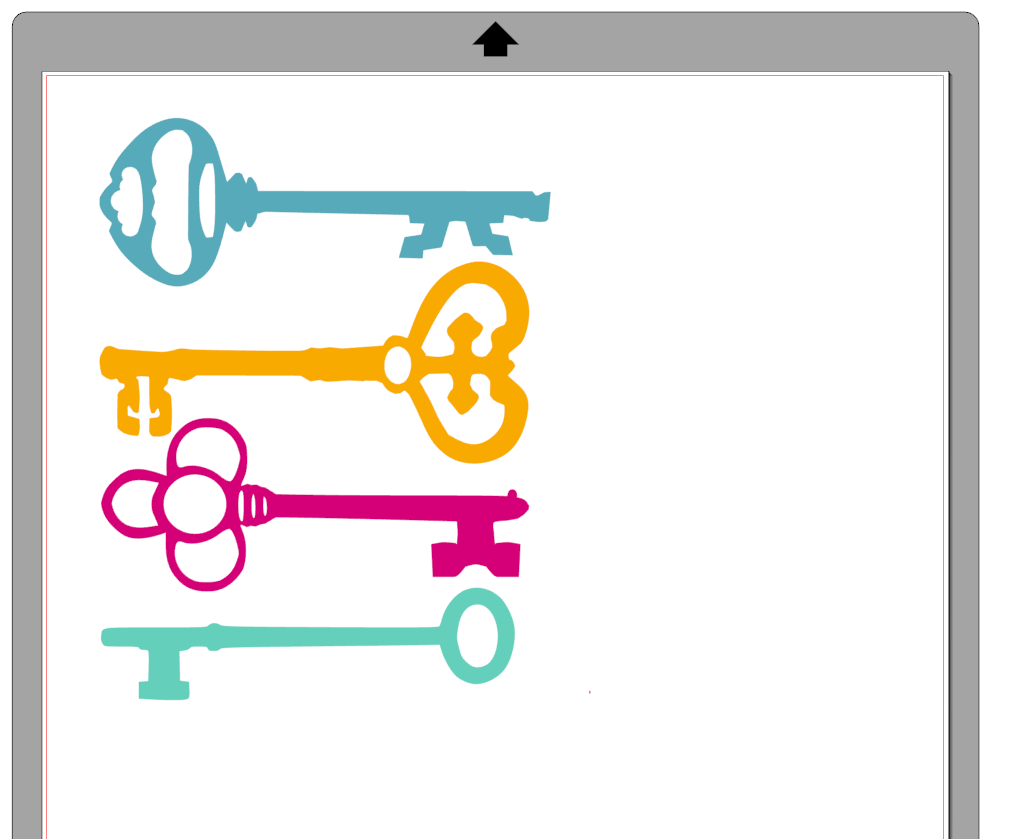
I created this file with four antique style skeleton keys. I thought this would be a very versatile design and you could use all four keys or just one at a time. I thought I would use all four keys and tile them across the board:

But then decided that this might be overkill, so I chose just one key to be my accent. I aligned the heat transfer key with my plaque and used my iron to iron it in place (this piece of wood was way too thick to close the top plate on my heat press, but the iron worked well too!).
Once I had the key in place, I removed the heat transfer backing sheet and then I added some key hooks:

I found a 4 pack of screw back hooks at the hardware store and I added them to the sign by screwing them in by hand.
To finish the project, I added in “hello” at the top with regular vinyl that heated up and pressed into the wood grain:
This was a pretty quick project and a fun experiment. I now have 3 more heat transfer keys to use that didn’t go on the plaque as planned… what shall I put them on? Which idea do you like best?

FEATURED SALES


2 comments
Thank you for doing this little experiment for everyone. Your project just justified my thoughts. I have been using permanent vinyl and heat and love the outcome. I do it on my scrabble tiles i make.
Oh, so it’s over three years on and I can’t believe no one has commented on your little experiment! As a rule, I’ve been a bit snobbish about putting just vinyl on my signs, preferring the painted look. But I’ve been having so many disasters, and have had to redo so many signs, and have wasted so much vinyl, paint and time in the process, that I’m ready to ‘lower my standard’! I started looking at the reviews on HTV and how well it works on wood. So today I attempted a sign on painted wood using HTV. Oh, it took forever to eventually stick, and the end result is still very vinyl-ey. I would not call it a success. So more googling and I eventually arrive at your post. I had to read it a couple of times to make sure I got it right – you were saying that applying heat to ORDINARY vinyl gave you the most authentic ‘painted’ look – wow, really?? So I’ve just tried out your theory. Started with the blowdrier as you said, then took it a step further and put it under the iron! I’m super happy with the results, the wood grain shows up really well, it looks like it belongs. Yay! A couple more experiments to make sure I didn’t fluke it and I might just be ready to throw away my paint brushes and spray cans! Thank you so much! xx