
DIY Photo Transfer to Wood
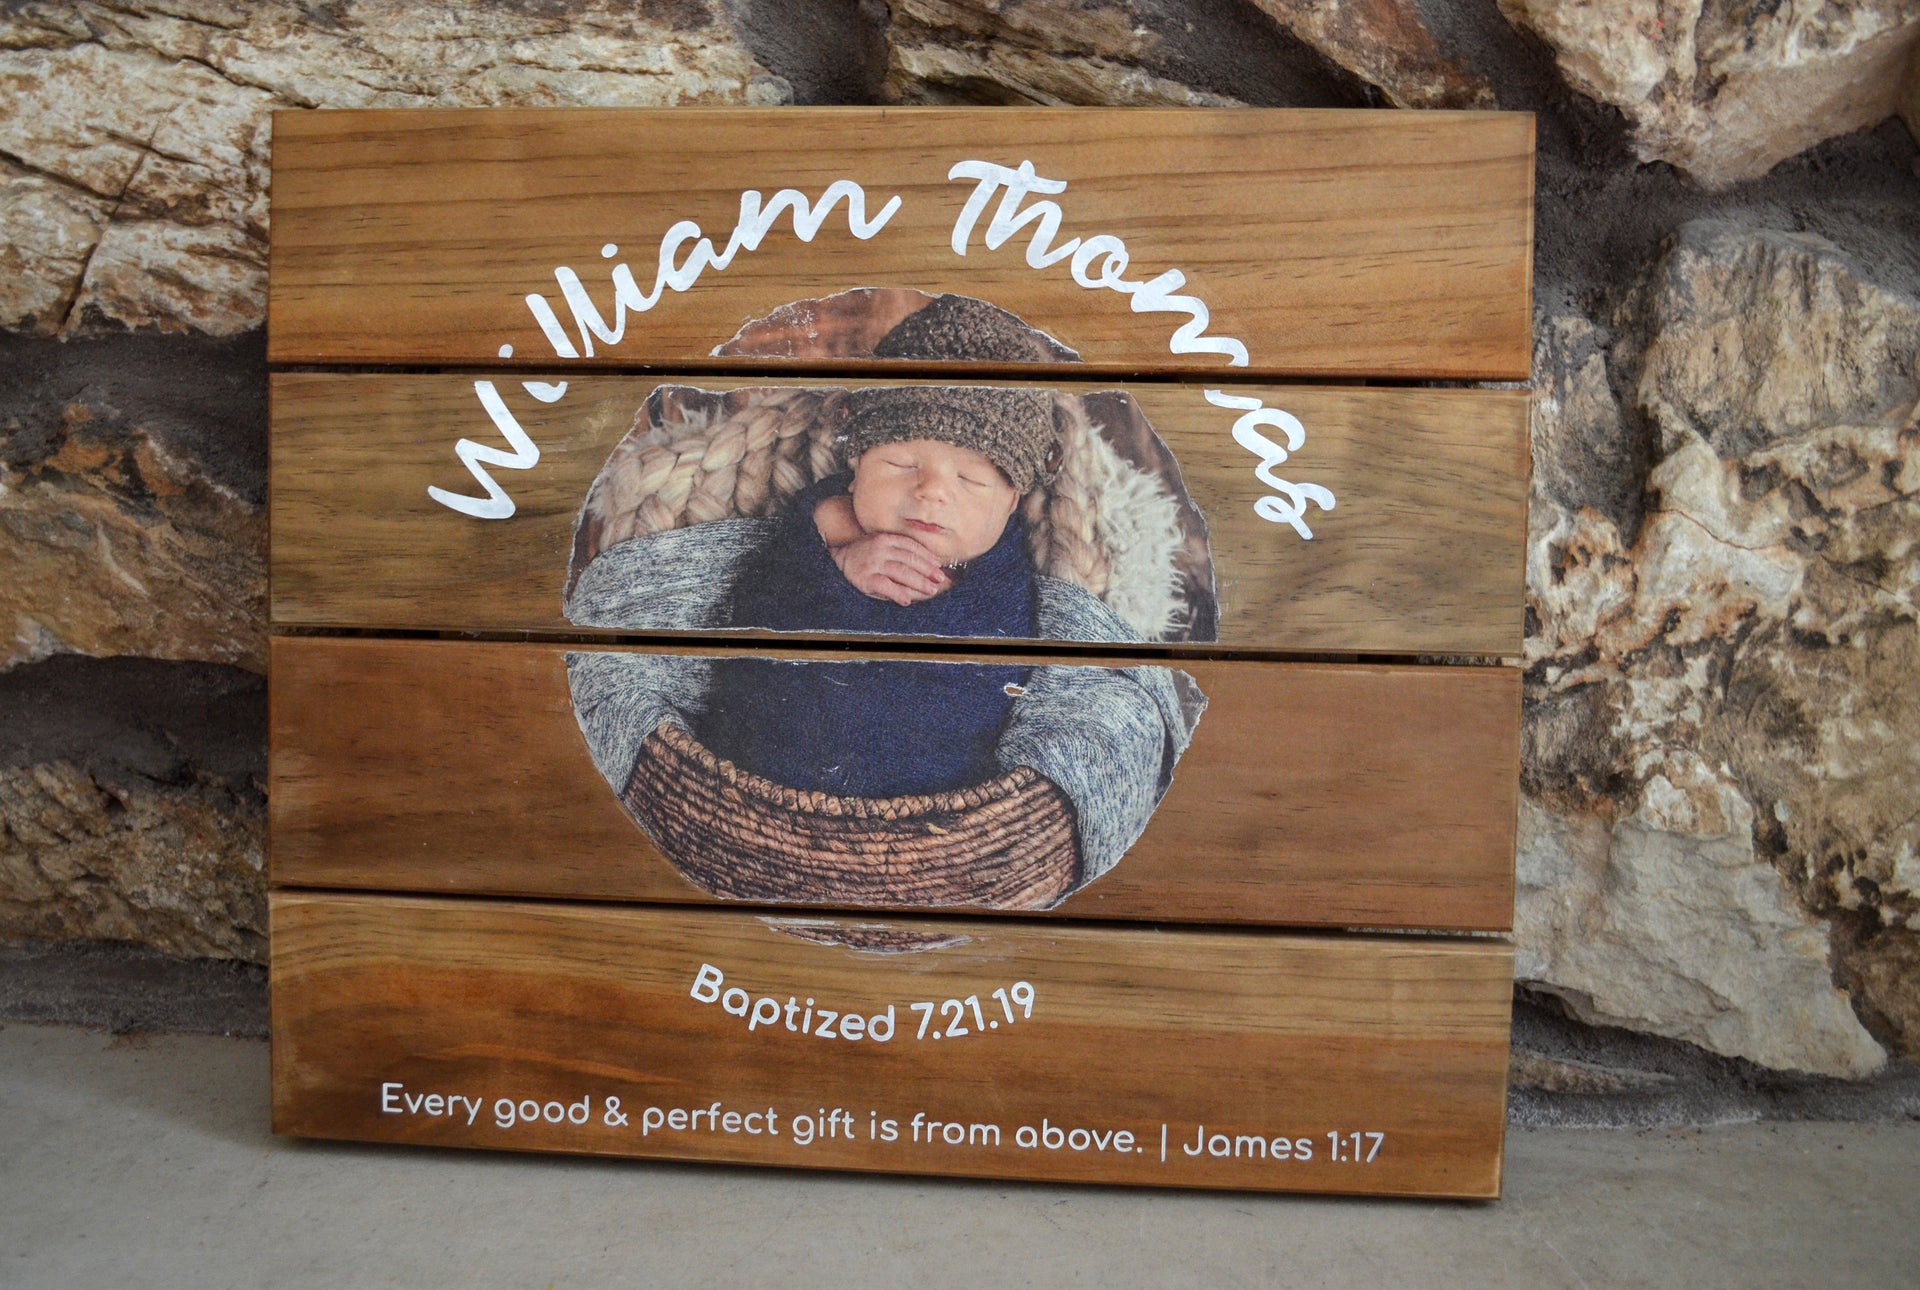
Want to add something extra to a wood sign besides just words? My friend's son was recently baptized and I wanted to make a unique gift for them. I decided to take one of their newborn pictures and combine it with his name, baptism date and a bible verse.

For this project you will need:
• Wood Sign
• Die Cutting Machine
• Vinyl
• Transfer Paper or Tape
• Mod Podge Photo Transfer Medium
• Mod Podge (matte)
• Paint Brush
• Paint
• X-Acto Knife
• Bone Folder Tool
• Weeder and Scraper Tools
Instructions:
1. Print out your picture on regular printer paper. This needs to be done on a laser printer, not an inkjet.

2. Cover the front of your picture with Mod Podge Photo Transfer Medium.

3. Place your picture where you want it to be on your sign upside down and let it dry overnight. Make sure it is down all the way. I used a bone folder tool to smooth it out. Wipe away any extra of the photo medium.

4. After your picture has dried, wet a wash cloth and let it soak over your picture for approximately 5 minutes. This will make it easier to start removing the paper.

5. Start removing the paper by rubbing your fingers in a circular motion over the paper. You will need to constantly get them wet and repeat several times.

6. If your sign has slats with the spaces in between like mine does, use an x-acto knife to remove the paper in those spots.

7. Cut your stencils for the words out of vinyl.

8. Weed your vinyl and cut around the words. Then use transfer paper or tape to place on your sign. Smooth out with the scraper tool.
![]()
9. Add mod podge to where you will be painting in your words. This helps prevent your paint from bleeding.

10. After the mod podge dries, fill in your stencils with paint.

11. Now you are almost done! Wait for your paint to dry and remove the stencils. Touch up any spots that need it. I then did a coat of mod podge to help seal the paint and picture.

DIY Repurposed Clock with Cricut Kraftboard
FEATURED SALES


1 comment
Hi, hoping you can help me please. I am wanting to make some wooden decorations using photos. I can see that you use the rub off method but wondered if you had any experience using any other paper and which would be the best. Although I like your results, if this was done in bulk it would be so time consuming so anything quicker with the same result would be an advantage. Thanks