
Oh Christmas Tree! DIY Paper Holiday Home Decor
So now that Halloween has come and gone, I am deeming it Christmas crafting season! (Yep, I am skipping right over Thanksgiving) That means that from this moment on I will be in my craft room with a cup of hot chocolate, Christmas music playing, Christmas candles lit and covered in red and green glitter!
My first holiday project to share are a few super simple Styrofoam Christmas trees!

We all know about that lovely “Styrofoam” section at the crafts store. I get sucked in I must admit. I never use to make things with it, but using the pre-cut shapes and paper is a GREAT and cheap solution to holiday decorating…and of course Craft-e-Corner has a wonderful selection of styrofoam shapes.
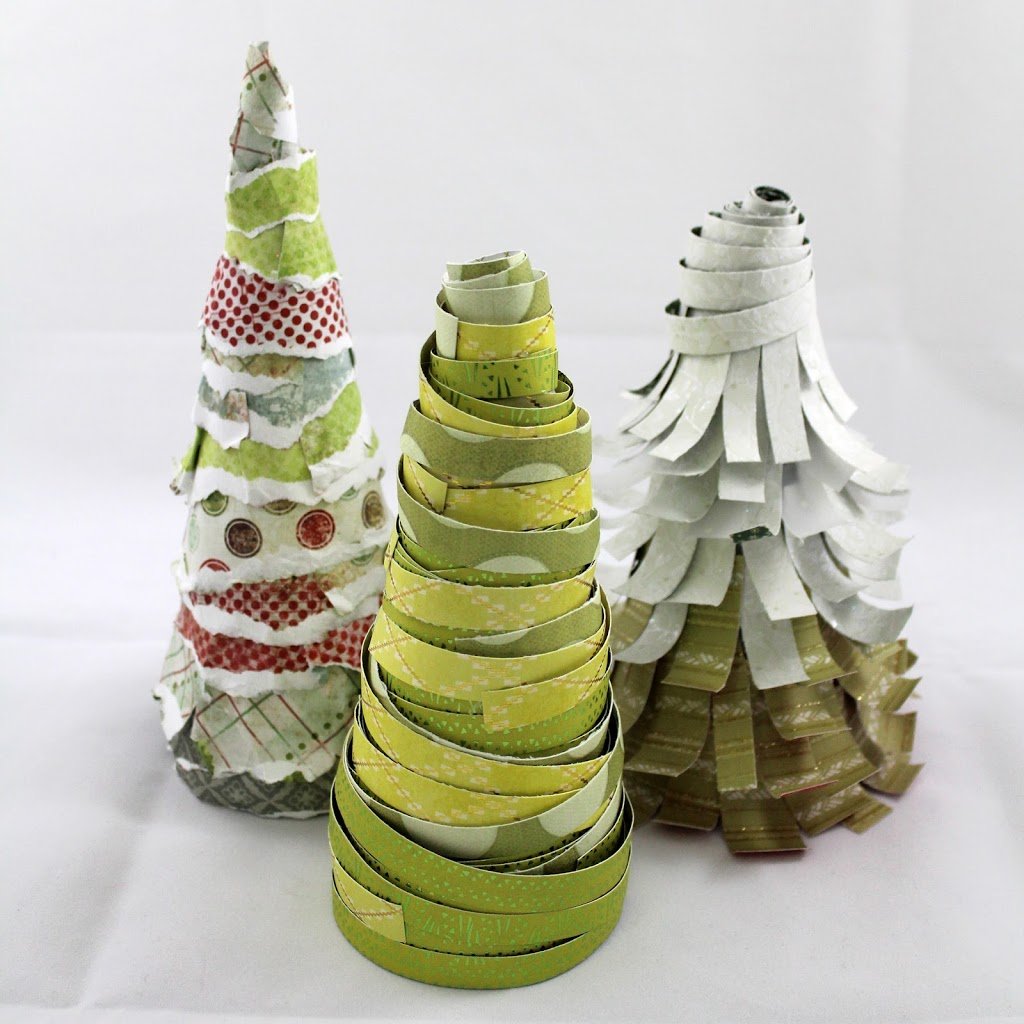
Here are the three Christmas trees I made using the cone shape!

All three are made using a different methods and strips of paper.
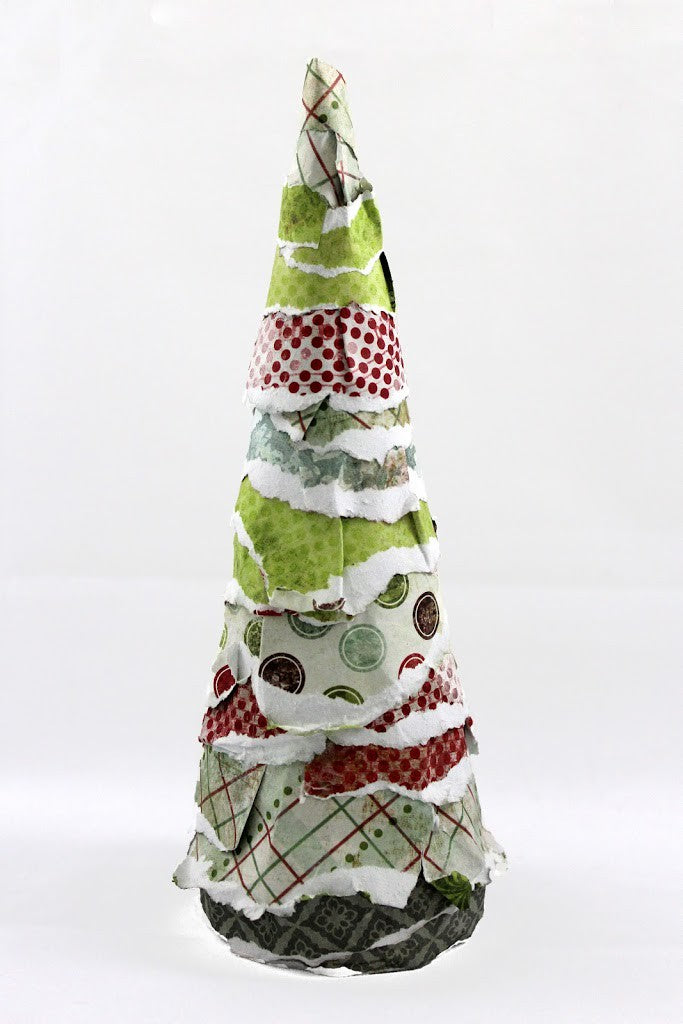
#1
For the first tree, I created a more grunge look by tearing the strips and crunching them into balls first. Then flattening them out and simply gluing them onto the tree. I did use hot glue, but do not use the hot glue directly on the cone. Put the glue on the paper first so it’s just a smidgen cooler before it hits the Styrofoam or it will melt your cone! For this one I used a mash of different papers and colors. This is the most simple of the three projects!
#2
For tree two, I simply cut out various paper strips about 1.5-2 inches long and about 1/2 inch wide. Using my bone folder I curled the ends of each strip. Again, using my hot glue gun, I glued on each strip one by one starting at the bottom and working my way up. For the very top of the tree I took one long strip and curled it to ‘cap’ off the tree. I used white sparkly paper on top so it had a sparkly snowy effect!
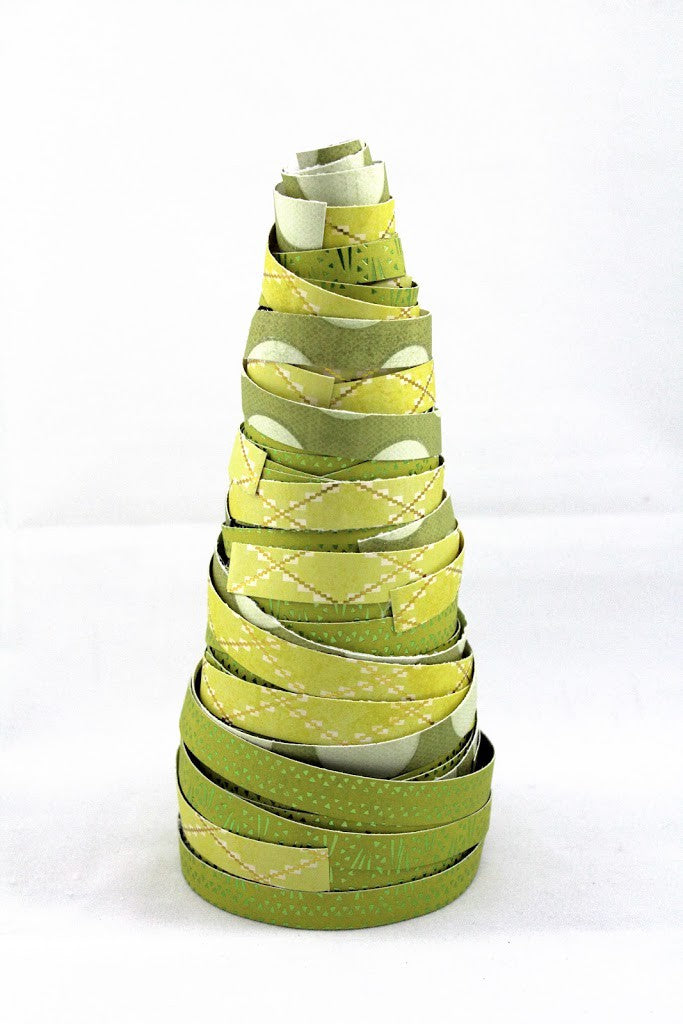
#3
For tree number three, I used the same technique for the top of tree two, but for the entire thing! I cut out 12″ strips of paper about 1/2 inch wide and using by bone folder, curled each one the best I could. Then I wrapped the curls around the tree loosely. Most of the curls didn’t need gluing and formed right to the tree, but towards the end I glued a few pieces into place to hold everything together. This one is my favorite! I curled all the strips of paper first and then put them on the tree all at one time. Doing this project in steps makes the process quicker.

Here are the finished trees! Aren’t the beautiful? I love that each one has a different look but they look great together! I did happen to use three of the same size cones, but they do come in different heights. TIP: To create various sized trees, you could just simply trim an inch or so off of the bottom of a cone to change it’s size. A simple butter knife will to the trick.
Hope you loved the project & happy holiday crafting!
WHICH TREE IS YOUR FAVORITE???
(comment below)

FEATURED SALES


1 comment
How tall are your cones? They are so pretty!