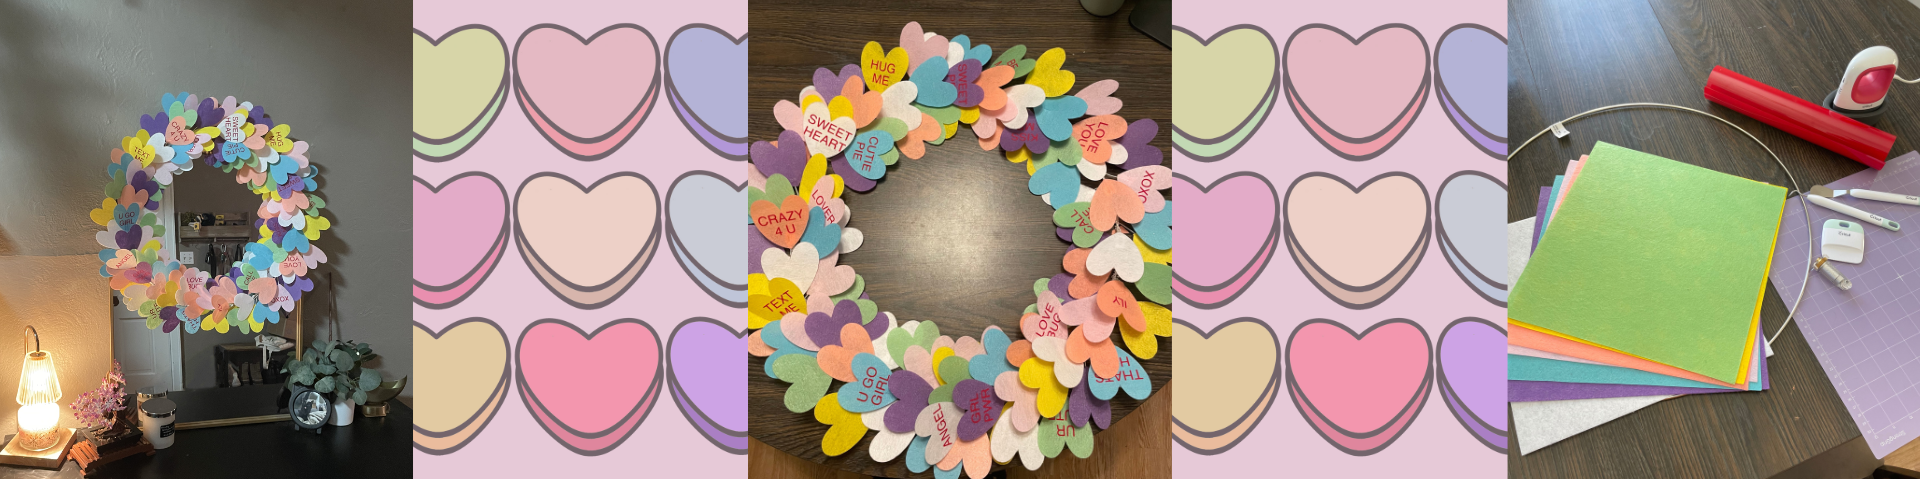
How to Cut Felt // DIY Valentine's Day Wreath

If you walk into Target, Michaels, Hobby Lobby, etc during almost any holiday period there are felt crafts EVERYWHERE. I am the type of person that if I see something I always think "oh I can make that" and so I set out on how to learn how to cut felt so I could make a cute Valentine's Day wreath!
I tested cutting the felt with different pressures and blades to determine which is the best.
Supplies:
- Cricut Maker 3- The blades I used are for the Maker 3
- Cricut Mini Press- The mini press was the PERFECT size for this project. I would also recommend getting a heat mat (don't iron straight on your table like me)
- Cricut Felt- I used colors from each pack, so this bundle is perfect!
- Cricut Strong Grip Cutting Mat
- Cricut Tools- I used a weeding tool, spatula, scraper, scissors and the tweezers (these are a must need if you have pets like me and cat hair gets everywhere)
- Rotary Blade- This was my preferred way to cut the felt
- Fine Point Blade- This blade comes with your machine and works to an extent.
- Cricut Iron-On- For this particular project, I used the red iron-on.
- Metal Circle or Wreath
- Floral Stem Wire in 20 Gauge
- Hot Glue Gun

Steps:
*I am not normally a "plan" type of crafter. I usually wing most of my projects, but one one of my coworkers suggested cutting my hearts out with paper first so I can get the size correct. That was a fantastic move because my initial size was SO small and not correct at all.

1. This project actually doesn't have a lot of steps as the machine does a bulk of the work. The first step is cutting out your felt! This is where I began testing which cutting method would be best. When placing my felt on my mat, I used my scraper to make sure that it really adhered to the mat. One of my coworkers suggested having contact paper on your mat to reduce the amount of felt residue left over. In my case with the Cricut felt, I didn't have an issue with a ton of residue on the mat.
- The first way I tried is with the fine-point blade on default pressure. The machine does two passes when in this setting. This method worked to an extent, but did require me to finish cutting the rest by scissors. Also, your fine-point blade will get "dirty" faster. To clean the blade, I just used some tin foil balled up and stabbed the blade into it. Be careful not to stab yourself!


- The second method I tried was with the fine-point blade on more pressure. This one again worked to an extent, but I still had to finish cutting with my scissors. This one worked better than the default pressure though, so between the two, I would use more.

- The third method was the rotary blade with default pressure. This one worked perfectly, but the rotary blade is MUCH slower than the fine-point blade. However, I did notice that the blade was cutting into my mat.

As you can see the "default pressure" left some cuts in my mat. Also, this mat was brand new when I started this project, but my cat loves to "help" with my projects as you can see! This is why the Cricut Tweezers are a MUST HAVE for my projects to remove stray cat hairs!

- The fourth method (and my personal recommendation) is the rotary blade on less pressure. I decided on liking this one the best (even though it took more time) because it cut the felt all the way through while also not cutting too deep into the mat.

I did notice that the rotary blade did sometimes change the pointed shape of the heart a bit. Personally, I didn't have an issue with it, but I wanted to show a picture so you knew that it could happen! The blue heart was cut with the fine-point blade and you can see the "tip" of the heart is normal. The pink heart has a bit of a curvature to the "tip" of the heart and was cut with the rotary blade.

- Just for fun I also tried the method of cutting the felt with a scissors. This was by far the least effective way to cut the felt. My cuts were inconsistent and it took a significant amount of time. For this whole project it would've taken me FOREVER using this method.

2. Next is weed your iron-on and to iron on your phrases for your candy hearts! I didn't really have a method for which phrase went on which color heart, but it worked out that I had just enough phrases for each color to have an equal number of hearts with phrases. I had my mini press on the lowest heat setting and held it on my design for about 15-20 seconds!
*Don't forget to mirror your design!!


3. Probably the most difficult step is adding the hearts to the wreath. I wanted mine to have more range, so that is why I used wire to make the hearts stand out a bit more. However, if you used a wire wreath frame, you could glue the hearts down flat. I started by wrapping my floral wire around the metal ring so that I ended up with two "sticks" on each side of the ring.

*Word of advice here is to not throw away your scrap felt from cutting out your hearts, because it can be used in adding a reinforcement to the heart and wire.
I then added a bit of hot glue onto a small piece of felt and attached it to the underside of the wire and placed the heart on top of that. I then let it cool and moved on to the next. (I liked the hot glue, because I could still remove the hearts without damage to the felt if I messed something up).

I repeated that process over and over varying the direction of the wire and if I had two "sticks" or "one" while making sure that the wires didn't show through too much.
* I wanted to add a bit of a comparison between Cricut felt (pink) and regular felt (purple). Cricut felt is much stiffer (less flimsy) than regular felt which I think is why it doesn't "shed" as much. I would also say that it is thinner and more compact.


Overall, that is the project! It wasn't too difficult, but I would say it is a bit time consuming. However, I definitely look forward to using felt again because I love how it turned out. If Valentine's Day isn't your thing, you can take the concepts for this project and change it for any holiday/season!
I hope you enjoyed <3
~Hailey


FEATURED SALES