
I am quite the Taylor Swift fan, so when the Eras Tour Movie was announced I knew I HAD to go. I was struggling to decide which era I wanted to dress as while still being comfy. I had been scrolling Etsy searching for the perfect thing to wear when I decided that I could just make my own, so it could include all my favorite parts of each era! I then began my journey with creating my design.
Materials Needed:
-
Cricut Machine: I have the Cricut Maker 3, but you can use any of the Cricut Machines!
-
Cricut EasyPress Machine: I used the 9x9 size and it worked fantastic!
-
Iron-On Vinyl: Choose your preferred colors for the vinyl. I went with colors that represent her albums! (Light Green- Taylor Swift, Yellow/Gold- Fearless, Purple- Speak Now, Red- Red, Light Blue- 1989, Black-Reputation, Pink- Lover, Grey/Silver- Folklore, Gold- Evermore and Dark Blue- Midnights). At Craft-e-Corner we are known for our bundles, so we have tons of Iron-On Vinyl Bundles that are premade, but we also offer a program where you can save 20% by building your own bundle - here.
-
Blank Sweatshirt: Pick a sweatshirt that you'd like to customize. Make sure it's clean and free from wrinkles.
-
Cricut Tools: These include weeding tools, a scraper, and a standard grip cutting mat. My design had so many little details and the Cricut Tweezers SAVED my sanity, they were SO helpful.
Fans of Taylor Swift merchandise are seeking unique items that reflect her iconic style and lyrics, capturing the essence of her music in wearable forms. They crave exclusive designs that showcase their love for Taylor while adding a personal touch to their collection. Yet, want it to be just right for you.... here is how you can create your own.
Steps to Create Your Taylor Swift Sweatshirt:
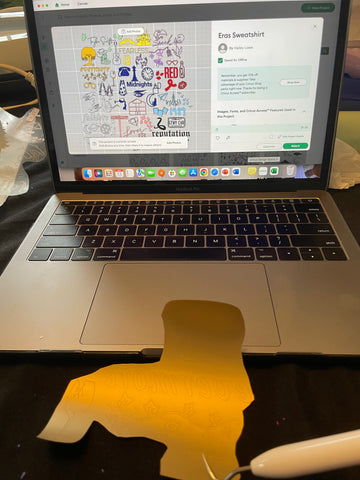
1. Design Your Image:
- Open Cricut Design Space on your computer.
- Create a new project.
- Design or import the Taylor Swift-related image or text you want on your sweatshirt. You can include song lyrics, album covers, or even a silhouette of Taylor Swift.
- Adjust the size of your design to fit the sweatshirt.

- I created my design in Cricut Design Space (I do pay for Cricut Access so some of my designs came from there). I then decided to do each era in a color that represents that era.
- In order to keep my design organized when I cut it, I "attached" each section by color. This kept my designs from separating and kept them in their correct order.

2. Load Your Vinyl:
- Place your iron-on vinyl on the cutting mat with the shiny side down (or without a mat if using Smart materials).
- Load the cutting mat into your Cricut machine.
3. Set Material and Cut:
- In Cricut Design Space, select the material type (iron-on vinyl).
- Follow the prompts to cut your design.
-
Make sure you mirror your design! I forgot to do this and definitely wasted some Iron-On.
4. Weed the Vinyl:
- Carefully remove the excess vinyl using weeding tools.
- Be precise when removing the small bits, especially in intricate designs. I had be design pulled up as I was weeding to ensure I was weeding the correct parts!
- The first time I used iron-on vinyl, I didn't keep the clear sheet, make sure you do, otherwise it will stick to your iron/heat press and make a mess.
5. Prepare Your Sweatshirt:
- Ensure your sweatshirt is clean and wrinkle-free.
- Turn on your EasyPress and wait for it to heat to the appropriate temperature for the vinyl you're using.
6. Position and Iron On:
- Position your weeded vinyl on the sweatshirt. I cut around the transfer sheets pretty closely so I could iron my design all at once. You do not have to do it that way, but if you do it separately make sure you are cutting back the times that you have the heat on your design so you don't melt it. Also, make sure the transfer sheet isn't on an of the other sheets.

- I removed the clear transfer sheet after the first press (as long as the design stayed). I then pressed again with a piece of parchment paper over the top to ensure it stuck.

- Press the iron firmly over the vinyl, moving it around for even heat distribution. Follow the recommended time and temperature settings for your specific vinyl.
7. Peel the Transfer Sheet/Final Press:
- Allow the vinyl to cool for a moment.
- Carefully peel off the transfer sheet, leaving your design on the sweatshirt. (In my case I heated my design again with parchment paper, so removing that)
- Once you're done, let your sweatshirt cool completely before wearing.

Tips:
- Make sure to read the instructions that come with your iron-on vinyl for temperature and time settings.
- If you're using intricate designs, be patient during the weeding process. Like I said before the tweezers seriously helped me during this process.
- Remember to mirror your image in Cricut Design Space before cutting if it contains text.
- I got a little carried away when I was close to finishing and I put one of my designs on to see if I liked the placement of it before I finished weeding it and I pressed it. I was crushed because I had finished my sweatshirt and now I had this random blob, BUT I was able to fix it. At this moment a Mini Press would have been an ABSOLUTE lifesaver and I will know own one in case this happens again. What I did is pressed just that design for a few seconds and then instantly went in with the weeding tool and was able to pull out the parts that I didn't weed beforehand. It was quite the tedious process, but IT WORKED. You can tell a little bit, but not enough for me to care.
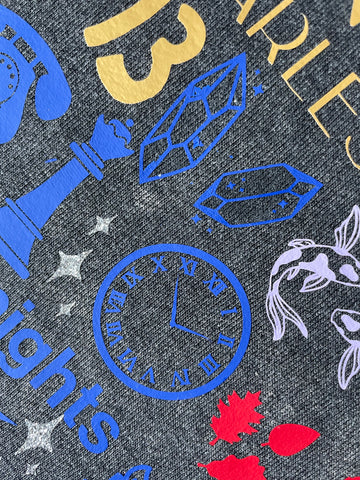
This was such a fun sweatshirt to make and wear to the movie! I got so many compliments on it. I loved that I got to make it my own.

You best believed you will ✨make the whole place shimmer ✨when you wear your own personalized sweatshirt!

Can you find bits of each of these eras in my custom, personalized, unique, tailored, handcrafted, made to order, signature, limited edition, personal touch, one of a kind concert attire?
-
Fearless Era: Experience the innocence and vulnerability of Taylor's early career with hits like "Love Story" and "You Belong with Me." This era captures the essence of young love and fairy-tale romances, perfect for fans of heartfelt ballads and catchy melodies.
-
Speak Now Era: Delve into Taylor's songwriting prowess with tracks like "Mean" and "Back to December." This era showcases her storytelling abilities and emotional depth, appealing to those who appreciate introspective lyrics and empowering anthems.
-
Red Era: Feel the passion and intensity of Taylor's music in songs like "I Knew You Were Trouble" and "22." This era explores themes of love, heartbreak, and self-discovery, resonating with listeners who crave dynamic pop-infused tracks with raw emotion.
-
1989 Era: Immerse yourself in the synth-pop sounds of hits like "Shake It Off" and "Blank Space." This era marks Taylor's transition to a more mainstream pop sound, capturing the spirit of fun, empowerment, and unapologetic confidence.
-
Reputation Era: Enter Taylor's dark and rebellious phase with tracks like "Look What You Made Me Do" and "End Game." This era embraces themes of empowerment, resilience, and reclaiming one's narrative, appealing to fans of bold statements and edgy production.
-
Lover Era: Embrace love in all its forms with songs like "Lover" and "ME!" This era celebrates romance, self-acceptance, and positivity, offering feel-good tunes and uplifting messages for fans of pop-infused love stories.
-
Folklore and Evermore Eras: Enter a realm of storytelling and introspection with albums like "Folklore" and "Evermore." These eras showcase Taylor's mature songwriting and indie-folk sound, appealing to listeners who appreciate atmospheric melodies and poetic lyrics.
Make your own custom stage outfit and showcase your fan art today!
Check out these other blogs and "Don't Blame Me" for getting you in the crafting spirit!
- How to Use Cricut Printable Iron-On with the Cricut Joy Xtra
- How to Faux Screen Print with Cricut and Create a Custom Tote Bag
- How to Make Waterproof Stickers with Cricut


Comments
Leave a comment