
Free Shipping
On Orders $49+
On Orders $49+
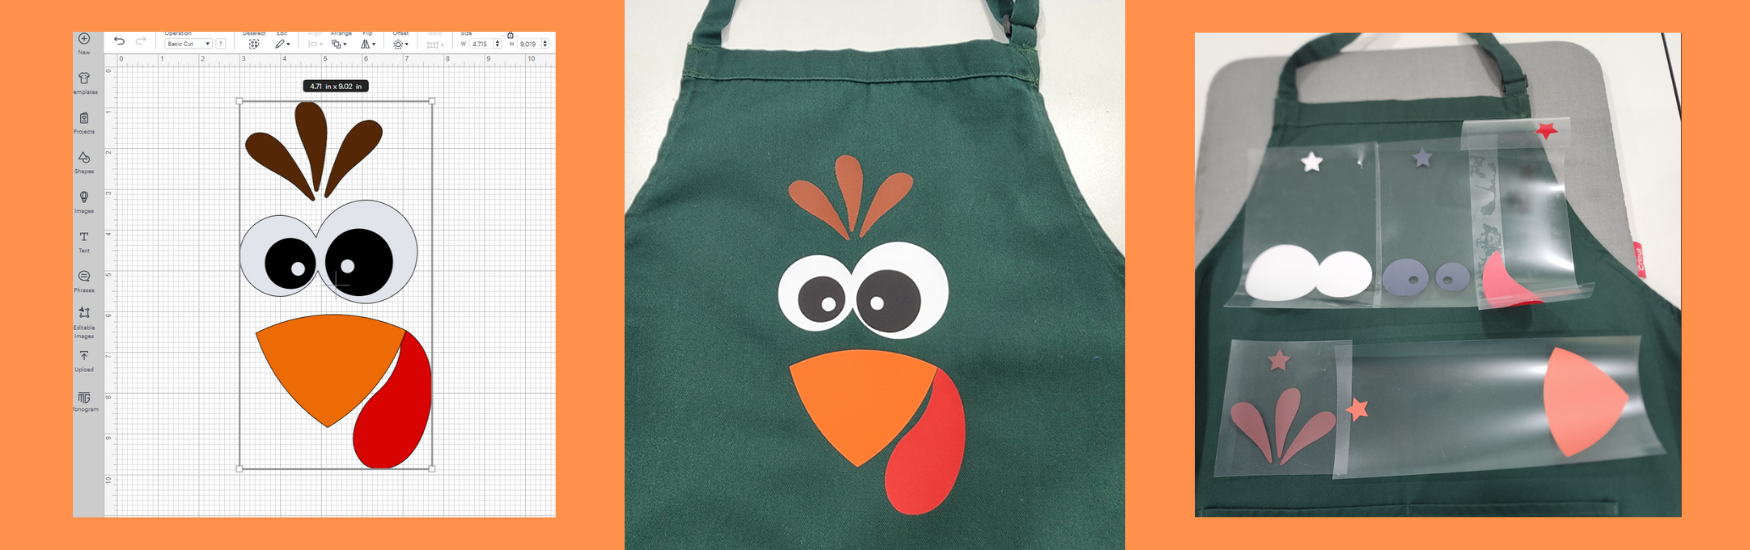
Here is a quick Thanksgiving apron to make with your Cricut. When I saw this cute turkey face SVG on Pinterest, I knew I wanted to make something with it. I quickly decided an apron would be perfect, especially since I host my family every year for the holiday.

I bought a dark green apron for this, so the colors would show up well and stains wouldn't show easily. I used leftover pieces of Everyday Iron-On in red, white, black, orange and brown for this project. Some pieces were from mini sampler packs, such as the Elegance and Neutrals Samplers. The design elements were narrow enough to fit on the 3.5-inch wide pieces.
Materials:
Apron
Turkey face SVG
Cricut machine
StandardGrip Cutting Mat
Cricut Tools
Everyday Iron-On
EasyPress 2 or other heat press
EasyPress Mat
Ruler
Scissors
First, I uploaded my turkey face SVG into Design Space and onto my canvas. You can find many designs like this on Pinterest. I purchased mine from Burton Avenue. I kept this at its original size for my apron.

I decided to use registration marks for proper placement of each element. This process is usually used for adhesive vinyl, but I don't like trying to eyeball things. I struggle to get things even, so I figured I would try this with iron-on.
After adding a small star above the design, I duplicated it five times to end up with six copies. This was to separate the different colors and cut them out individually.

I hid elements of each copy to show only one color for cutting purposes. This left me with one extra design that I could refer to as I put this together.

You can see that the space between the star and the actual piece to cut was often long. This would waste some Iron-On material, but I was okay with that since the pieces weren't that big to begin with, and I don't use these colors that often, and I always have lots of black and white on hand.

I cut out each color with my Cricut and weeded it, leaving the star attached to each carrier sheet to use for lining up the pieces later.

I preheated my apron with my EasyPress 2, using the Cricut Heat Guide for proper temperature and time settings.
Then I started placing the different colored pieces on the apron, lining up the stars. I left off the black piece, as that one would need to be layered over the white piece later.

Some of the carrier sheets for the design elements overlapped. I trimmed those pieces away, so the Iron-On would adhere properly to the apron.


Once everything was trimmed and ready for heat application, I measured the entire design and decided to use my 12" x 10" EasyPress 2, so I could apply heat just once for the first layer.

I placed a piece of parchment paper over the design before heating it. I also had to make sure I did not heat the stars, as they were not part of the design.

I had to heat some of the colors longer to get them to adhere properly, perhaps because I was heating through multiple layers of carrier sheets. When reheating, I tried not to reheat parts that were already well attached.

Once all the first layer pieces were applied, I was ready to layer on the final black eye pieces. First I removed all the carrier sheets from the other pieces, while leaving the stars on the apron by cutting them apart from the rest of the design. I had to be careful to leave the stars in the exact same position on the apron.

I lined up the black star with the other stars for proper placement of the eye pieces.

I used my EasyPress Mini for this color to avoid overheating other parts of the design, again using parchment paper between the heat press and the carrier sheet.

All went well until I removed the carrier sheet from the apron. I think I tried to remove it too soon, and part of the larger black eye piece got a crease in it. I tried to stretch it to fix it, but it did not work. It was too late to take it off and reheat it, so I had to leave it as is.

This was very disappointing, especially after all the trouble I went to to ensure proper placement.

Even from a bit farther away, I could still see the crease in the iron-on. That just wasn't going to fly, not for me. I had to find a way to fix this because there was no time to start over and make a new apron.
Helpful Tip: Make sure your design is fully adhered and let the iron-on cool long enough before removing the carrier sheet.
I decided to recut the larger black eye piece and apply it over the top of the creased one. Before applying it, I used a box cutter blade to trim off the creased iron-on, so the new piece would lie flat on top of it.

I again used my EasyPress Mini for this and preheated it to medium, using parchment paper over the design to protect it.

After heat application, I made sure everything was fully cooled before removing the carrier sheet.

It worked! I am so happy with how it turned out. You can't even tell that one eye piece has two layers instead of one. I can't wait to wear my new apron on Thanksgiving Day! Here it is below all completed and fixed.

I meant this to be a quick and easy project, but using the registration marks made it take a bit longer. And then fixing the creased iron-on extended the project time. However, I'm still happy I made it and found success in the end.
Do you have something fun to wear on Thanksgiving? An apron like this would be great or even a shirt. There's still time to make something cute for yourself. An iron-on project is usually pretty simple.
What if today, we were just grateful for everything? Charlie Brown
Leslie
Hello Autumn Fall Placemats Using Cricut Iron On
How to Use Multiple Colors of Iron-On for One Shirt // Cricut Skin Tone Iron-On

Leave a comment