Picture Frame Mats with Cricut Joy Xtra
Have you made anything with the new Cricut Joy Xtra yet? It has its own Smart Materials and cutting mats and can be used for most projects. It's great for crafters with limited space. When it first came out, I started brainstorming what I could make with it.

Since this machine can cut materials up to 8 1/2 x 11-inches, an 8 x 10 picture frame came to mind. I decided it would be fun to make my own frame mat out of cardstock. I would make cutouts in it to highlight photos of each of my grandchildren.

Materials:
Cricut Joy Xtra machine
Joy Xtra Cutting Mat
Cardstock - I used various types and colors
Picture frame 8x10
Small photographs - 3 in x 3 in worked well
Scissors
Pen or pencil
Cellophane tape
While looking through my cardstock stash, I found numerous colors and types that would work. It was hard to choose just one, so I made five mats that I could switch out when the mood hit. I stuck with colors that match my home décor.

There was glitter, splatter, foil, marbled and patterned cardstock, which satisfied my craving for variety.
In Design Space, I inserted a square shape onto my canvas and changed the dimensions to make an 8x10 template. I decided to use a scalloped circle for the cutouts and added that from the Shapes menu.

The cutouts were 2 inches in diameter, and I needed 8 of them, so I duplicated the circle 7 times and arranged them in a pattern I liked, spacing them as evenly as I could.

I tried making the circles larger and compared them to the smaller ones.

I opted for the larger size cutouts, which were 2 1/2 inches in diameter. They filled in the mat more and allowed me to use larger photos. I then used the Align function in Design Space to align the cutouts, starting with Align Top.

Since I wanted the rectangle cut as well as the cutouts, I needed to combine them. I used the Combine function in Design Space and selected Subtract form the options. This is similar to the Slice function.

I removed the portions I didn't need from my canvas, and here is how it looked when I finished.

I changed the color to gray for easier viewing and rotated the design 90 degrees to make it vertical. This would help me group the photos better by family. It would work either way.

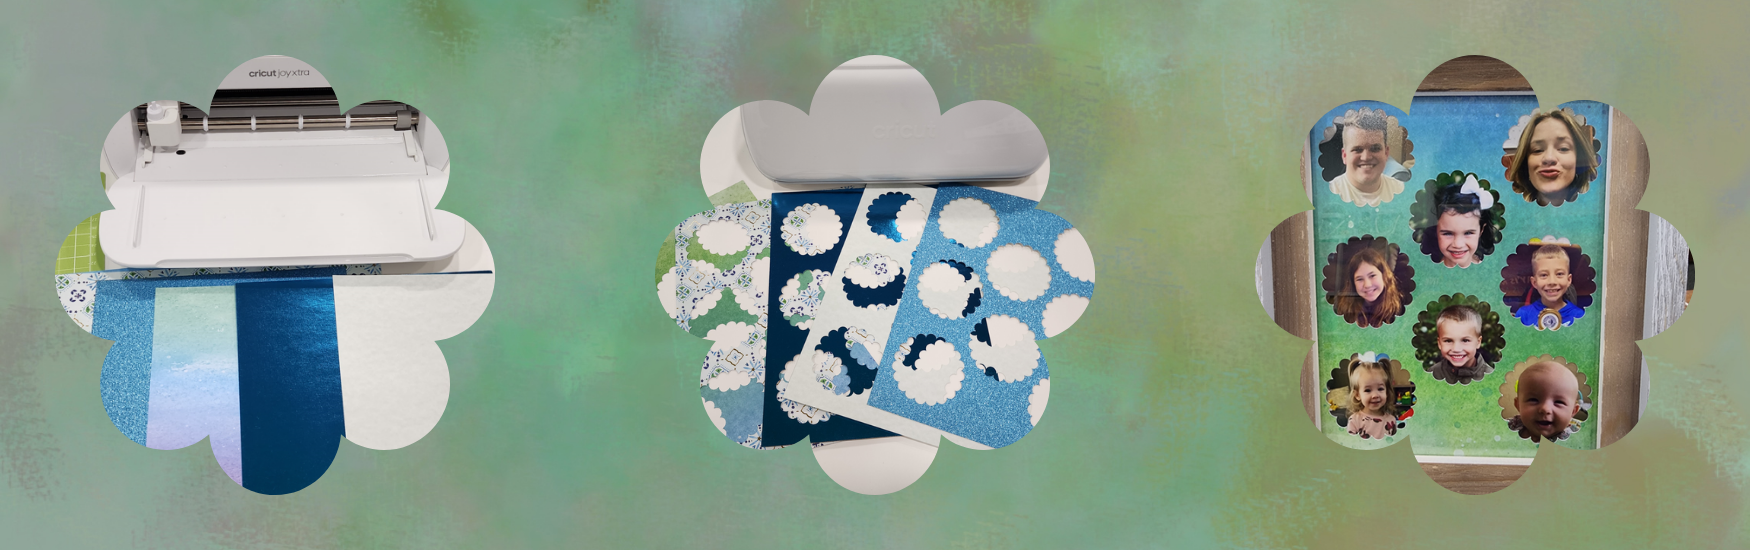
Now I was ready to cut out my frame mats. I did them one at a time, using a Standard Grip cutting mat. A Light Grip mat could also be used, depending on the thickness of your cardstock. Here are several individual mats and all five of them cut out.

They turned out great. The hard part would be choosing which one to use first. See them all below with the frame I picked out.

I sent some recent photos of my grandchildren to a company called PostSnap to have 3x3-inch prints made for this purpose. Here they are below. Sorry about the glare.

Aren't they all so cute? My oldest granddaughter was being goofy in her photo. That's part of the reason I chose it. I sure do love these peeps.
Once I chose which mat to use first, I checked out how the photos would look behind it. Some trimming would be necessary.

I centered each photo from the front, turned them over carefully and made marks where I would trim them. After cutting off some corners, I again centered the photos from the front and began taping them onto the back of the mat.

This is how they looked all taped on. Using tape instead of glue will allow me to easily switch between mats.

I love how the mat and photos look in the frame. This project turned out even better than I imagined. Now I can hang it up and gaze at my darlings every time I walk by.

These picture frame mats were made with cardstock I had on hand, and the picture frame was on sale. The photo prints cost a bit more because it's hard to find 3x3 prints, and I wanted them mailed to me. There was a minimum of 20, so I had to order extras, but it was well worth it.
Are you inspired to make your own frame mats now? I think the cutouts truly highlight each photo and make them stand out. This was an easy project, and I enjoyed seeing it all come together.
A project does not have to be elaborate to be fabulous.
Leslie
DIY Grandma Sign: A Perfect Gift for Mother’s Day!
FEATURED SALES