Before trying out the Print then Cut feature with your Cricut Explore Air 2 or Cricut Maker, it is important to calibrate your machine and blade first. It only takes a few steps to calibrate, let me walk you through it.

Print Then Cut is a really fun feature that both the Explore Air 2 and Maker machines are able to do. With Print Then Cut, you do just as the name implies, you use a networked printer to print your image first, then load the printed image into your machine to cut it out. When you use Print Then Cut, Design Space will automatically add in registration marks for your machine to read when it goes to cut. While it’s usually pretty accurate, calibrating your machine and blade ensures you’re getting the best cut possible. Even brand new machines with brand new blades need to be calibrated first. Thankfully it’s a fairly simple process and it doesn’t take too long to do.
To begin, click on the burger menu in the upper left-hand corner in DesignSpace:
Click on Calibration from the menu:

Click on Print Then Cut:
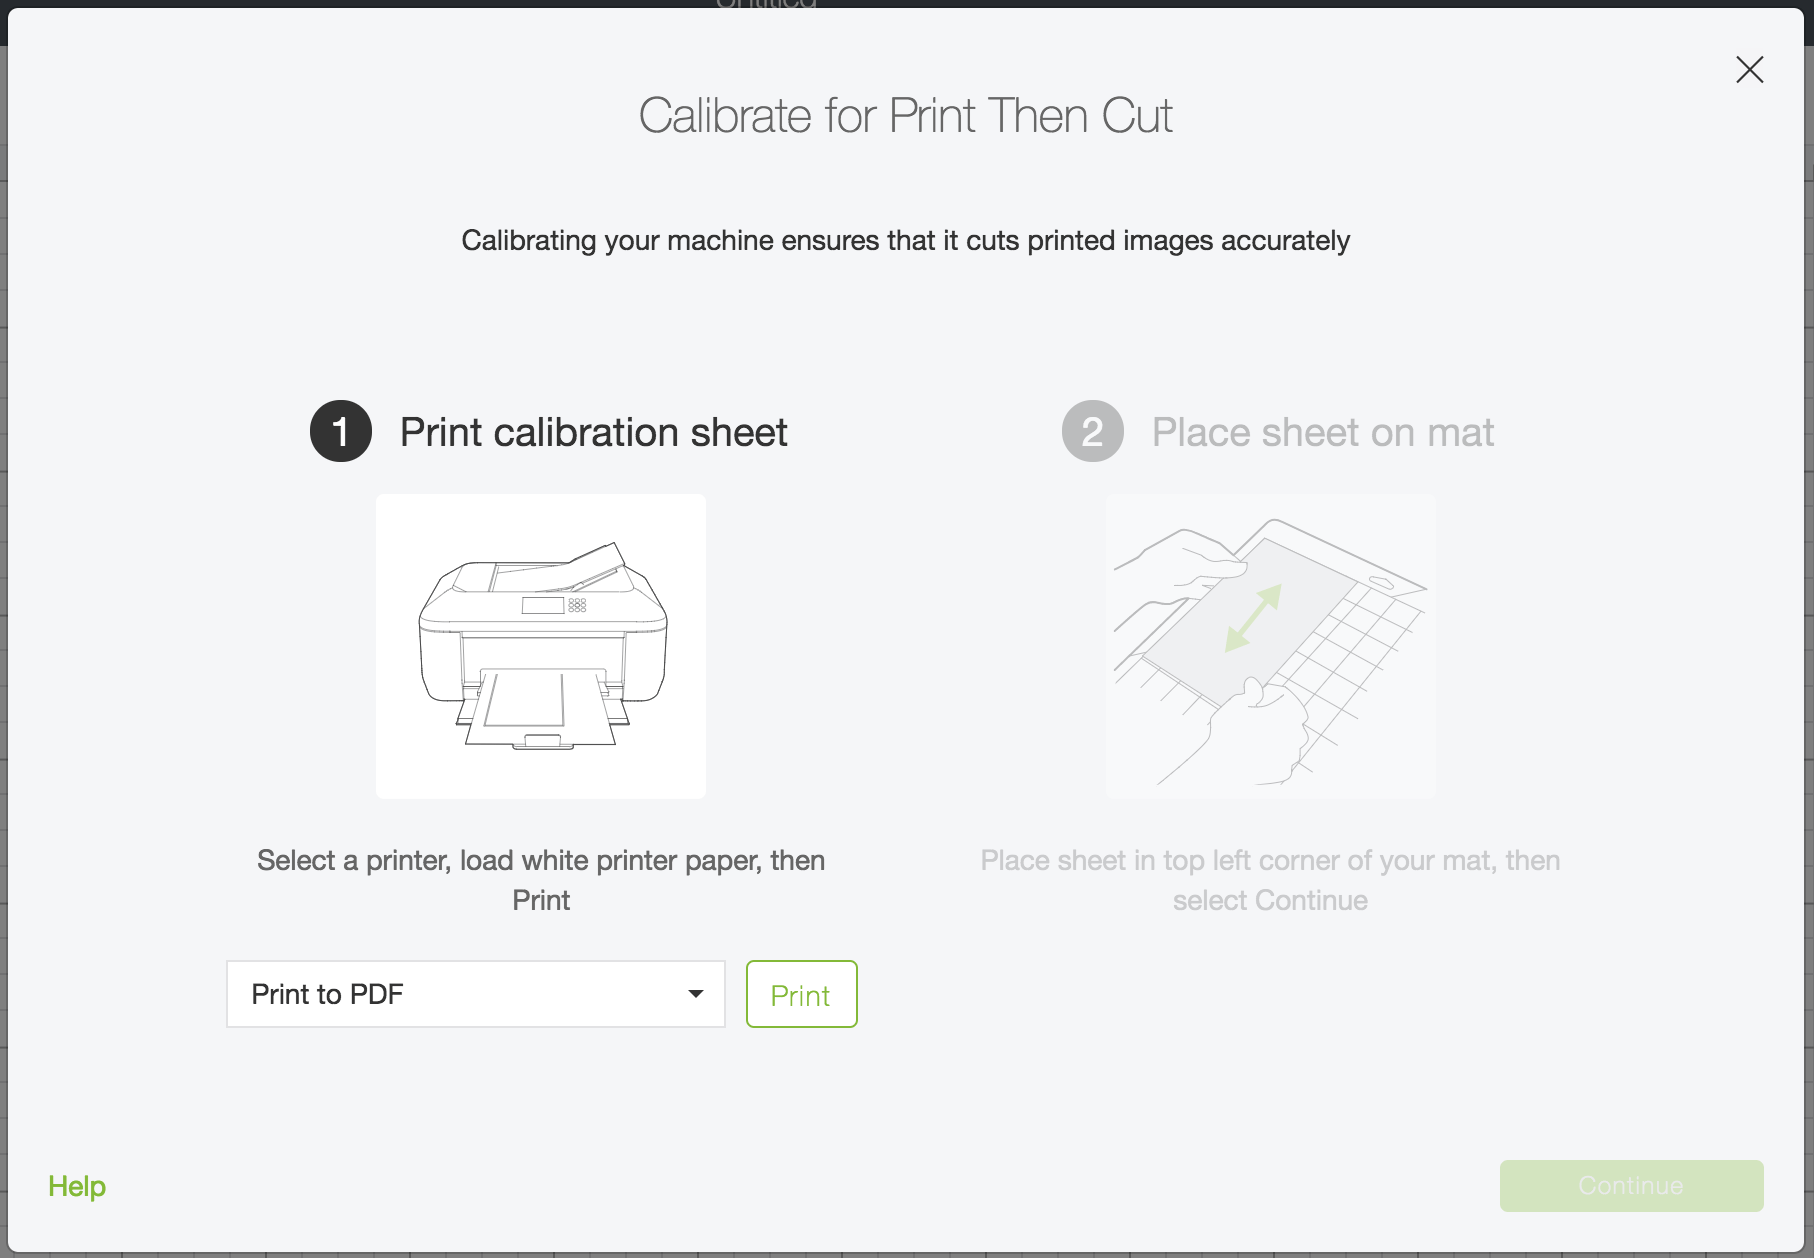
Select your printer from the dropdown box and click print to print the calibration sheet:
Once you have printed the calibration sheet, place the sheet on the cutting mat in the upper left-hand corner and click Continue. Load your fine point blade into the machine in Clamp B:
Select your machine from the dropdown, load your cutting mat, then click the flashing Go Button on the machine:
The machine will scan a bunch of lines on the page. A light will turn on under the blade carriage which will allow the Cricut to check the calibration marks on the test sheet. Once it has determined it can find enough calibration points, it will proceed to cut out the smallest square in the middle of the page.
Without unloading the cutting mat, take a look and see if the cut line touches all around the square. If the lines touch all the way around, select Yes from the options and then click continue.
If your lines are off and you select No, Design Space will go to the next step to help get a closer cut.
Once you get a good cut result and click Yes, the machine will begin cutting the numbered and lettered lines around the outside of the calibration sheet:
Next, Design Space will ask you to examine the cut lines and pick the two that best overlap the printed lines. Look at the top line (1-21) and the right-hand lines (A-U). Select the most spot on cuts from the drop down.
In my test run, the top line # 7 and right line O were the closest to down the middle of the printed line.
Note: Your results may be different, examine your sheet to pick the best match for your machine.
The machine will do one more calibration cut and will then cut out the larger rectangle.
Once the machine is done cutting, unload the cutting mat and examine the cut results. If you are happy with the calibration, click Yes and click Continue. If you are not happy with the calibration, you can go through the steps again to get a better cut result.


Leave a comment