
Free Shipping
On Orders $49+
On Orders $49+

Have you ever made your own coasters? Here are some glass ones decorated with Cricut permanent vinyl. This was a simple project I came up with to use a set of glass squares I had on hand. They were probably meant to be coasters, but I didn't know that for sure. All I knew was the colors matched my home décor perfectly.

Materials:
Cricut machine
Cricut permanent vinyl (or removable) - I used black
Cricut StandardGrip cutting mat
Glass coasters (or others that vinyl will adhere to)
Cricut Transfer Tape
Cricut Tools
Cricut Felt (or other backing material)
Scissors
Ruler
Glue
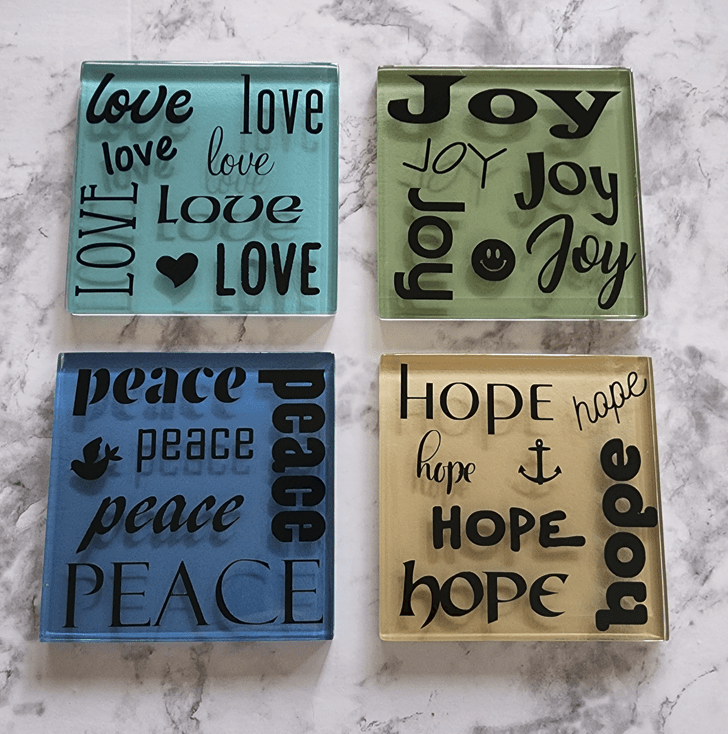
I created a design using the words, Love, Joy, Peace and Hope, one word for each coaster. I typed each word multiple times using different fonts, some in caps, some lowercase, and some in script format. Then I turned the words in different directions and added a small symbol to fit each word's meaning.
Before I got into my design, I needed to prepare the coasters. They had a foam backing that was hot glued on and were banded together with old tape that made them sticky. They were kind of a mess. Here they are with one of the backings removed.

After pulling off the dried glue, there was still some residue on the backs of the coasters. I used a couple drops of lemon essential oil on a paper towel to get that off, which worked great.

A backing would still be needed to avoid scratching any surfaces when the coasters were in use. I opted to use white felt from the Cricut Carousel Sampler pack. The glass was a bit see-through, and I didn't want the backing to interfere with the design on top of the coasters.

I first measured and cut a square out of cardstock to use as a pattern and then cut out four felt squares that I would glue onto the backs of the coasters later.

Now I moved on to creating my coaster designs. I started by inserting a square in Design Space for a template and sized it to fit my coasters. Then I duplicated it to have four templates. For each word, I typed it once and duplicated it several times.

I selected a different font for each word and started arranging them in my square template. Then I found a symbol to add to each.

Here is the first coaster design complete, with square templates on my canvas for the other three.

And here are all four of them completed and ready to cut. I grouped and attached them all to cut at one time.

I loaded my permanent vinyl onto my StandardGrip cutting mat and inserted it into my Cricut Maker 3. I could also have used Smart Vinyl and cut out my designs without a mat.

Below are my designs all cut on one sheet of vinyl.

I chose to cut them apart with my Cricut Portable Trimmer for easier weeding.

Once the designs were weeded, I laid one over a coaster to make sure it would fit, using a precut felt backing piece to check the sizing as well.

I applied each design to a coaster using transfer tape and a scraper.
![]()
Then I removed the transfer tape.
![]()
Now it was time to glue the felt backings onto the coasters. I used E6000 glue for this purpose, which worked well. I was glad the glue didn't show through the glass.

The coasters looked nice and clean with the backing attached.

And here are all four coasters done. I absolutely love how these turned out! How wonderful to do a quick and easy project that is not only functional but completely adorable as well. (I have used these several times already, and any water from condensation has not affected the vinyl.)
I hope I have inspired you to try your hand at making your own coasters - perhaps in a different way than you've seen before. These would also be great as a gift. You could personalize them with the recipient's name or interests.
Whatever you are, be a good one. (Abraham Lincoln)
Leslie
DIY Coasters with Cricut Infusible Ink Pens

Leave a comment