
Free Shipping
On Orders $49+
On Orders $49+


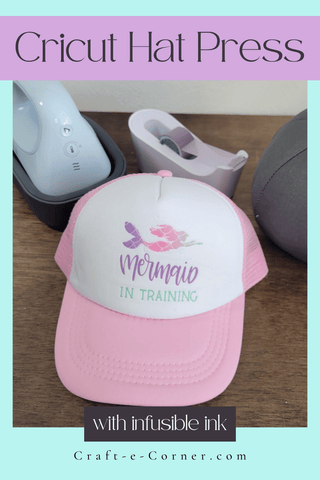
The new Cricut Hat Press makes making customizable hats super easy. They turn out looking so professional. They make great gifts as you can make them for any theme you want!
I decided to make a mermaid hat for my daughter. This will be a great hat she can wear throughout the summer.
Materials:
Cricut
Cricut Hat Press and Hat Form
Infusible Ink Transfer Sheets
Cricut tools
Strong Grip Heat Resistant Tape

I first started by creating a design in Design Space. Cricut recommends an image no larger than 2.25 inches high by 4.25 inches wide. I first started with a rectangle that size so that I knew what size to make my design.

I found the mermaid in design space (#MBE66B69).

I used the Contour tool to make it just the outline. To do that you just click on Contour and then select Hide All Contours. This will make it a solid mermaid tail.

I ungrouped the tail from the rest of the body so that I could move them together.

Then I selected weld to make it one solid image.

I then used text to create the rest of the design for the hat. I made it so that it fit inside the rectangle template.

Next, I clicked Make it. It then asks if I am going to cut without a mat or on a mat. Since I am using Infusible Ink Transfer Sheets I will be cutting this on a mat.

Design Space will separate each part to a different mat depending on the color. At this point you will want to make sure that you MIRROR each mat. On the next screen I selected Infusible Ink Transfer Sheets as the material and cut each color.

Here is each design cut and weeded.

I then turned on my Hat Press. If you have not set yours up yet you will want to download the new Cricut Heat App. After you have set it all up I click on Start New Project.

I chose Infusible Ink Transfer Sheet as my transfer Material and Trucker Hat for the Applied to.

I will then tell me to set it to High for the temperature. Or I can click on Send Settings to Hat Press.

It then will tell me to use a lint roller to remove all debris from the hat.

It will also say to preheat blank for 5 seconds after the press is warmed up.

I placed my hat on the hat form. It recommends to take the sweat band out from inside the hat and undo the back closure if able. I then add my infusible ink to the hat. I use a lot of strong grip heat resistant tape to make sure that it is securely down on the hat.

Then I cut a piece of the butcher paper that comes with the transfer sheets to fit over my design. I secured this over the top with more strong grip tape.

Then I place the Hat Press on my hat and image and press the go button. It says to apply pressure and move the press back and forth on the hat.

It will show the time on the app.

When it is done heating it will beep. I returned the press back to the base. The app says to Remove the butcher paper and to remove the tape and design warm.

I removed the butcher paper first.

Then I removed the transfer sheet.

Look how pretty that turned out!

Think of all the possibilities that could be made!
*A positive attitude is good for the head and a fabulous hat doesn't hurt either.
~Beth
Leave a comment