Fall is coming fast! Pretty soon the leaves with be changing and it will be time to bring out the Autumn decor! Fall is my favorite time of year and my favorite season to decorate my house! I love the rich browns, oranges, purples and golds! Here’s a peek at the rich beautiful colors I used to make these fabulous Fall paper rosettes.
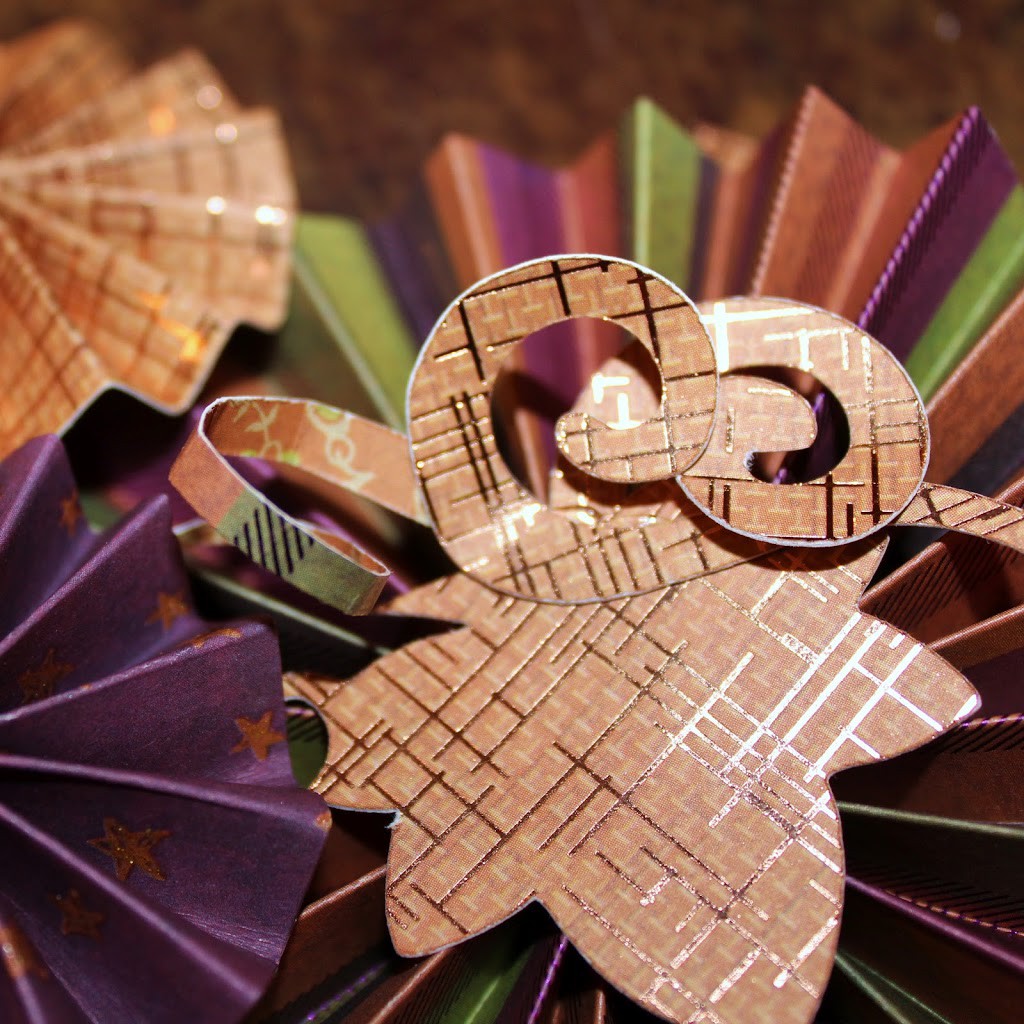
I used the New (soon to be released) S.E.I Halloween paper line. The leaf was cut out from the Preserves Cricut Cartridge.
Here are a few of the rosettes I made.I LOVE chevron and this bronze foiled Chevron paper from S.E.I is to die for! It looks more black here but in the light its a deep bronze color! Sorry it’s a bit hard to photograph! In my next Tutorial I will show you how to take all of these beautiful rosettes and create a fabulous Fall Wreath!
So let’s start with how to create a simple paper rosette!
First, cut a strip about 1-1.5 inches wide and 12 inches long. This will make a smaller rosette. TIP: the width of the paper will be half the width of the rosette when it’s finished. So a 1inch wide strip of paper will make a 2inch wide rosette!
Next you will want to score your strip the entire length so you can accordion fold the length of the strip. I scored the strip about every 1/4inch with my Wescott Paper Cutter! TIP: You don’t have to have a scoring tool for this step. If you feel comfortable just folding it on your own this works just fine too! I did it both ways. For thicker paper a scoring tool helps keep the creases clean but it’s not necessary.
Once you have the whole length of the strip scored, start folding back and forth to create an accordion like so! These first few steps take the longest.
This is what your strip of paper should look like when done folding.
Next, match up your two ends and adhere them together. For this, I used hot glue, but you can use whatever strong holding adhesive you’d like. TIP: You may have to cut your ends to make them match exactly.
This is how it should look. Glue the two ends together to create an accordion circle with the pattern on the outside.
The next part is a bit tricky and takes some practice. Take a scrap piece of cardstock and cut a small square from it. Put a large glob of hot glue on it. Center your ‘rosette’ accordion circle over the glue. Now take the top accordion creases and push them to the center of the square where the glue is and hold until dry. TIP: practice folding the center down before you do this with the glue. Also, be careful! It’s HOT! If you are anything like me, you burn your fingers on hot glue all the time! I have given in and got myself some Hot Glue Gun Helpers for when I am using hot glue a lot. They are a crafters must have! They work great and prevent me from burning my fingers!
I also add a dab of hot glue to the center of the rosette once it’s folded down and in place. TIP: If you look in the picture the glue is oozing from the center a bit. This is the perfect opportunity to add a decorative brad, button or embellishment to the center of your rosette! I added a small bronze brad.
That is how you create a simple rosette! Use whatever combination of paper, colors & embellishments you’d like, and stay tuned to see how to create a Fall wreath with them!
Here is a SNEEK PEEK at tomorrows post!
Hope you all loved the tutorial today and HAPPY CRAFTING!
WHAT IS YOUR FAVORITE FALL COLOR TO CRAFT WITH?


Leave a comment