
Free Shipping
On Orders $49+
On Orders $49+
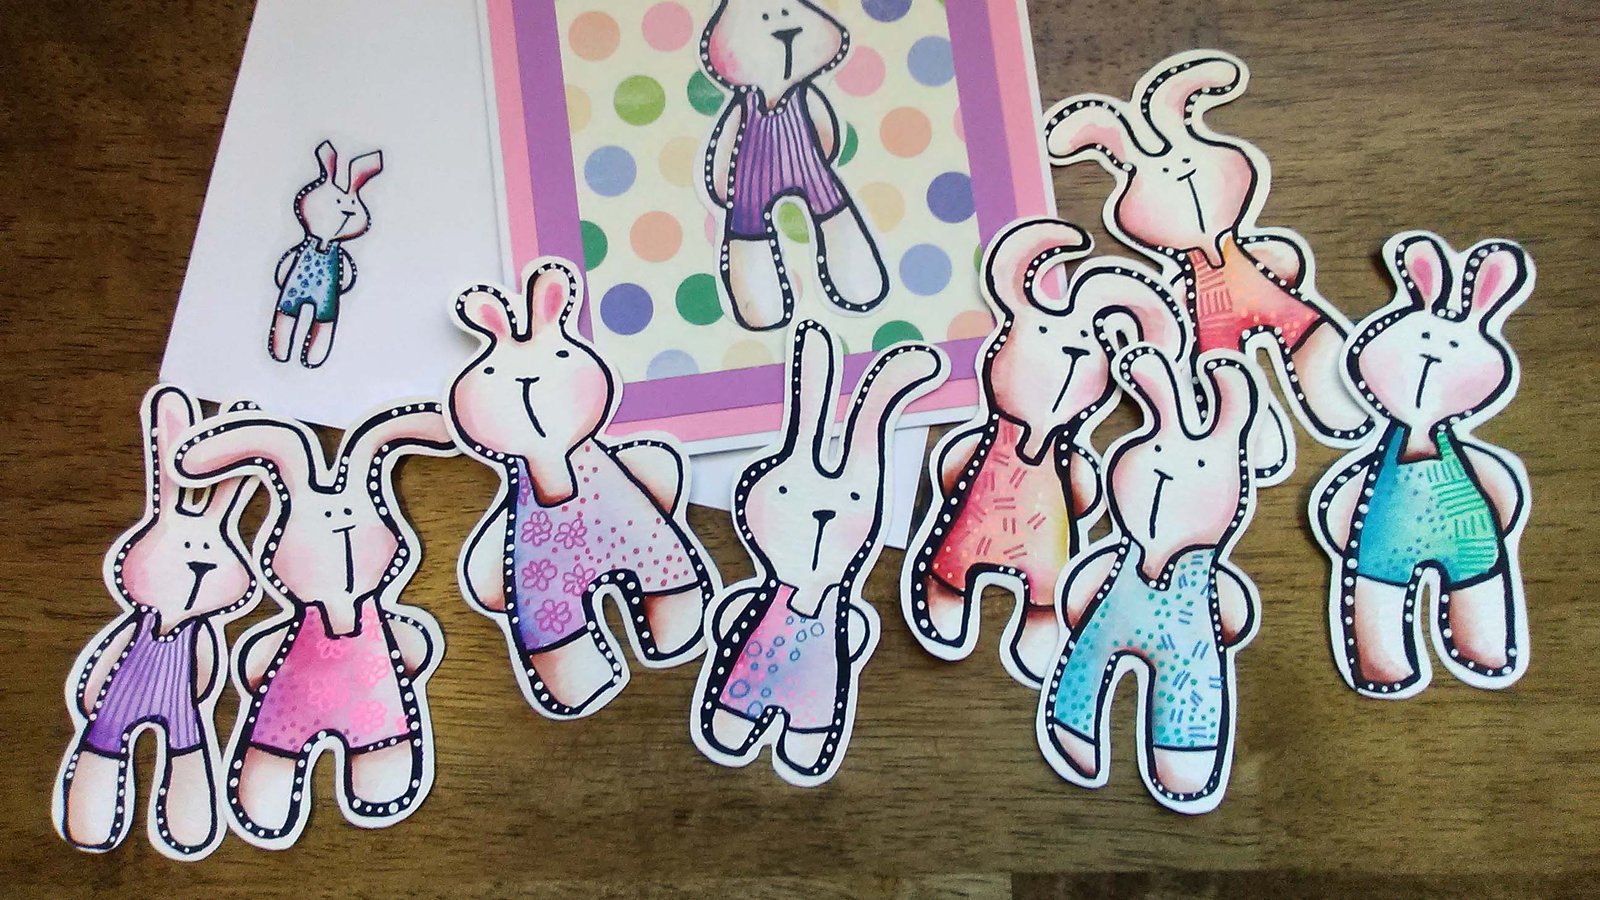

Looking for a fun way to reuse original art? Then, check out Cricut stickers! Create your own print then cut images and make any number of stickers to dress up notebooks, cards, gift tags and more.

We’re going to draw the outline of very simple bunnies using black ink or black craft paint with the fine paint brush. The painted lines are going to be wonky and that’s okay! We want that to add charm and character to the figures.
Cut your watercolor paper into smaller pieces about 4x3 inches. There’s nothing magical about this size – feel free to go larger if you’d like. But I find that 4x3 is big enough without being so big that I have lots of trouble controlling my painted lines.

I would encourage you to paint right on the paper without sketching a bunny on the paper in advance. This is the most fun in my opinion and results in the best bunnies. Paint a few on a sheet of copy paper to ready yourself if you’d like, and then jump right in! If you don’t like the result, you can always paint on the back of the paper or toss that one. Remember- it’s only paper! However, if this is really too far out of your comfort zone, you can draw the bunnies using a fat black marker.
I like to start with some ear shapes.

Then make some lines to suggest a head.

Continue from the neck down to some simple legs.

Make a long “T” shape for a nose and mouth and add a couple of dots for eyes. Draw in some simple clothing. Allow to dry.


Color in the bunnies using watercolor paint (or your favorite medium.) Brush a bit of clean water in the center of the bunny’s ears then drop it some pink watercolor paint. Repeat to apply a pink blush to the bunny’s cheeks. Brush some clean water over the clothing and drop it several colors of your choice. Choose a darker color (I’m using brown) to shade the neck, edges of the face and ears as well as the legs/feet. Doodle with colored pens or pencils to add some design to the clothing if desired. Add some simple dots to accent the black outlines. Allow to dry.


Scan or photograph the completed artwork to make a PNG or JPG file that can be uploaded to Cricut Design Space. Choose Complex image type design when uploading the file and save it as a Print Then Cut Image.


Size the images in Design Space to a maximum size of 9.25 x 6.75 inches. This is the largest size that Cricut can process for Print Then Cut. The software will create the rectangle surrounding the bunnies like you see below. This is normal and part of the process for aligning the printed image for cutting.

Follow the prompts in Design Space to send the image to the printer for printing. Cricut Printable Sticker Paper and Printable Vinyl are suited for use with ink jet type printers only. If you have a laser printer, be sure to choose a printable sticker or full sheet label paper designed for laser printers.
Use the single paper feed option on your printer for the sticker paper (instead of feeding from a paper tray) and choose a paper setting recommended by the paper manufacturer. Be sure to check whether the paper should be loaded for single page feed right side up or upside down, to ensure that you are printing on the front (correct) side of the sticker paper.
Cricut Printable Sticker Paper is quite thick paper and I used a label paper setting to print the bunnies. However, given the wide variety of printers out in the world, you might need to do some testing with your own equipment to find the printer settings that work best for you.
Press the printed sticker paper to the cutting mat in the upper left hand corner in the same orientation as the shown in the mat preview. Take care to the place the sticker paper as smooth and straight on the mat as possible.
Continue to follow the prompts in Design Space to cut the stickers. If you are using Cricut Sticker paper, simply select the sticker paper materials setting. Otherwise, choose the closest material option for the labels you purchased.
I love how these turned out! What a great way to reuse original artwork across multiple projects. These bunnies would look great on cards, treat boxes, placemats – you name it! I think this would be an awesome project with kids’ art too. What kind of stickers will you make?

Read more about making stickers using Cricut Sticker Paper in this post, How to Maker Stickers with a Cricut Explore Air or Maker. And check out additional tips for using the Print Then Cut feature in Cricut Design Space on our blog.


Comments
Leave a comment