
Free Shipping
On Orders $49+
On Orders $49+
Have you tried out the new Cricut Card Mat 2x2? This product is a game changer for making your own cards. The mat is made for Cricut Explore or Maker machines and you can make up to 4 cards at a time. This speeds up the process, saving you time. Here are 22 different tips for using this new card mat plus a downloadable guide for easy reference.

These are things I discovered while using the Card Mat 2x2 for the first time. You can view the post I wrote about it for more details: How to Use the Cricut Card Mat 2x2. I did some research along the way and would like to share what I learned with you. Here we go!
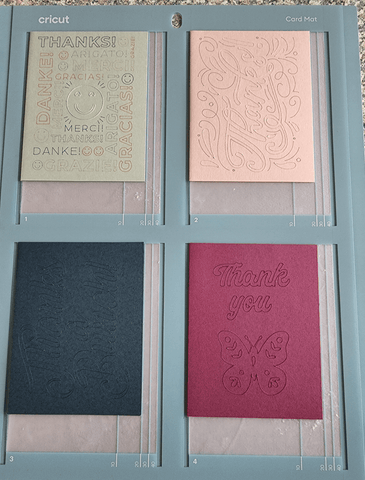
Tip 1: The Card Mat 2x2 features 4 panels which can hold 5 different card sizes. Cricut created some new sizes and renamed all their cards to match universal sizes. The sizes are listed below. "R" is for rectangular and "S" is for square.
R10 - 3.5 in x 4.9 in (8.9 cm x 12.4 cm)
R20 - 4.25 in x 5.5 in (10.8 cm x 14 cm)
R30 - 4.5in x 6.25 in (11.4 cm x 15.9 cm)
R40 - 4.75 in x 6.6 in (12.14 cm x 16.8 cm)
S40 - 4.75 in x 4.75 in (12.1 cm x 12.1 cm)
Tip 2: You can make one to four cards on the mat at one time.

Tip 3: To align cards properly, insert the card Mat 2x2 into the machine top edge first. The top edge has a hole in it, and the Cricut name will be right side up.
Tip 4: Allow enough room behind your Cricut for the mat to pull through, or the machine could jam.
Tip 5: The card mat is quite sticky. You may need to use the tip of a weeder tool to pry up the edge and insert the card beneath it.

Tip 6: While you can use different designs, all cards to be cut on the mat together (with one pass) must be the same size.
Tip 7: Know the size of your cards and set them properly in Design Space.
Tip 8: When inserted into the mat, cards should line up precisely to the correct size on the mat. Ensure they are in all the way to the right and to the top.
Tip 9: Use a brayer to ensure the cards are stuck well to the mat with no bubbles underneath.

Tip 10: Avoid wearing out the same spot(s) on your mat by moving cards around to different places. This is important if you don't make four cards every time you use the mat.
Tip 11: Group and attach each design before cutting.
Tip 12: If you used a "Guide" for your design size on your canvas, hide it before cutting. Just click on the eyeball symbol in the Layers Panel to hide it.

Tip 13: All designs must be set to the same color to cut them together on one mat. One way to do this is to use Color Sync in the Layers Panel and drag each design/color into one. You can still use any color cards you want to on the mat.

Tip 14: Move the little white star wheels on your Cricut to the center of the mat before cutting to prevent leaving marks on the cards, as the card mat is thick.

Tip 15: To make multiple identical cards, duplicate one design by increasing the Project Copies in Design Space when preparing to draw and cut in the "Make It" function.

Tip 16: When telling Design Space how to load your materials, select "On Card Mat."
Tip 17: To protect the card's design, if you plan to draw on the inside of your card(s), do that before cutting the front design, if possible.
Tip 18: Design Space will always draw before cutting, so have your pens ready to go before starting to cut your cards. Prompts will appear each time you need to switch colors.

Tip 19: Use a scraper or spatula to carefully remove the edges of your card from the mat when it's done and then gently pull off the rest to preserve your design.
Tip 20: Any bits left on the mat can be removed with a scraper or spatula, pushing them to the top or bottom of the mat to avoid them getting caught in the mat's grooves.
Tip 21: To keep your mat sticky, replace the liners on your card mat after each use to protect them from dust and dirt. There is one on each side.

Tip 22: For cutaway cards, use a weeder tool to lift the edges of the cuts carefully, if needed, and then pull the rest off with your fingers to avoid scratching or puncturing the backer underneath.

Well, there you have it. The 22 tips I found the most helpful. You may find others I did not include, but this should get you started. If you did not grab the free guide above, you can access it here. Happy cardmaking!
Leslie

Comments
Leave a comment