
Free Shipping
On Orders $49+
On Orders $49+

I’ve made quite a few projects with my Cricut Explore Air 2, but haven’t attempted an iron-on project until now. Here’s what I learned and hopefully some easy instructions for another beginner!
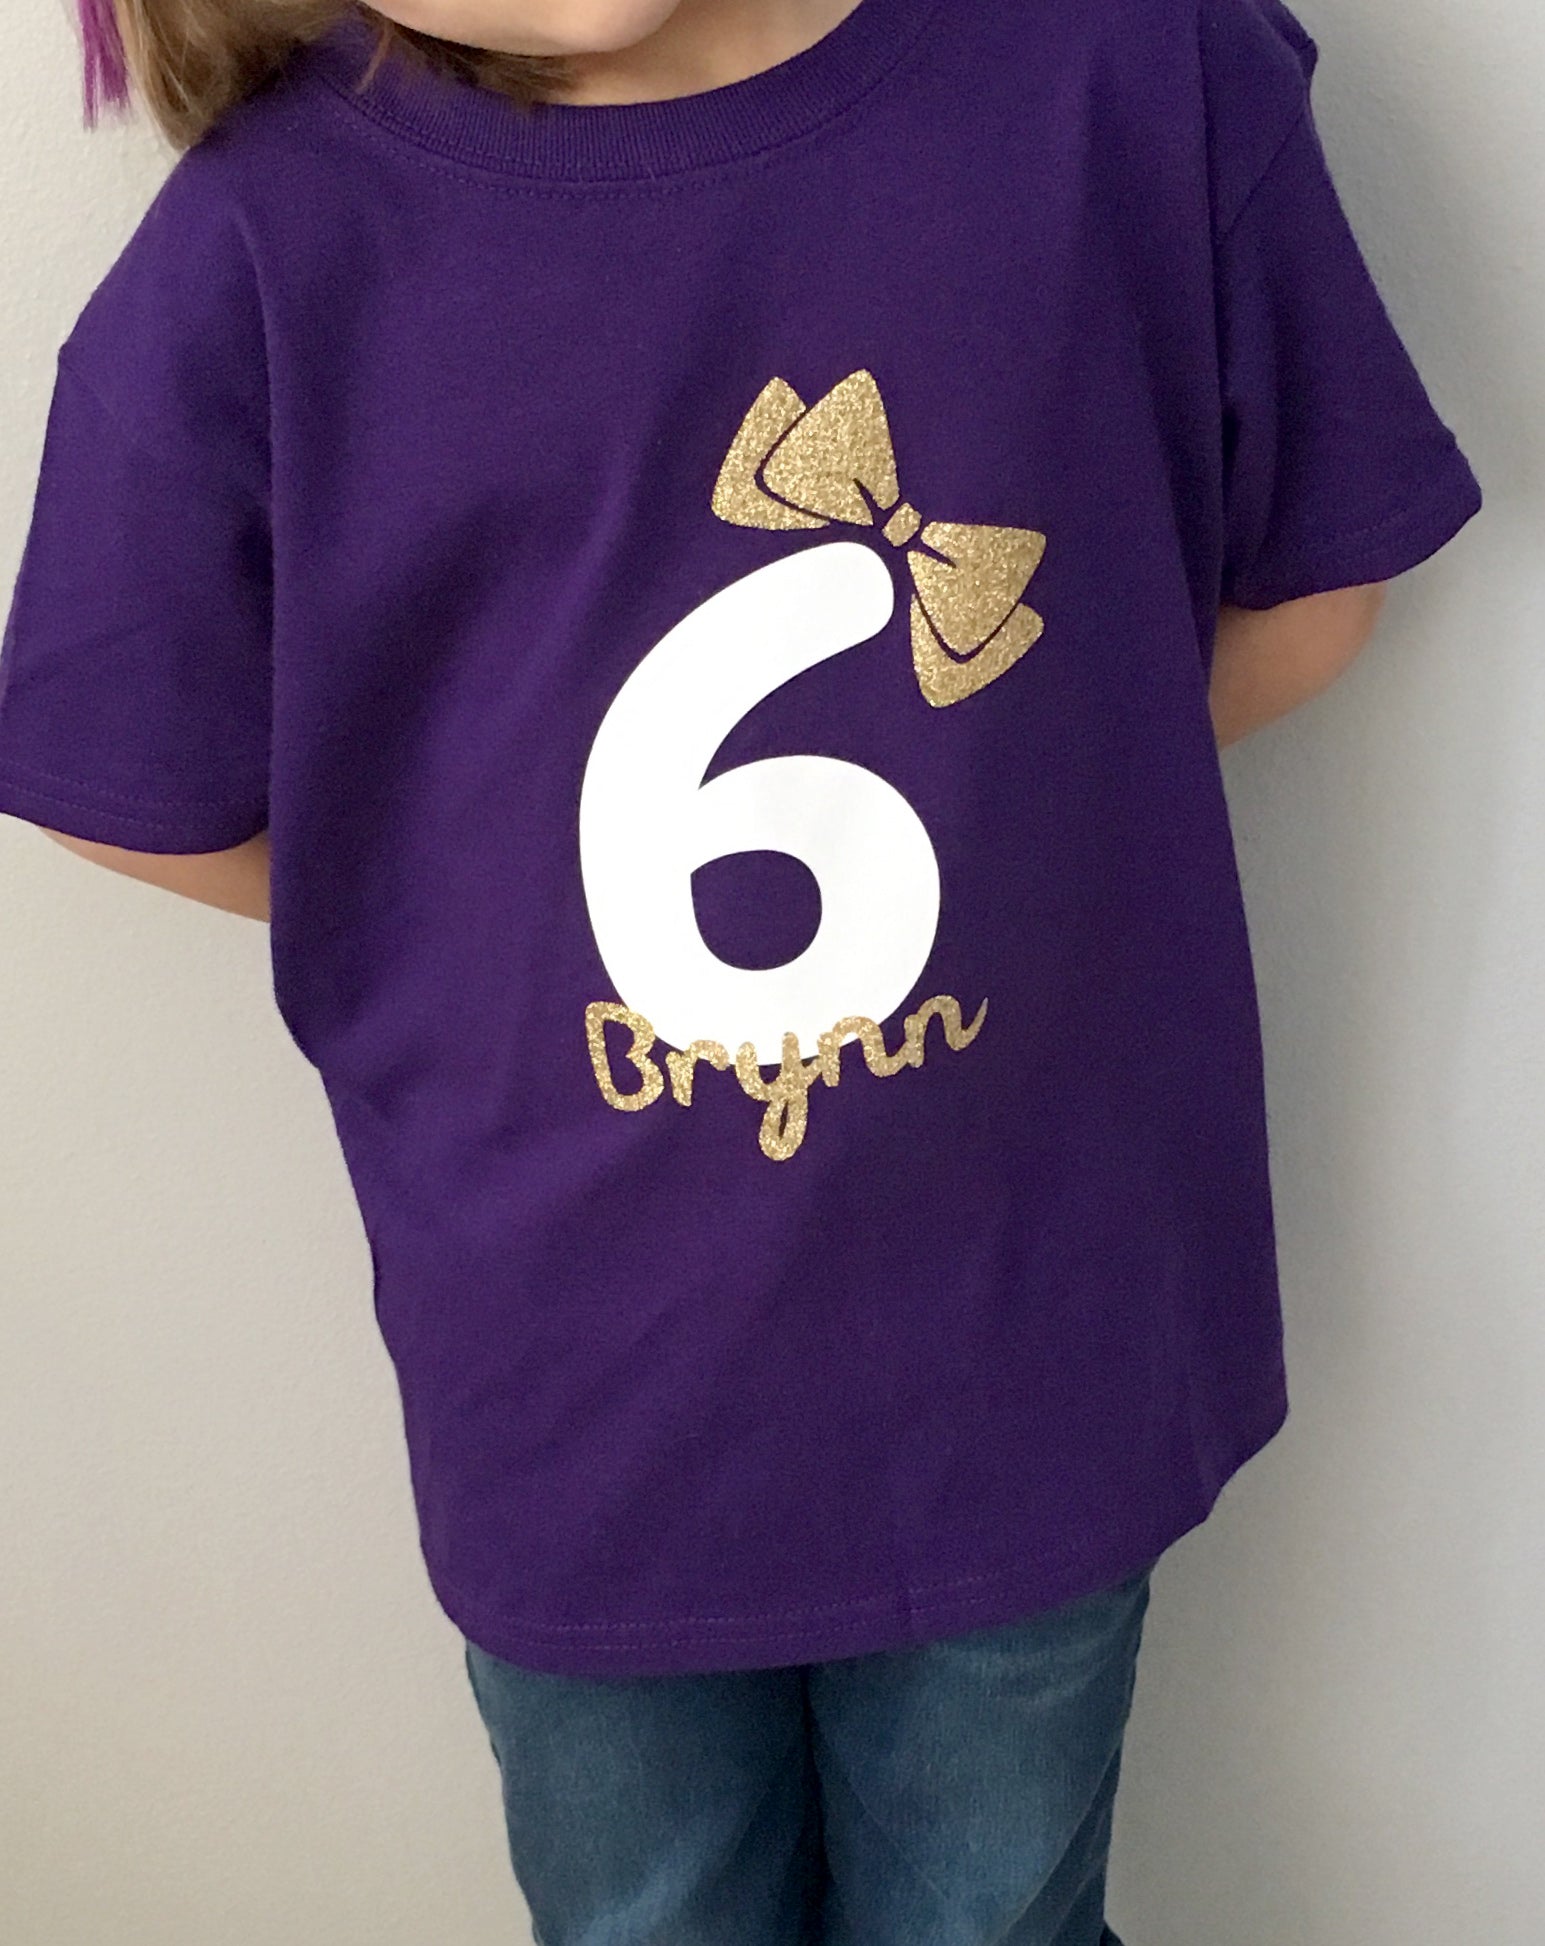 My daughter, Brynn, is about to turn 6 and she requested a birthday shirt. Last year I bought one for her, but now that I have an Explore Air 2 I figured why not make one instead.
I first made my design in Adobe Illustrator, but you could easily purchase your own images for this if you don’t have design software.
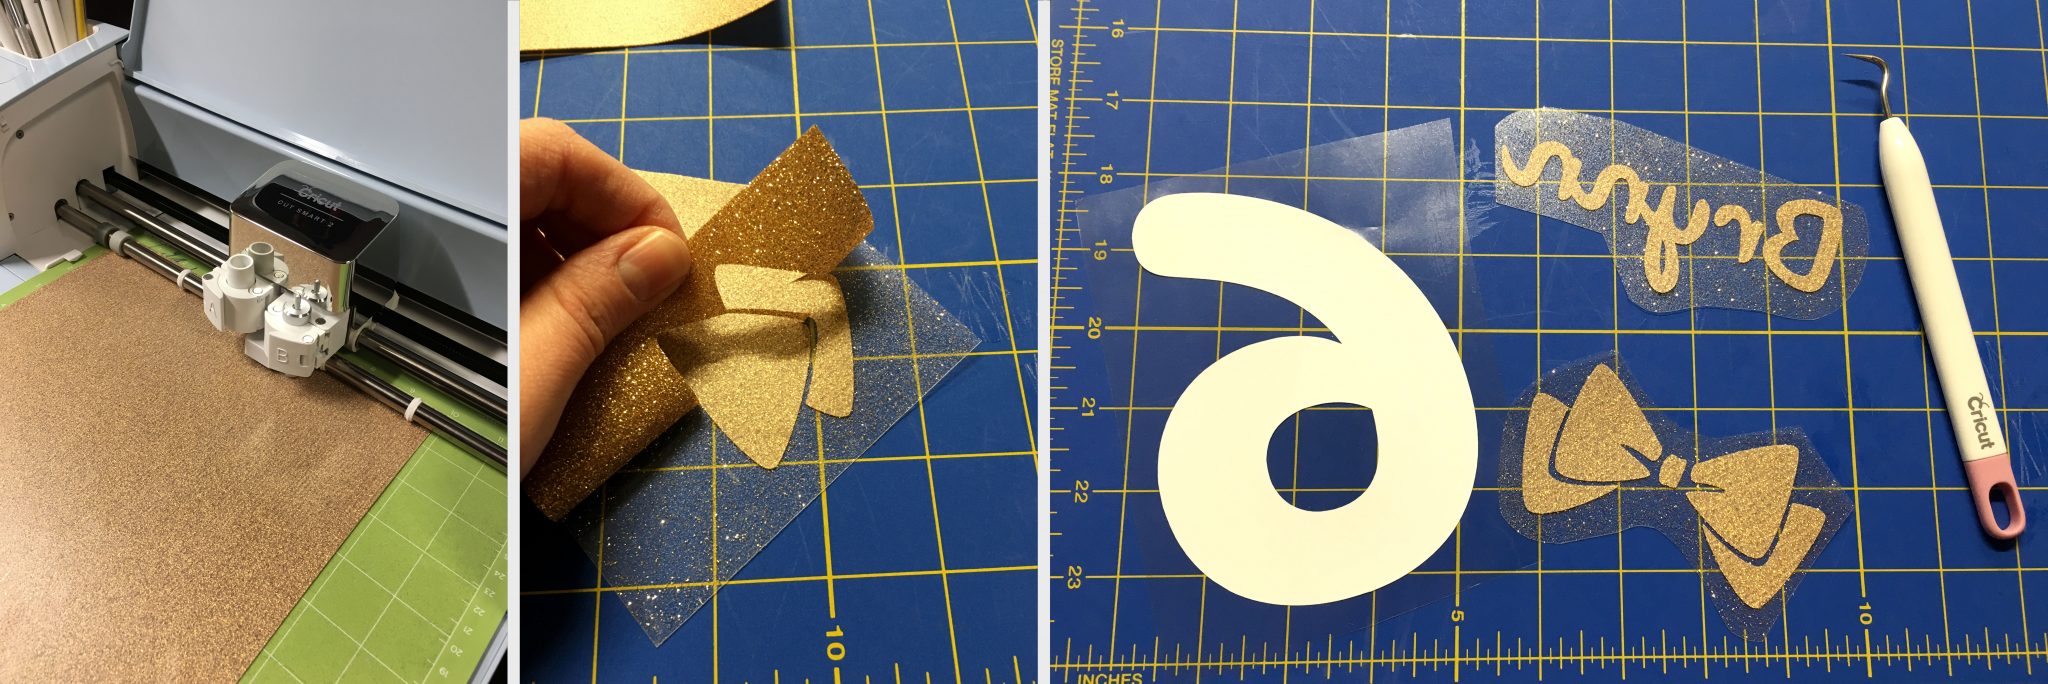
 I saved each image (the bow, 6 and Brynn) as a separate file and brought them into Design Space so that they would be separate layers.

Make sure that you mirror your image before you have your machine cut it.

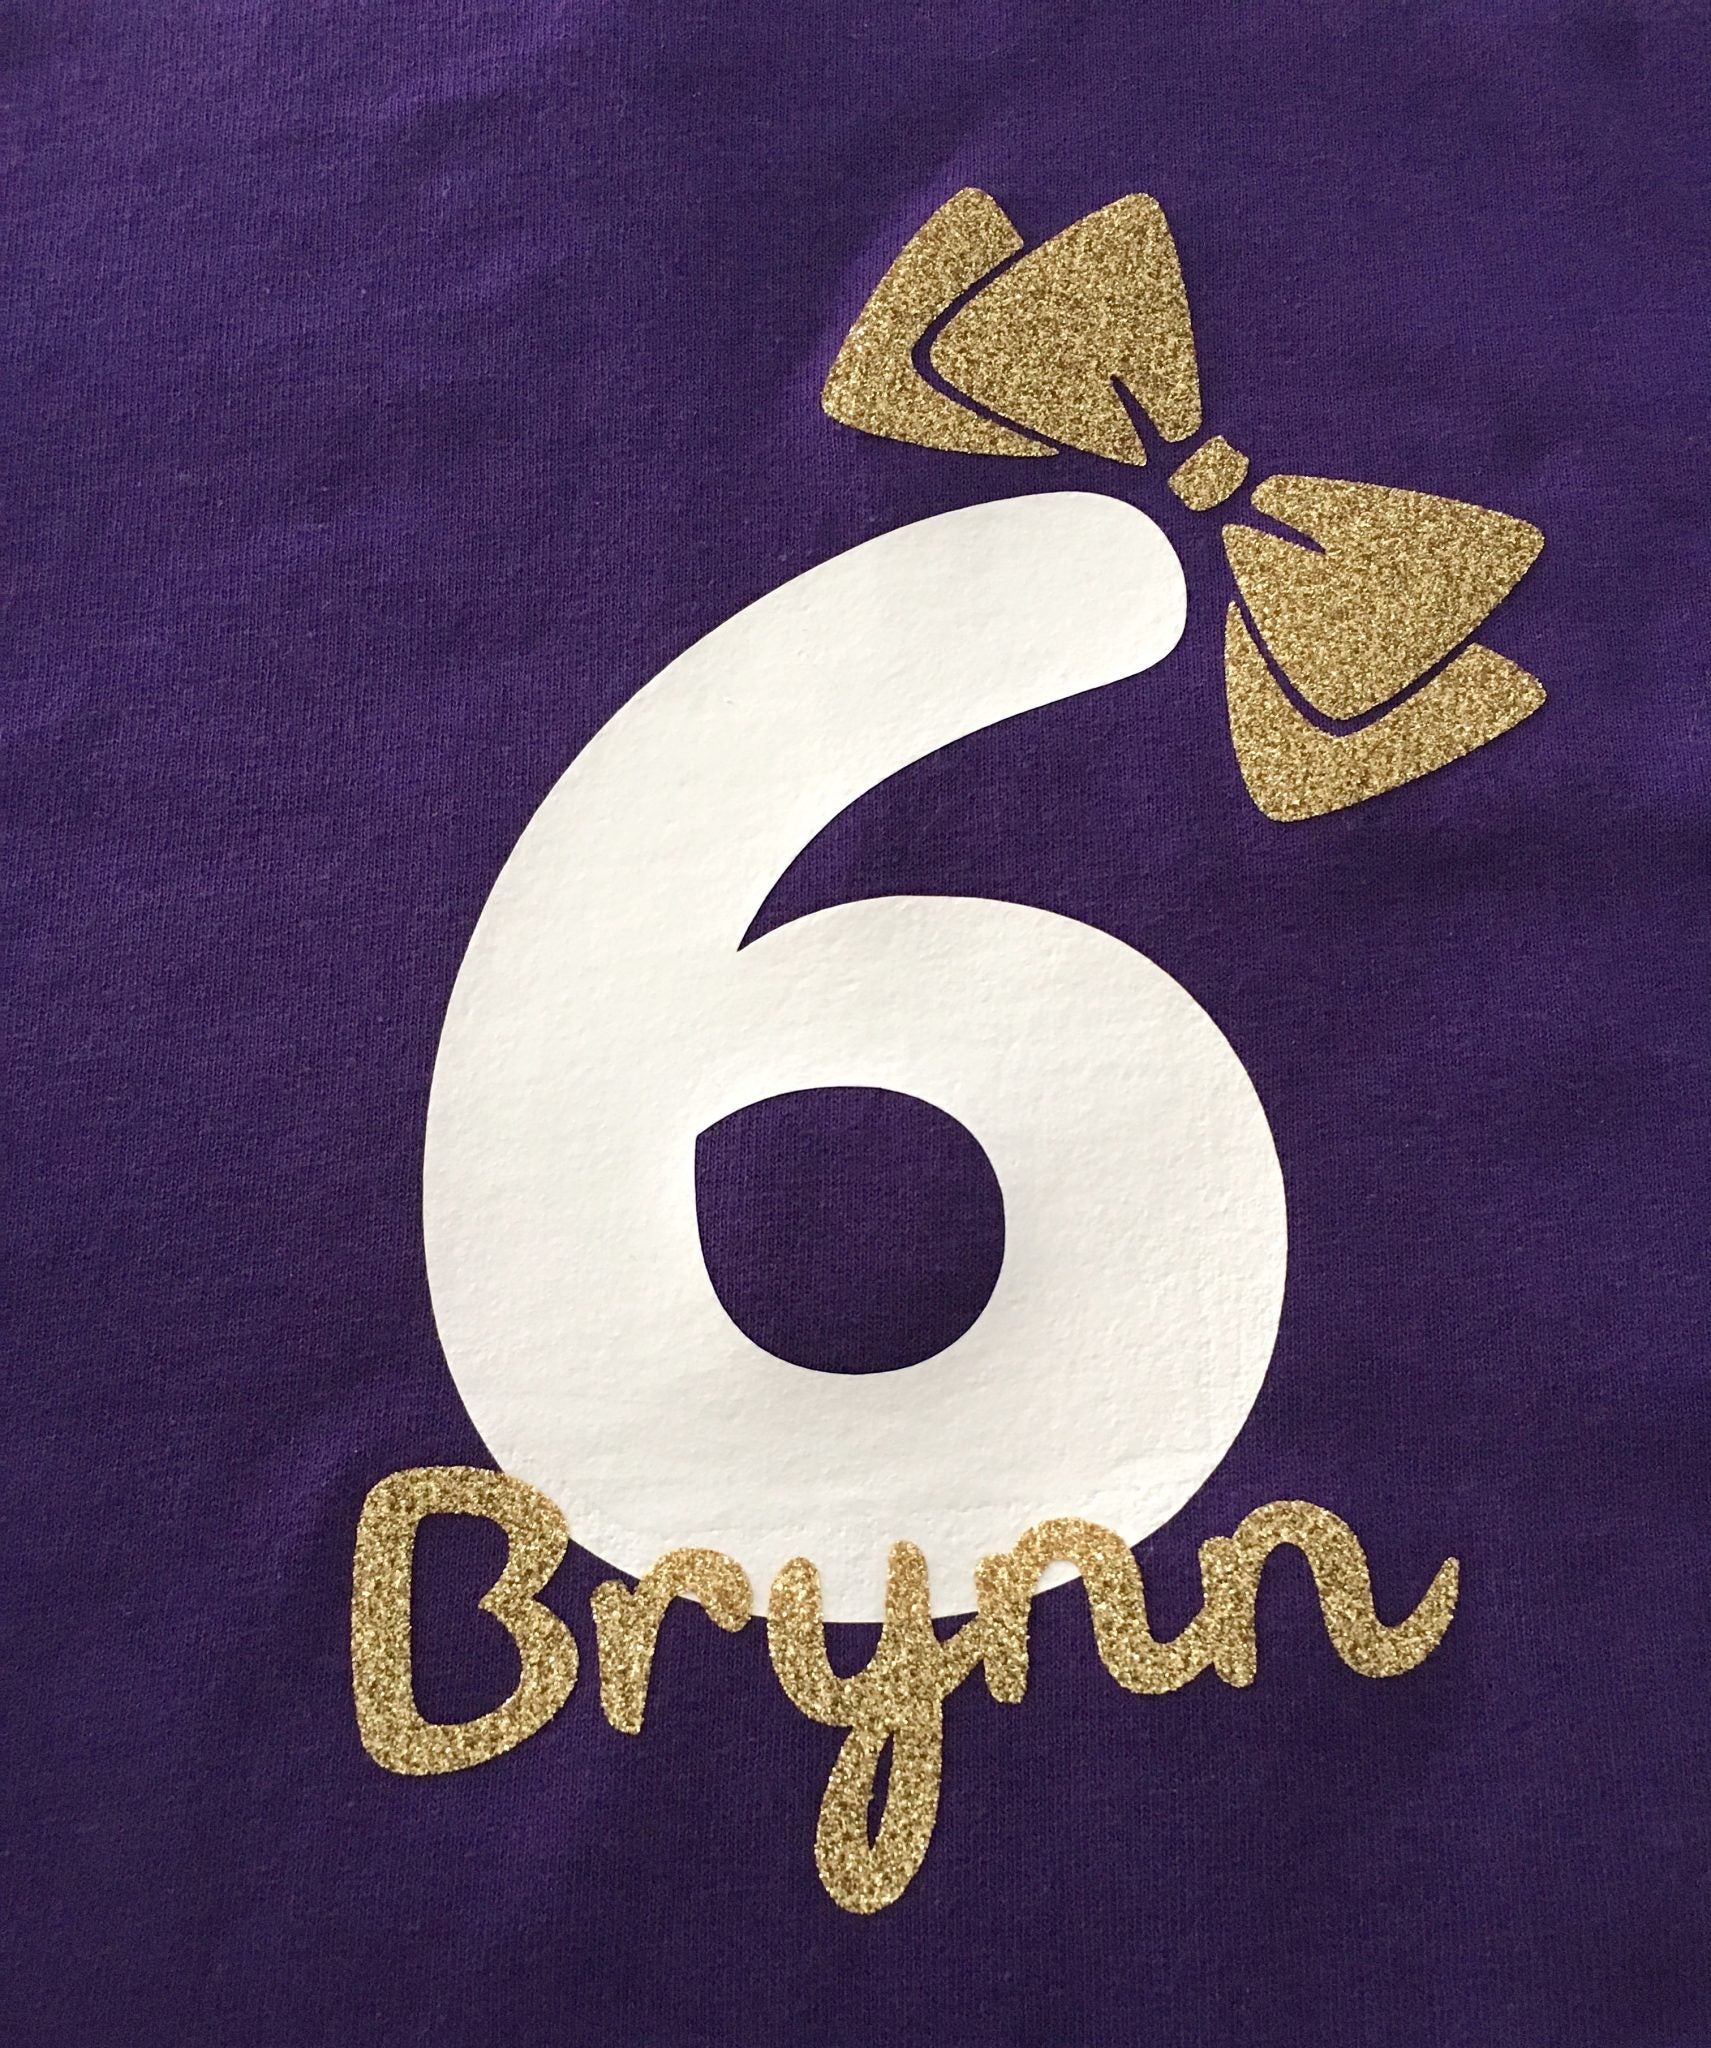
I wanted the “6” to be white and the bow and “Brynn” to be gold glitter. I cut these out by iron-on color and then weeded them.
Note: When putting your iron-on on your mat, the shiny side needs to be down.
Next I found a video made by Cricut and followed their instructions for using an iron (instead of a heat press) to apply the iron-on.
I turned my iron settings to linen/cotton and no steam.
 I applied the “6” first because part of my gold will be layered on top of it. I then placed a thin towel on top and held the iron down for about 30 seconds in one spot and then moved it to another spot until the whole image was heated. Next I flipped over the shirt and repeated the same process.

I let it cool and then removed the plastic backing sheet. Lastly I repeated the same process above for the gold images.
Overall, I thought the process was fairly simple and that it turned out cute!
Cricut Crafts to Do With or For Your Teen/Tween

Leave a comment