
Free Shipping
On Orders $49+
On Orders $49+

If you're a fan of DIY projects and love creating personalized clothing for yourself or your loved ones, you're in the right place. In this post, I'll show you how I created a unique t-shirt inspired by one of the most iconic characters from the Addams Family.

In the Netflix show Wednesday, the spider web window is a prominent feature the show. It is a large, intricate window design that resembles a spider web, with curved lines and intricate patterns that create a spooky and mysterious atmosphere. The web design is made up of dark metal and is set against a backdrop of deep purple glass, giving it an ominous and eerie appearance. I thought that Cricuts Reflective Iron-on Vinyl could duplicate that effect for a T-shirt design for my daughter who is a huge fan.
Materials used -
Cricut Iron-on Glitter in black
Plain black shirt
I started off by measuring my shirt so I can get an idea of how large I want to make my project in Design Space

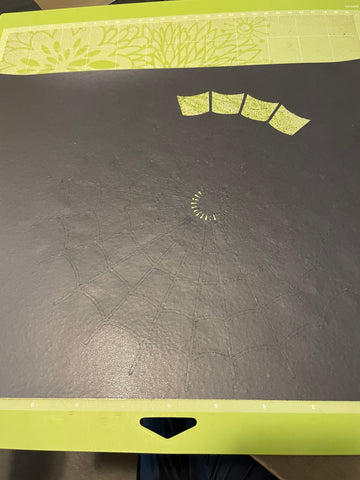
I found the spider web under images and it is free if you have the monthly subscription. In the Netflix show "Wednesday" the window I am re-creating has one half of it pink and the other half the reflective deep purple. I was initially going to incorporate both colors but decided against it once I saw how beautiful the Reflective Iron-on is. That is why there is a half circle included in this photo as well as a full circle.

I wanted the spider web layer on top to make sure that it was the same size as the circle. Using the "Bring Forward" function in Cricut Design Space is a simple and effective way to adjust the layering and positioning of your designs.
To use the "Bring Forward" function, start by selecting the layer or object you want to move forward in the layer stack. You can do this by clicking on the layer in the Layers panel or by clicking directly on the object on the canvas.
Once you have selected the layer, right-click on it to open the context menu. From there, choose the "Bring Forward" option.


After making sure the spider web and circle were the same size it was time to cut! The circle was cut first and I used the Holographic Iron-on Vinyl for that and then the black glitter Iron-on Vinyl for the spider web.

When weeding it is sometimes easier to keep it on the mat. It stays flat that way.
The web was a bit tedious to weed but Cricut tools are definitely very helpful

Using the tape measure again I made sure that the circle was in the middle of the shirt before applying the heat.

I used my Cricut Easy Press mini to apply the heat. I put it on high and then applied pressure for 50 seconds. I peeled the protective plastic up a bit and found it needed more heat so I applied 30 more seconds of heat with firm pressure. I did not want to over do it because I knew I would be heating the Iron-on vinyl up again to apply the spider web. It can become warped if heat is applied for too long.

At this point my three year old had enough of crafting so my attention was split. I placed the spider web over the circle I had just made on the shirt and did not notice how the edge of the sider web did not touch the edge of the circle. Oh well. I had some trouble with the spider web it seemed like it needed a much longer time to adhere. I probably used heat for about 3 minutes checking it about every minute.

This is how it turned out!

It isn't perfect but my 10 year old still loved it & I think it looks so cool!! This reflective Iron-on is so pretty! I did think it looked a bit bland though and the shirt needed more. I had more Reflective Iron-on so I thought why not use it.

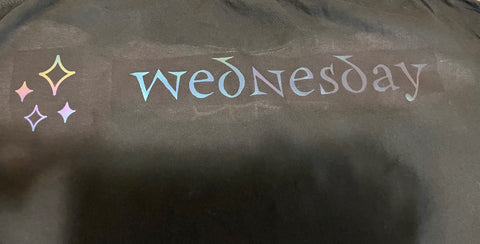
I chose this font that I thought went well with the theme and then some simple stars for added detail. I measured how much vinyl I had left and then made sure everything I wanted to add fit within the measurements.
Make sure to mirror the image before you cut it! I also welded everything together so it would all cut at one time.
To use the "Weld" function, start by selecting the shapes or letters you want to join together. You can select multiple shapes by holding down the "Shift" key on your keyboard while clicking on each shape.
Once you have selected your shapes, click on the "Weld" button in the Layers panel. The button looks like two overlapping squares, and is located towards the bottom of the panel.
This is what it will look like once welded together

This is what it looks like all weeded

I then used my Cricut scissors to cut the pieces I wanted separated.

I used my Easy Press mini to apply the Iron-On Vinyl and used about 50 seconds of pressure to apply it.

Do you see where the shirt is lighter colored around the design? I am not sure why that happened but once I washed it, it did go away.
Here is the back
Here is a look at the final project! My 10 year old is definitely happy with it.


With this simple yet creative project, you can add a touch of spooky style to your wardrobe. I hope that I have inspired you to create your own project! Sometimes it can be intimidating to get going but it is so much fun and even the most simple designs can turn out to be so special! So what are you waiting for? Grab your Cricut machine and start creating your own Wednesday Addams-inspired t-shirt today!
Cricut Rainbow Reflective Iron-on // Dog Shirt Tutorial
Cricut Reflective Rainbow Iron-On Book Totes + 10 Useful Tips

Leave a comment