
Free Shipping
On Orders $49+
On Orders $49+

Do you like making Cricut crafts for babies? I sure do, so when I learned a new grandchild was on the way, I decided to decorate some socks for her. All I had to do was create the designs, cut them out of Iron-On Vinyl and apply them to the socks with my Easy Press Mini. This was a simple project, and the socks all turned out so cute, especially since they are so tiny. I can just picture them on her little feet.
Materials:
Baby socks (I bought a pack of six)
Cricut die-cutting machine (Maker, Explore or Joy)
Everyday Iron-On (I used black)
Easy Press Mini
Easy Press Mat
Cricut Tools
Cardstock
Scissors
Pencil or pen
Ruler

First, I decided on my designs. I had seen some cute sayings on Pinterest, so I used some of those and made up a few of my own. I used the ‘Text’ box on the left panel of Design Space to type in the text for the first one.

I arranged the words to be in a square shape. Design Space always aligns the text on the left side, but I wanted the words centered, so I used the ‘Align’ tool on the top bar above my Canvas and chose ‘Center.’


I needed to measure the bottom of the socks to decide what size to make each design. Before doing that, I created an insert to put inside the socks to keep them flat for this purpose. I just drew around a sock, cut out one insert and then traced around it to make several more.

Then I put the inserts into the socks for measuring purposes.

I used a ruler to measure the bottom of the socks where I would apply the designs, so I knew what size to make each one. Some socks had a different color on the heel, which would seem to change the available design area, but I ultimately decided to make all the designs the same size.

I decided on a 1.25-inch square and thought it might be helpful to make a square template to use for sizing. I inserted a square from the 'Shapes' tool on the left panel of Design Space and then sized it to the correct dimensions.

I decided to change the color of the square template to white since I wanted to see the black text inside it. I simply clicked on the small box to the right of the Operation drop-down and chose white.

Next I chose the font I wanted, which turned out to be 'Headline News'.

Then I reduced the size of the text image to fit into the box and placed it over the square to see how it fit.

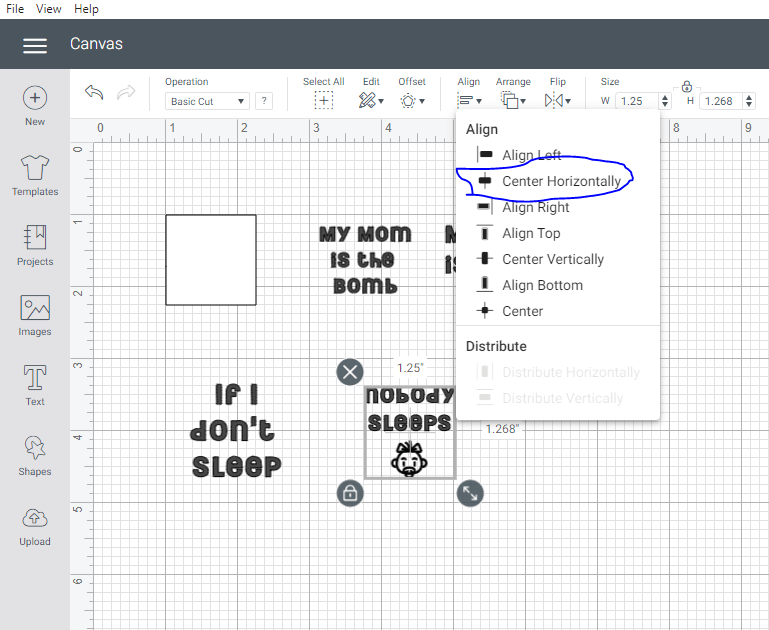
I continued typing text with the words I wanted, using the 'Text' tool on the left panel. A few of them would have an image along with the text. For the one that says, "If I don't sleep, nobody sleeps," I would insert an image of a baby face under "nobody sleeps." I clicked on the 'Images' tool on the left panel of Design Space, chose a baby girl image from Design Space and inserted it into my Canvas.


Once the image was on my Canvas, I reduced the size of it to fit under the text and to keep the entire design the right size to fit in my square template. I used the little arrow icon on the bottom right of the image for sizing. I could have also used the dimensions above the Canvas to do this.
I centered the image under the text and highlighted the text and image together, which created a box around it. Then I used the 'Align' tool above the Canvas and selected 'Center Horizontally."
I continued typing text and creating my designs until I had them all done. Here they are all created and sized.

I Grouped and Attached all the text for cutting. However, when I clicked on 'Make It', the designs were too close together on the mat. It would be too hard to cut them apart that way.

To correct this, I canceled the cut and went back to my Canvas, so I could move the designs a bit farther apart. First, I had to Detach and Ungroup them so they were separate designs again. After spacing them, I again Grouped all the designs together and Attached them for cutting.

This time, the designs were arranged better on the mat, so I could easily cut them apart once my Cricut was done cutting them.

Now it was time to choose my material, and I selected Everyday Iron-On.

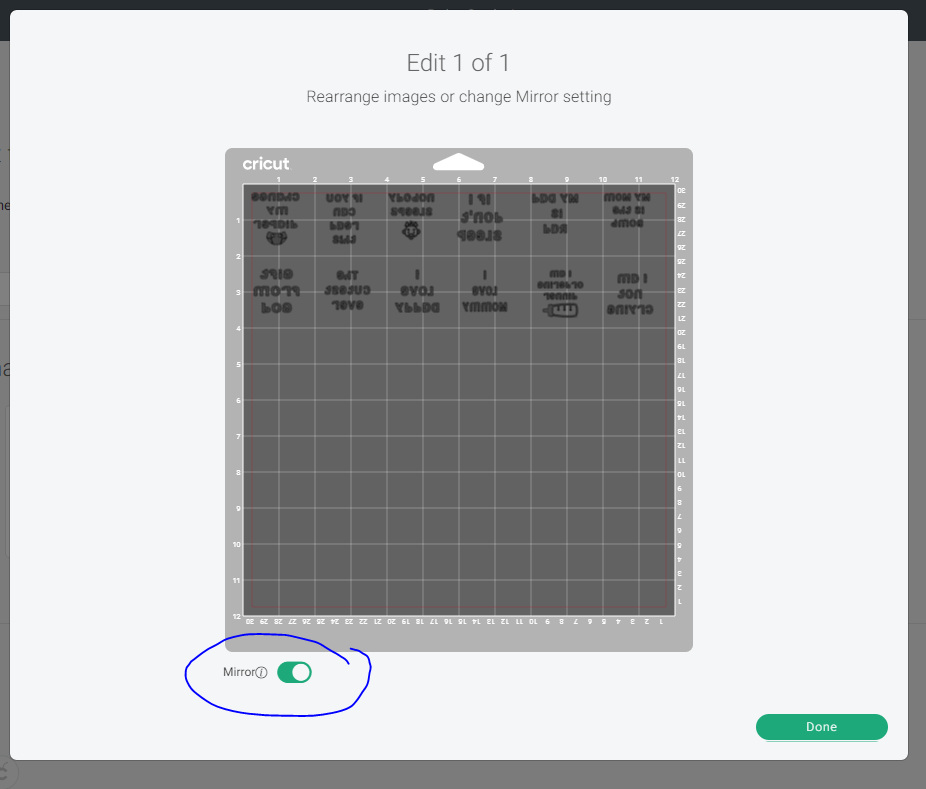
It's a good thing Design Space has such specific directions. I had forgotten to mirror my design before selecting my material, but I saw the reminder on the screen to make sure my design was mirrored. If I didn't do this, the text would be backwards once I ironed it on my socks. I would have had to start all over, and that would mean buying more socks, too, or getting all the applied vinyl off. Not fun.

I used the 'Edit' button under the image of the mat on the left panel to correct this. This opened up a new box, and I clicked on the button next to 'Mirror' then hit 'Done.'
The reminder to mirror my design also told me how to lay my material on my mat. With Iron-On, you always place it shiny side down, so that's what I did next. I used my Cricut Brayer to smooth out the Iron-On onto the mat, so there were no bubbles underneath it. Then I hit 'Continue' to cut out my designs.
Once they were all cut out, I cut the Iron-On into little squares, so each design was on its own piece. Then I weeded each design, which simply means to pull off any extra material, leaving only the design on the carrier sheet. I used a weeder tool to do this as usual.

Before applying my designs to the socks, I removed the inserts I had in them and placed them on my Easy Press Mat. I didn't want the material to be stretched when I applied the Iron-On. I left the socks upside down and placed the designs on the socks in preparation for heating.

I used the Cricut Heat Guide to determine the amount of time and the temperature to use for applying the designs with my Easy Press Mini. It needed to be preheated to Medium, and the heat time was 25 seconds on the first side and 15 seconds on the second side.
Here are two pair of socks done. You can see these a little more close up.

And then a couple more.

And here they are all done. I can hardly wait to see our little sweetheart wearing them. It won't be long now.

This was my first attempt at applying Iron-On to socks. I wondered if I should have used SportFlex Iron-On instead of Everyday Iron-On because socks are stretchy. However, I know she won't wear these for very long since babies grow so fast. I think they will be okay. If not, I'll know for next time. Because there WILL be a next time, I'm sure.
Have you ever applied Iron-On or Heat Transfer Vinyl to socks? I recommend trying it, if you haven't. It's a quick project and not at all difficult, and I find them adorable. I would like to make some for myself now (although they definitely won't be as cute as the baby ones).
Never let anyone treat you like regular glue. You're glitter glue.
Leslie
Fabric Baby Blocks Using Cricut Iron-On

Comments
Leave a comment