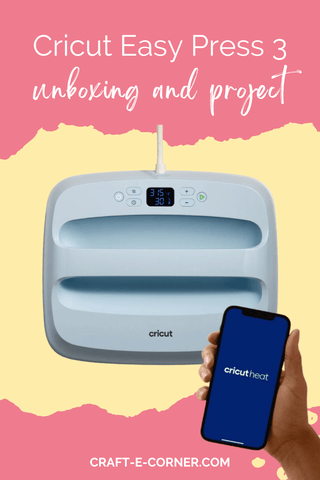
Cricut EasyPress 3 // Unbox, Set Up, and First Project with Cricut Heat App
Cricut released the Easy Press 3 with the Cricut Heat App last year. It comes in the 9x9 and the 12x10. I just got the 12x10 so let's unbox this Easy Press 3, activate it, and make a project with it using the new Cricut Heat App.
Materials:
Cricut Maker 3 or Explore 3: Smart Iron on Weeding tools Easy Press 3 Easy Press Mat Tshirt
Hey crafters. I’m Beth with Craft-e-Corner. Today I am here to talk to you about the Cricut EasyPress 3. We will unbox and show you what is inside. We will go over the key features and then complete an iron on project using the Cricut Heat app. Let’s get started. The new EasyPress 3 comes in both the nine by nine and the twelve by ten. Other than the size, these are the exact same. If you are on the fence about what size to get, that will really depend on your projects. The nine by nine is a great size for storage and just having out in your craft base. If you're doing bigger projects and would have to press multiple times with the nine by nine, I would consider just going to the twelve by ten. Also, if you think you are going to do sublimation or infusible ink projects, I would go with the twelve x ten right away. Let’s open this up. On top is a sample iron on piece to create your first project. If you have never used an EasyPress before, this is a great first project. Next is the welcome packet. Let’s open this up and see what's inside. First there is a let's get started page on how to activate and set up the EasyPress with the Cricut Heat app plus there is a user manual and safety instructions. And lastly there is warranty information which is a one year warranty. All right, let's take the press out of the box. The first thing you'll see right away is the press is in this canvas bag to protect it. And here is the storage heat plate. Let’s take it out of this bag. This is where you'll put the heat press when it's warm. Let’s go ahead and open up this canvas bag and take out our heat press. First thing you'll notice is it’s covered with this plastic wrap. It’s also this beautiful light blue mist color. Here’s the cord. Let’s go ahead and take this plastic off if you haven't done so already. You’ll want to download the Cricut Heat app. In my heat app, you'll see that I already have the hat press and the nine by nine. But I want to set up my new twelve by ten. So, I'm going to go into my heat presses and set up new press. It is now searching for my press. So, let's go ahead and turn it on. You’ll see that it shows app on the display screen here which is telling us it's trying to connect to the app - here it found it. So, let's go ahead and hit connect. All right, it found it and let's activate our ecosystem. All right, it's activated. It does go over a first project if you need it. I've used it before, so I'm going to skip this project. And there we go. There’s our new twelve by ten. Let’s turn it back on before we jump into our project. Let’s go over the features of the EasyPress. Here's the power button to turn on and off. Of course, the temperature button looks like three little wavy lines. If we need to change the temp, we will press it and then use the plus or minus to get to the temp we want, click it again and it will turn this Go button orange as it's heating to that temperature. Same thing with the clock. If we want to change the amount of seconds, we can plus or minus and hit the clock again. And it will do that when we hit Go, as soon as it is heated up, it will turn the play button green. All right, let's jump back into the heat app and get ready for our project. So, I click on my twelve by ten EasyPress and let's start a new project. First thing is you're going to select the material you're using. I am using Smart Iron on, so I'm going to select that and I have a 100% cotton T shirt that I'm putting it on. So, again, material smart iron on applied to 100% cotton. It’s telling me a work surface Cricut pressing mat. All right, so it's showing me that we need it at 315 degrees. I can press this button down here, and because it’s connected to my phone via Bluetooth, it sends that straight over to my machine for the 315 degrees Fahrenheit. And we're going to wait for that to heat up on the app. It shows the degrees it's at right now and about how much longer it'll take to heat up. All right, it is now heated to 315 and it’s telling me to apply a quick press of 5 seconds. It even shows it on my machine here. Let's go ahead and press the Go button for the 5 seconds and we'll put it back in our base. Now, back in the app, it's telling us to place our design and press. So, here is my design. I wanted to point out, I do have the EasyPress mat underneath my T shirt here. I got my design on there and let's go ahead and press so for 30 seconds, set it right over the top and hit Go. When it's all done with those 30 seconds, we can remove it from our shirt. It does want to flip it over and heat from the back, but I do need it to press the rest of the thing. So I am going to use the clock here to go up to 30 seconds so that I can heat the rest of my design because it did not all fit underneath my press. So let's go ahead and press the bottom half for another 30 seconds and we'll return it to our base. And here again, it's asking me to flip it over and press the back for 15 seconds. So, let's go ahead and do that. Hit the Go button and it'll count down the 15 seconds. Lastly, in our app it is telling us to peel cool, so once it is cooled to the touch, we can remove this liner. My trick for removing a liner is to go more at a diagonal and not straight across. We hope you all enjoyed this video. If you did, hit the like button and subscribe for more Cricut, inspiration and education. If you have any questions, gives us a comment down below.
If you have the Easy Press 2 and love the Bluetooth compatibility then I would definitely recommend upgrading. It really takes the guess work out of making an Iron on project. It shows you step by step all along the way.
You do not need the Heat App to operate the Easy Press 3 but you will need to have the app to activate it.
* I can't clean my craft room because I get distracted by all the good stuff I find again. ~Beth


Leave a comment