
Free Shipping
On Orders $49+
On Orders $49+

Have you applied Cricut Iron-on to wood yet? I wanted to try it, and I had just the right quote to put on a sign. I had seen signs that say, "Dogs Welcome, People Tolerated" and thought they were cute, but since I'm not a huge fan of dogs, I thought it might be fun to reverse the message.

My sign would say, "People Welcome, Dogs (Barely) Tolerated." I started with a wood round and opted to use blue foil iron-on. That may have been a bit too challenging for my first time, but the process looked so easy from what I had seen.

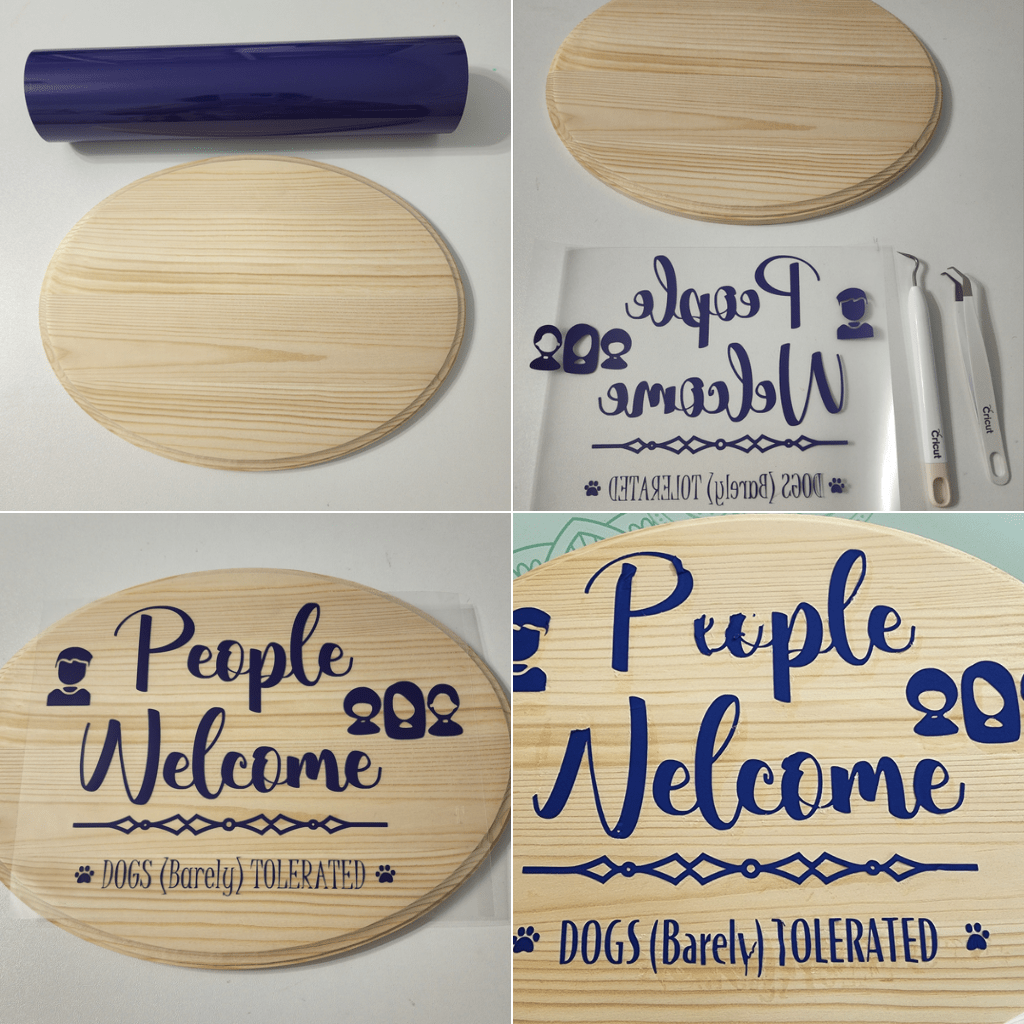
I created my design in Design Space using text and adding a few images.

Instead of applying my design to the raw wood, I decided to add some stain to it before adding the iron-on. I thought it might help with adhesion.
I cut out my design with my Maker 3 and weeded it. Unfortunately, my design did not transfer well. It did not want to stick to the wood, so I had to start over.

For my second attempt, I used a raw wood oval sign. I created an oval template in Design Space to resize my design to fit the new plaque. I would use blue Everyday Iron-on for this one.
The design looked great before I tried to apply it with my Easy Press, but again, the transfer failed. It wasn't sticking well, so I heated it again and ended up melting the iron-on. I wanted to retry using the same wood piece, but the melted iron-on left some residue and bumps on the wood surface. Unfortunately, sanding it did not help like I had hoped.

On to my third attempt (I was still not giving up on this). This time, I used a stained and varnished round of wood with white iron-on. Again, the design looked great over the wood before heat application, but it still failed.

The iron-on just peeled right off of the wood, leaving a bit of residue. This was easy to remove because of the varnish, but I did not try the project with that piece of wood again.
For one last attempt, I purchased another wooden oval and chose to use glitter iron-on for the design. By this time, I had figured out a few things.
#1 - The iron-on may stick to raw wood better than to stained wood.
#2 - Overheating the iron-on causes it to melt.
#3 - The Easy Press must have good contact with the wood for even transfer.
I had seen people using an Easy Press Mini for these iron-on wood projects, but I didn't understand why you would do that with a large design. I figured it out by the end of the project.

#4 - Using an Easy Press Mini to adhere iron-on to wood allows much better contact between the wood and each portion of the design. It may take a bit longer, but the results are worth it.
Here is my final attempt, with the glitter iron-on partially applied. So far so good using the Mini Press.

And here is the finished sign. All in all, it turned out pretty well. It was not completely perfect, but it would work.

While I persevered and completed this project despite all the problems, I was rather disappointed with it at the end. The sign did not seem as bright as I had anticipated. The quote still makes me smile, so I will definitely display it somewhere, especially after all the time and money I invested in it.
It's hard to explain why I had so much trouble applying iron-on to wood with this project, when others have made it look so easy. I believe it was a combination of having wood pieces that were not smooth/even and errors I made when applying heat. I hope I didn't scare you away from trying this. Sometimes it's valuable to share what didn't work for the benefit of others.
What popular quote would you like to reverse? Have fun with it and be true to yourself.
One fails forward toward success. Charles Kettering
Leslie
July 4 Wreath: Cricut Iron-on on Wood

Leave a comment