
Free Shipping
On Orders $49+
On Orders $49+

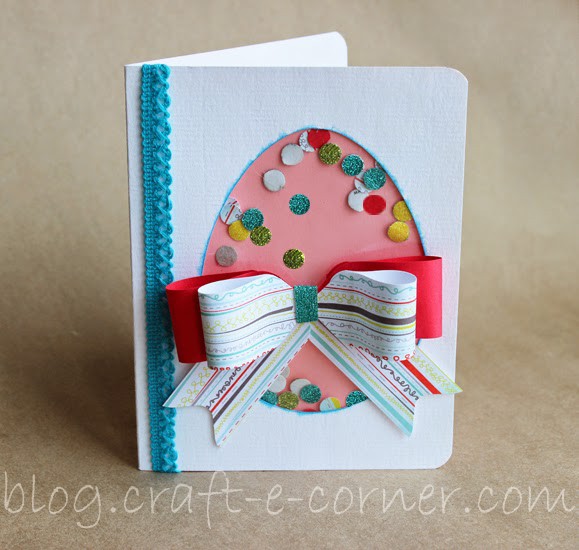
It’s no lie, I love my We R Memory Keepers Envelope Punch Board. It is such an easy tool to use and I have made some really cool envelopes from a paper stack with it already. All the We R Memory Keepers punch boards are awesomely easy to use and are SO versatile! In this card, I used the envelope board to make the bow:
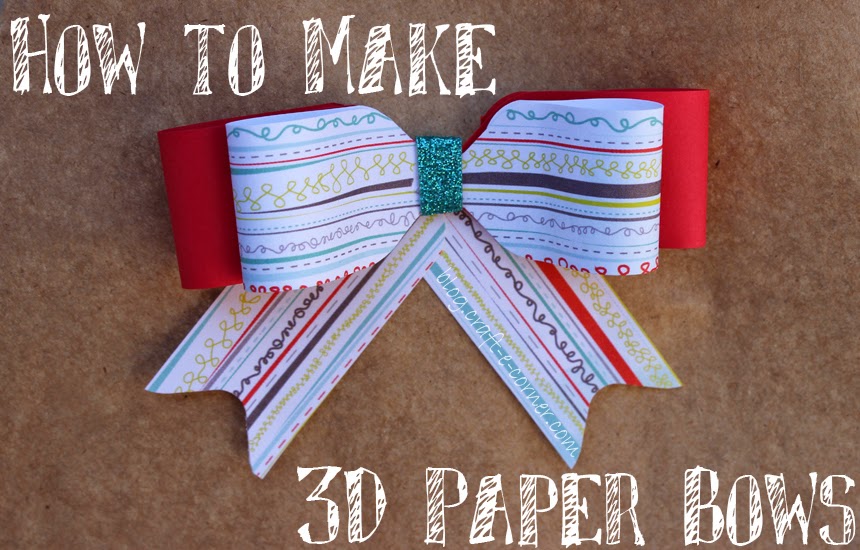
I know, you might be scratching your head right now, how do you make a bow with an envelope punch board… let me tell you how to do it!
First lets start out with the card. I drew out an egg shape by hand, traced it onto my card base and then cut it out with a pair of scissors (no die cutting machine required!). I used a Megan Elizabeth Chillax Ink Edger to ink the inside of the egg to give it a little definition. Next I cut a piece of pink card stock the same size as the inside of the card. I grabbed a piece of plastic from a Peeps package (did I mention lately that I just Love My Peeps?) – it’s always good to recycle when crafting! Any piece of plastic will do. Cut the plastic to the same size as your pink card base. Now take a hole punch and punch out some holes for the inside of your card. You can do different shapes too- this is a great time to get creative! How many hole punches you use is up to you- I ended up with about 30. Run some tape runner around all of the edges of your pink paper and pile your hole punches in the middle. Carefully lay your plastic down over the adhesive, making sure there aren’t any gaps that your hole punches could fall out of the card. Next attach the pouch to your card base and you have the majority of the card finished.
Now we can make the accent bow!
You’ll need three strips of 1″ paper. Two that are 5″ and one that is 6″. The paper I used is from the Bo Bunny Alora Collection 6×6 paper pack. I love all the fun colors in it! You can use all the same colored paper for your bow, or you can do two different colors. If you do different colors, make sure your “accent” color is the 6″ strip.

Take your first 1×5″ strip and center it on your envelope punch board. This is 5″ so you’ll want to line it up on the 2.5″ mark on the board. This will be your ribbon tail (the bottom piece).


Repeat on both ends to finish the bottom piece. Isn’t that a neat trick?
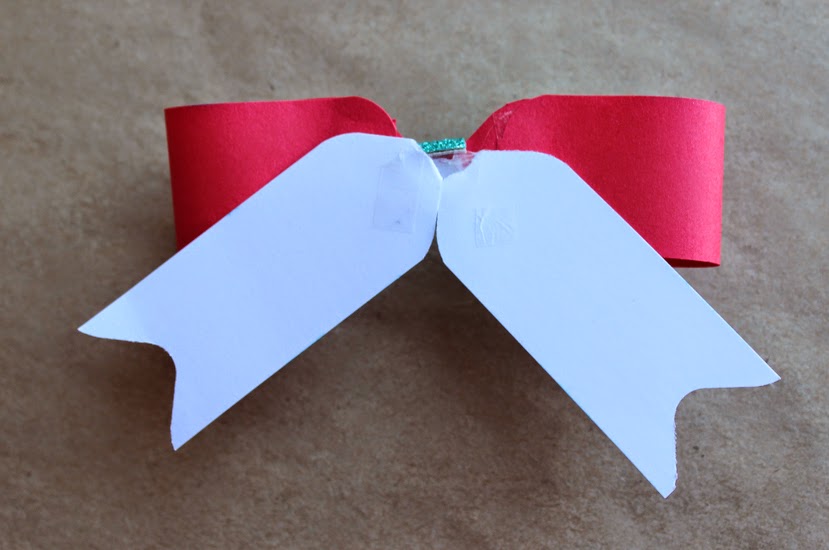
Now take your two “bow” pieces and center them on the board (remember, one is longer so it will need to be centered on the 3″ mark). Punch both sides. Now turn your punch board around and round those corners! Just insert the edges of your paper into the back punch and round the corners.

When you are all done, you will have 3 parts for your bow that should look like this:


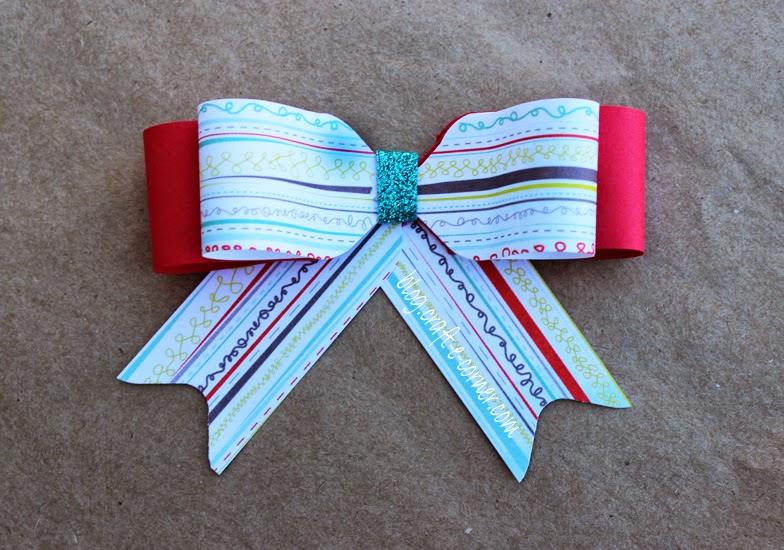
Do this with both your bow pieces and then add a little adhesive between the two pieces and layer them together.
I added a little piece of American Crafts glitter card stock to the middle of my bow. I cut a really little piece of paper that was just the width of the inside of the bow and wrapped it around the back and attached with some adhesive. I never throw away any scraps from my glitter paper! Just a little bit of it makes such an impact on craft projects that even little scraps can be used! I love this paper! You can add buttons, Sparkle Lightz, ribbon or more to the center of the bow instead too.
To finish off the bow, take your pennant ribbon back piece and fold it at an angle in the middle so the curves line up. If you need to rip the paper a little, that is okay (it will be hidden behind the bow anyway). Add some adhesive to the piece and attach it to the back of your bow.
Now your bow is complete!
Add a little adhesive to the back of your bow and attach to your card. I finished off with a bit of ribbon around the edge of the card and it was all done!
This is a really easy and fun card! I hope you enjoyed learning how to use your envelope punch board to make something other than envelopes!
Happy Easter!


Leave a comment