
Free Shipping
On Orders $49+
On Orders $49+


It’s the most wonderful time of year! Why not kick off the Christmas season with a new Christmas wooden door hanger that you made? This sign can easily be a gift idea as well!
Materials:
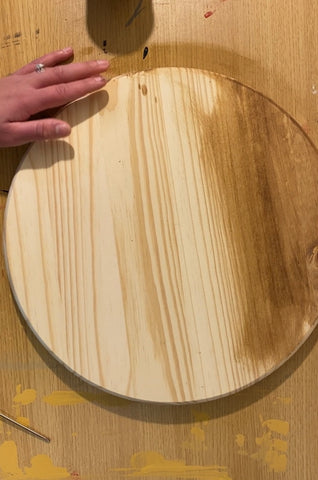
15” inch wood round
White acrylic paint
Painting tape
Polycrylic
Minwax Golden Oak Stain
Cricut Smart Vinyl Black
Cricut Scraper
Cricut Transfer Tape
Cricut Weeder
Twine
D-hooks
Drill
E-6000 Glue
Prep:
Take an old rag and dip it into the stain. Make sure you get the edges and that the stain is even. If preferred, you can do several layers of the stain to make the color darker.


Step 1:
After the stain has dried, create your design on Design Space. Select the pressure as default and the size 5”x 12”.
Once the design is weeded, get a rough estimate of where to put the tape by marking the location with a weeder tool.
Apply the tape and paint the top and bottom white. Let the sign dry.


Step 2:
Apply your transfer tape and then place your design on the sign.
Use the polycrylic to seal the sign. This may take a couple of coats. I used a fan brush that worked great to apply the seal to the sign and sides.

Step 3:
Create your bow while the sign is drying. You will need to cut three strips of burlap and two strips of the plaid ribbon.
Burlap:
20”
20”
18”
15”
Ribbon:
10”
20”
15”
Layer the three pieces of burlap with the middles touching facedown. Do this with the 20” ribbon on the top. Apply the glue to every piece and keep it bent. An option to go about this part would be to tie the middle.


Take the 10” and 15” ribbon along with the 15” burlap. The 10” piece will be the middle part. Wrap the middle with the two 15” pieces toward the front and glue.


Staple the back of the bow in place if needed.
There will be some excess material but the ends will be cut once the bow is glued.
Step 4:
Take your drill and measure out where the D-hooks will be placed. I measured 4” and 10” on the sign.


Cut 20” of twine and tie them at both ends. Apply some glue so they remain secure.

Step 5:
Place the pine picks where preferred and glue them to the sign along with the bow. Staple the bow where the staples will not be seen.


Take both ends and cut a slant towards the middle of both sides of the burlap and ribbon.


There you have it! A great DIY wood sign perfect for your door, porch, or a gift for Christmas!
Cricut Christmas Gift Card Holder with Free SVG
Debossed Christmas Card with Cricut Smart Sticker Paper
Last Minute Gift Wrapping with Cricut Joy
Leave a comment