On Orders $49+
On Orders $49+

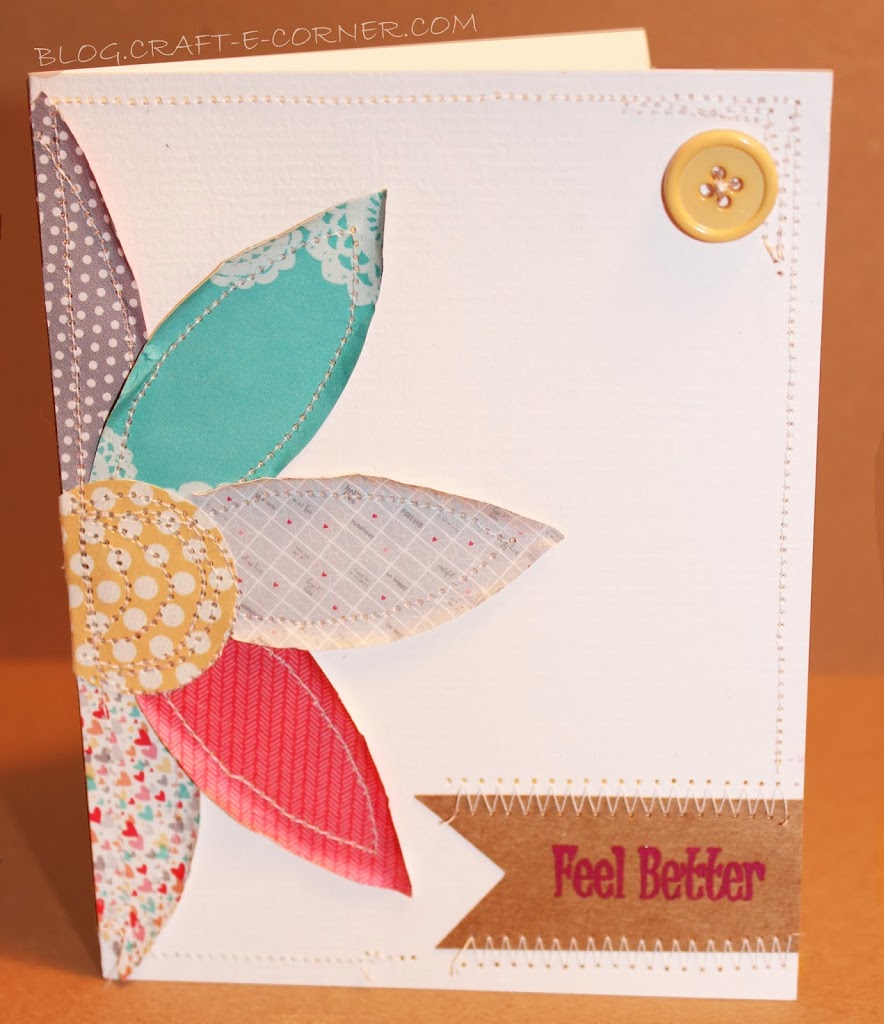
Saturday is National Quilting Day! While I know there is a difference between sewing and quilting- I thought a sewn card would be the perfect way to honor this crafting “holiday.” My Mom is a quilter, through and through… she also recently caught the bug that has been going around. I feel terrible that she is sick so I set out to make a card for her to hopefully make her feel a little better! This is what I came up with…

I love how this card turned out! No die cutting machine required! I think the stitching details and the distressed paper makes this card look almost like a fabric quilt block, my Mom is going to love it! Read below for full tutorial on how to make this card!
I started out creating a cardboard template for my petals. I just grabbed a piece of a cereal box and made a quick pointed petal shape:

Next I used a scrap book paper catalog for all my petals… I love using catalogs for craft projects, there is such a variety packed into one little book and you are recycling! (Remember this recycled necklace tutorial?!) I traced out my petals (I made the petal to fit inside the little squares in the catalog). You could certainly use a die cutting machine for this part, but I thought “the old fashioned way” was fastest here. If you’re making multiple cards, a die cutting machine would be the way to go for sure!

I trimmed the petals with a regular pair of scissors. I chose a variety of colors and patterns (based off what was in the catalog)- but you could do all one color or pattern. I made 5 petals and 1 circle for the middle:

After I decided which order I wanted my petals to go in, I pulled out my sewing machine and started stitching the petals on. You’ll want to build your flower from the bottom up- so start with the back bottom petals, then add the middle two, then the top petal and then finish with the center circle. TIP: Run a line of adhesive tape on the back of your petals to keep them in place while you sew. I used my Glue Glider Pro with the Repositionable tape cartridge so I could move the pieces around until I was happy with their position on the card.
This might sound silly- but make sure you’re sewing your petals on with your card OPEN- you don’t want to be stitching your card closed as you put on your petals (ask how I know this…)! Sew your pieces right on to the front of your card. Trim any pieces off that overhang (see below).

Once I got to the middle, I stitched the center circle on using a few passes on the sewing machine. If you have a setting on your sewing machine to keep your sewing needle down when you’re at the end of a stitch, make sure you use that setting so you can rotate your card easily!

Once I got all my pieces sewed on, I ran my finger around the edges of the petals and roughed them up a little to distress them and make them look like fabric.
Next I made a quick banner for my sentiment using the “Feel Better” stamp from my “I’m Just Saying” Megan Elizabeth stamp set. I stamped my sentiment on a scrap piece of kraft card stock and used my Bachelorette Ink Edgerz with clear embossing powder and my heat gun to make my sentiment stand out a little more.
TIP: Use a square punch to make a quick banner! Just line up your sentiment with the corner of a square punch and punch out just the end. Turn your punch upside down to make sure you’re lining everything up right.

I sewed my sentiment onto the bottom of my card using a quick zig zag stitch. Next I machine sewed around the entire card (but made sure not to sew over the sentiment). I did a little extra stitching in the upper corner (it looked too plain without it) and hand sewed on a button in the upper corner as a finishing touch!

I made a matching envelope with my We R Memory Keepers Envelope Punch Board (Click here for a full tutorial on how to make your own envelopes!). I just love the feeling of this card- it turned out so pretty!


I hope this card helps my Mom feel a little better! Who wouldn’t love getting a hand made card in the mail instead of bills and junk mail.
Happy Crafting!
Kala
Comments
Leave a comment