
Free Shipping
On Orders $49+
On Orders $49+

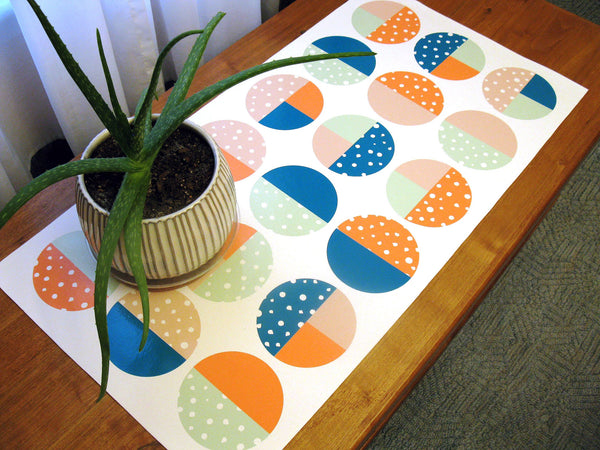
Looking to add some personality and style to your table or shelf? Look no further than this easy DIY vinyl table runner! With basic adhesive vinyl shapes and a smooth vinyl substrate, this runner is simple to create and easy to clean, making it perfect for use in areas exposed to water like under houseplants. In this tutorial, we'll show you how to create a striking runner using a Cricut vinyl bundle, plus share tips for using the Slice Tool in Cricut Design Space to create a unique design. Whether you're new to vinyl crafting or a seasoned pro, this project is sure to impress!
Shop the decorator or specialty fabric selection at your local fabric store. Look for any plain vinyl, vinyl tablecloth, or vinyl drapery lining fabric that fits your design aesthetic. You will need a smooth vinyl (or similar feel) substrate that your adhesive vinyl will stick to well. I am using a piece of white marine vinyl cut to 18x36 inches. But the beauty of DIY is you can choose any color and cut the runner to fit your table or shelf exactly! I think this project would look quite striking with colorful Cricut vinyl on a black or dark background as well.
Create your cut design in Cricut Design Space. I am using quarter and half circles that will make up a complete circle measuring 5 inches across.

To add a little more interest to my design, I have used the slice tool in Cricut Design Space to remove the Spot Background (#M3FFDAC75) from some of my half circles. To slice the background from a shape, add both to your canvas and position the background on the shape in whatever orientation you prefer. (I positioned my backgrounds rather randomly, so each resulting patterned piece was a little different from the rest.) Select both the background and the shape and click slice.

The slice action will result in a number of new layers as shown below. Delete the unwanted parts, saving the patterned half circle for your cut design.
Need more help? Read more about the Slice Tool in this tutorial from our blog.

Create as many circles as you need for the size of your table runner. Plan for one 5 inch circle for about each 6x6 inch space on the vinyl fabric substrate. My runner is approximately 18x36 inches so I am using 18 circles organized in 6 rows of 3. Organize your cut design in Design Space until you are happy with the layout and colors.

Make the project and weed the vinyl. Apply the adhesive vinyl to the table runner like giant stickers - no transfer paper needed. Press well to adhere, then enjoy!


Learn about additional Design Space features while creating other beginner-friendly vinyl projects from our design team.


Leave a comment