
Free Shipping
On Orders $49+
On Orders $49+


Can you believe fall is just around the corner? I love fall decor and wanted to make something to add to my fall decorations for this year. This is a simple project using vinyl as a stencil.
Materials Needed:
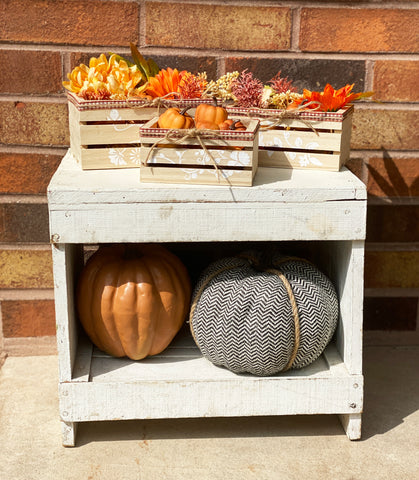
• mini wood crates
• fake pumpkins/flowers
• ribbon/twine
• glue
• mod podge
• paint
• Cricut vinyl
• Cricut transfer tape
• Cricut die cutting machine
• Cricut tools
Directions:
1. Find Designs
I found these three floral designs in Cricut Design Space:
#M23C46155
#M23C460A7
#M2734E1F9

Size your designs accordingly to the size of the crates you have.
2. Cut & Weed Vinyl
Cut your vinyl and weed it by taking the design out so that it becomes a stencil for painting.
3. Transfer
Use transfer tape and apply the vinyl to your crates.
4. Mod Podge
Apply Mod Podge over your stencil. This will help prevent the paint from bleeding. Let it dry all the way before painting.
5. Paint
Apply paint after the Mod Podge has dried. Then let the paint completely dry before removing the vinyl.
6. Embellish
I added ribbon and twine around the edges using a tacky glue. I then filled the crates with little pumpkins and some fall foliage.

You can use these as indoor or outdoor fall decor or style differently for any season!
10 Autumn Color Palettes for Fall DIY Using Cricut Vinyl
Leave a comment