
Free Shipping
On Orders $49+
On Orders $49+


Are you looking for a creative way to personalize your wedding favors this summer? Look no further than your trusty Cricut machine and a few simple supplies. With the help of Cricut pens, you can add a subtle touch of shimmer to your favors, making them extra special for your guests. In this blog post, we'll walk you through three different wedding favor ideas – a cookie bag, candy box, and sachet bag – that you can easily create using your Cricut. Whether you choose to make one or all three, your guests will be delighted by the personalized touch.
First up, we'll show you how to create a simple and elegant cookie bag using basic freezer paper and a decorative seal. Next, we'll demonstrate how to use cardstock and a bit of adhesive to make a customizable candy box. Finally, we'll guide you through creating a sweet-smelling sachet bag using a drawstring bag and your Cricut to create a personalized tag. No matter which favor you choose to make, these DIY creations will be a hit with your guests and add a personal touch to your special day.
All you need for these cookie bags is freezer paper, tape runner or iron, and a sticker or decorative seal. The coated side of the freezer paper lines the inside of the bag and keeps oil from the cookie from penetrating to the outside of the bag.
The bag uses a basic envelope pattern available in Cricut Design Space and ordinary freezer paper from the grocery store. Set the machine to draw on the paper (non-shiny) side of the freezer paper and cut out. Fold the envelope on the score lines to assemble the bag. You can opt to iron the folded tabs to the body of the bag to secure the sides (the freezer paper will stick to itself when heated with the iron) or you can secure the sides with double stick tape. Insert your cookie and seal the bag with a decorative sticker.


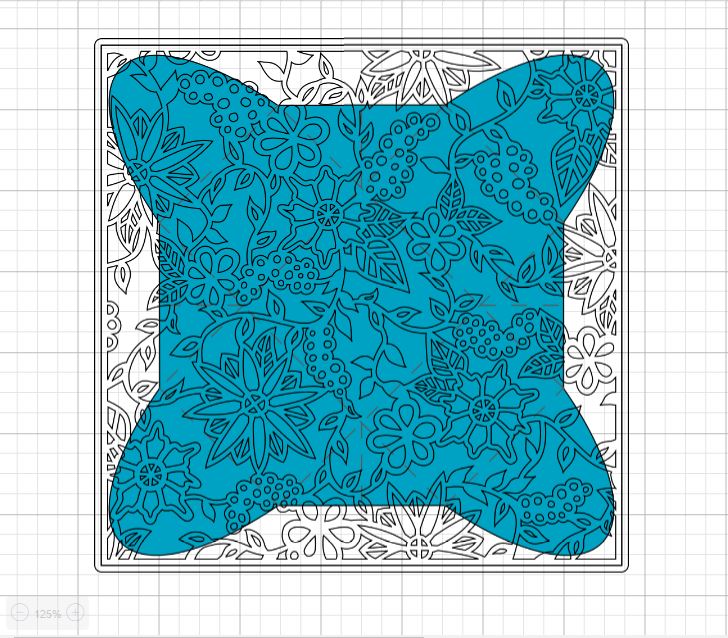
Choose from a wide variety of designs in Cricut Design Space to create any size box to hold a treat for your lucky guests. All you need is cardstock, a bit of adhesive, and any other embellishments to suit your event. You can create a design with a drawing on the sides of your box or pen an all over design, or anything in between. The machine makes quick work of scoring and cutting the box, leaving you only to fold on the score lines and complete the assembly. Insert your candy and secure the box using a glue dot or other adhesive. Add a paper flower on top or any other embellishments.


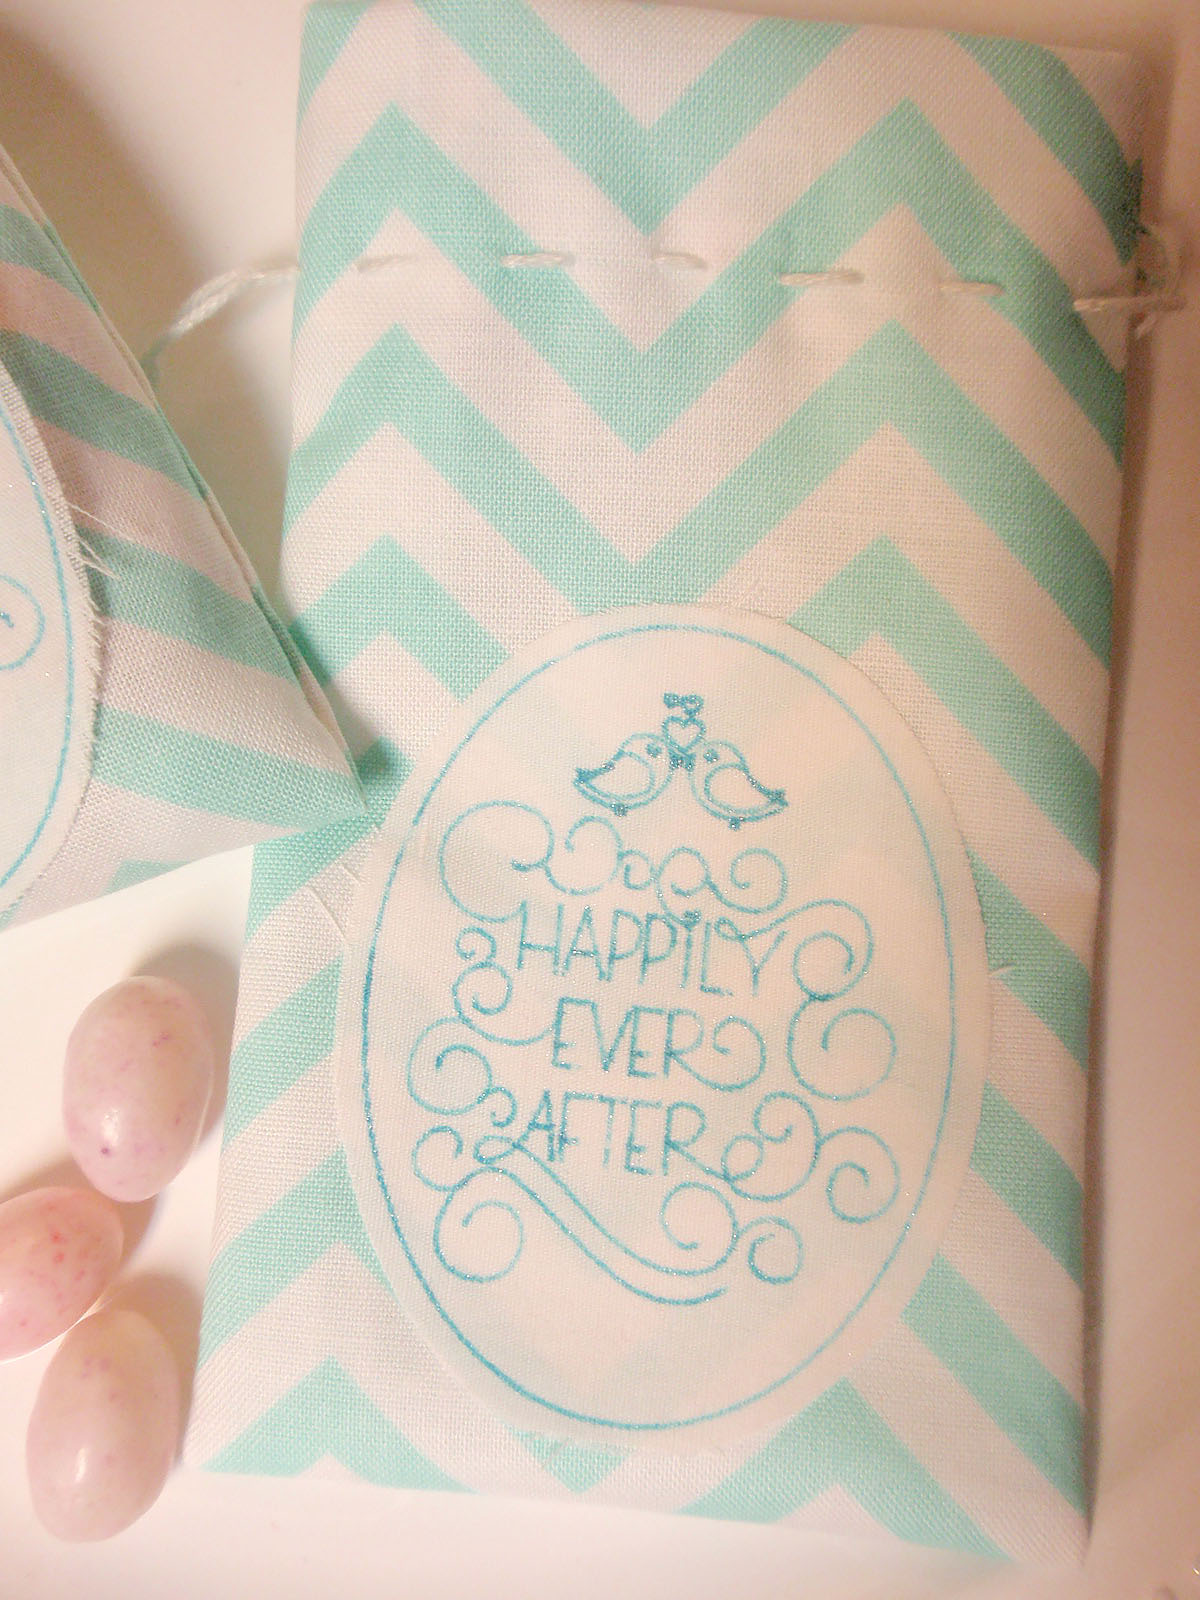
Last, but not least, the sachet bag favor requires a small drawstring bag (handmade or purchased), a plain fabric for the tag, and double-sided paper-backed fusible webbing. Iron your tag fabric to the fusible webbing following the manufacturer’s instructions. Use your Cricut to draw on the fabric and cut out the tags. Remove the paper backing from the cut tags and iron the tags onto the drawstring bags following the manufacturer’s instructions. Fill the bags with scented lavender, mints, or whatever (!) and gift to your guests to enjoy.


How to Make a Vinyl Decal with a Cricut: Cutting Board

Leave a comment