
Free Shipping
On Orders $49+
On Orders $49+

Whenever you install a new rotary blade, it is important to calibrate it before using it with your Cricut Maker. This includes the one that comes with the machine! It only takes a few steps to calibrate the blade, let me walk you through it.

Calibrating your Cricut Maker blades is important because it ensures you’re getting the best cut with your machine. Even brand new blades need to be calibrated, thankfully it’s a fairly simple process and it doesn’t take too long to do.
To begin, click on the burger menu in the upper left-hand corner in DesignSpace: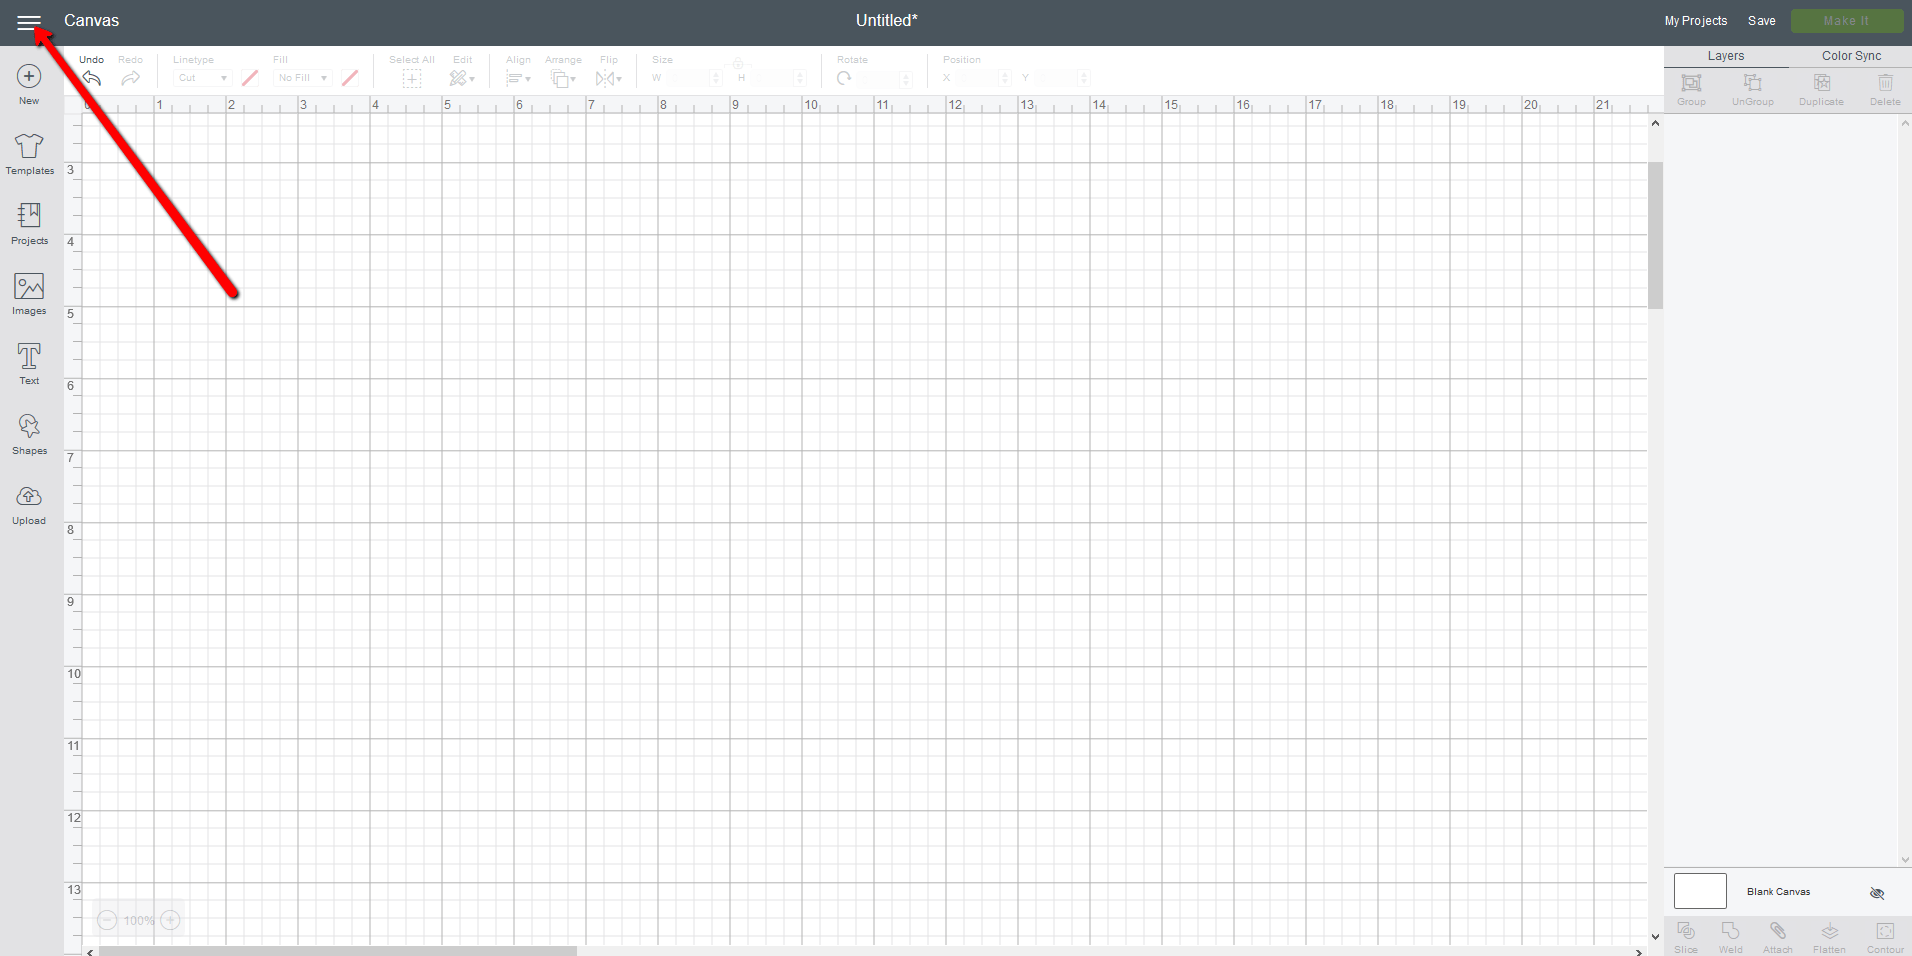
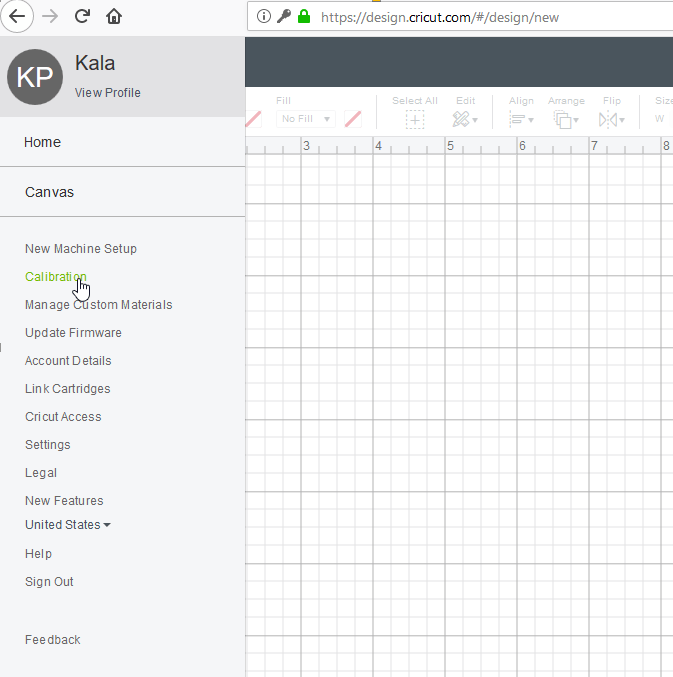
Click on Calibration from the menu:
From here, you’ll be able to pick if you want to calibrate the Rotary Blade, the Knife Blade or Print Then Cuts. In this case, click on Rotary Blade: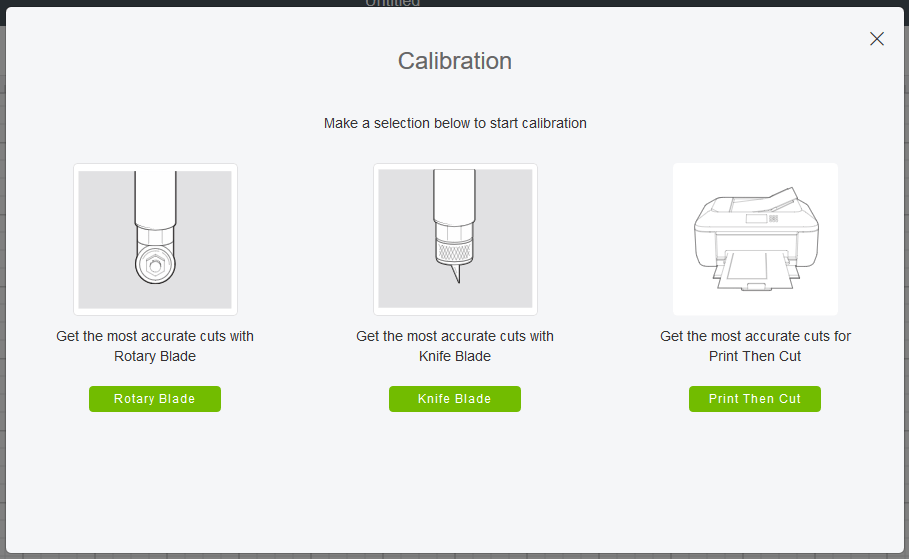
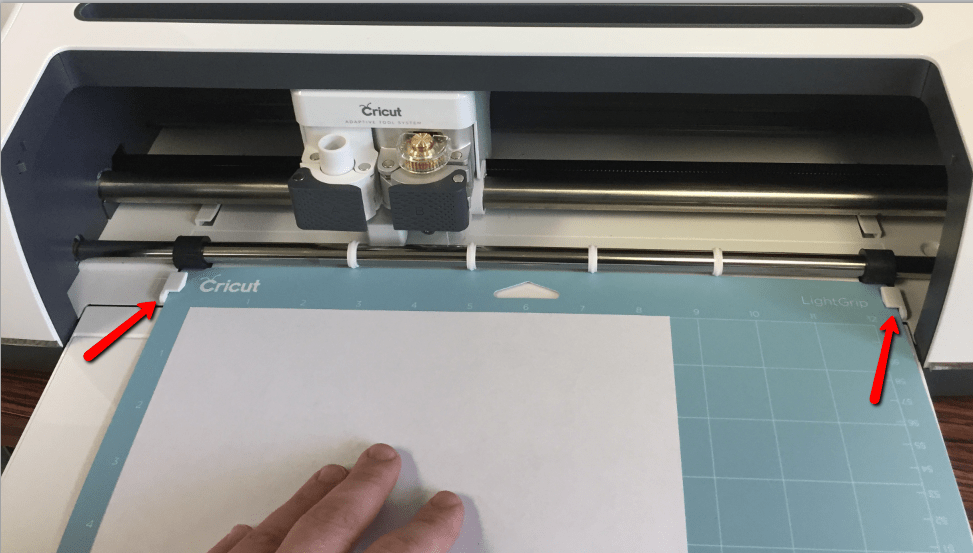
Install your rotary blade into your Cricut Maker’s Clamp B and lock it in place. Place a piece of printer paper in the upper left-hand corner of your LightGrip (blue) cutting mat as shown in the illustration.
Note: Typically you use the pink FabricGrip mat when cutting with the Rotary Blade, but you’ll want to use the LightGrip mat for calibration so you can get the piece of printer paper off the mat when you’re done doing the test. Printer paper is delicate so it may stick too much to the FabricGrip mat. Also, don’t worry, cutting paper with your rotary blade, while not recommended for normal cutting, will not harm the blade. Printer paper is so thin, it won’t damage your blade to use it during test cuts. Once you have your paper and mat ready, click Continue:


To load your cutting mat into your machine, slide the mat between the mat guides. Butt the mat against the roller bar. Hold the mat with one hand and press the Load button with the other. The Load button is a double ended arrow on the right of the machine. The machine will pull the cutting mat into the machine:
 Once you have your mat properly loaded, press the flashing Go button on the machine. Tip: The Go button has the Cricut logo on it.
 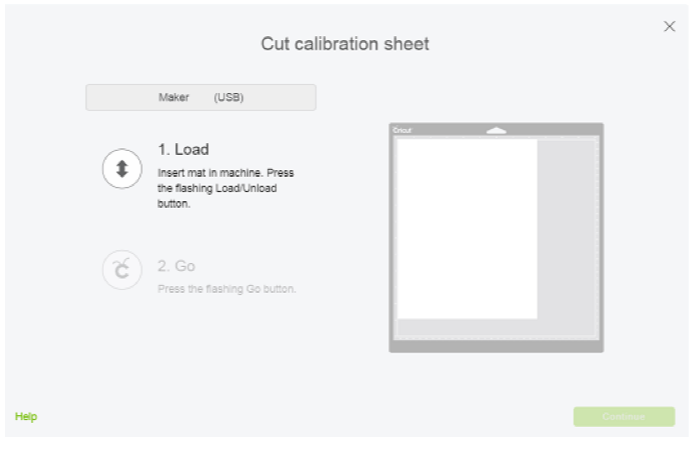 The machine will cut a series of lines with the rotary blade. When it is done cutting, unload the cutting mat by pressing the load/unload button (the double headed arrow). The machine will spit the mat out so you can take a look at the cuts. Decide which set of lines overlap the most and select the set from the drop down menu:
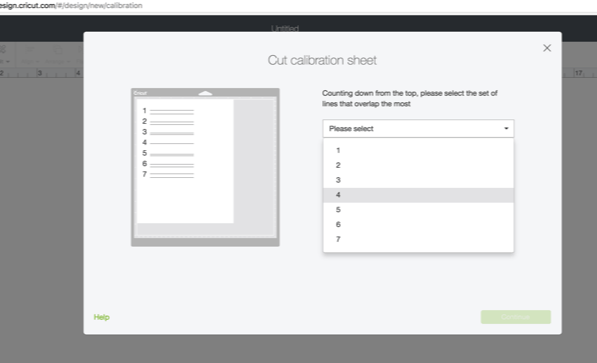
Click Continue. DesignSpace will confirm that the calibration is complete. Click Close:

Make sure to follow these steps each time you install a new rotary blade to ensure the best cuts possible! If your cuts are starting to turn out poor, try calibrating your blade before replacing, it may just save you from replacing a blade earlier than needed!
Looking for more information on the Cricut Rotary Blade? Learn All About the Blades: Cricut Rotary Blade and learn When and how to change a Cricut Rotary Blade:
How to Replace a Cricut Maker Rotary Blade
All About the Blades: Cricut Maker Rotary Blade
All About the Blades: Fine Point, Deep Point and Other Blades to Use with Your Cricut Machine

Leave a comment