On Orders $49+
On Orders $49+


Here is a project using Cricut Dry Erase Vinyl to make labels for a glass jar. This way, you can change the label any time you want to repurpose the jar. The Dry Erase Vinyl cuts and weeds just like permanent vinyl and is applied the same way, making it super easy.

I came up with this project when I found a square glass jar I really liked. I immediately knew I wanted to put a label on it and thought of giving it as a gift but did not know who the recipient would be or what they would use it for. I realized a wipe-off label would be the perfect solution and would make the jar very versatile.
Materials
Glass jar
Cricut die-cutting machine (any will work)
Standard Grip Mat
Cricut Permanent Vinyl (I used black)
Cricut Dry Erase Vinyl
Cricut Scraper
Cricut Weeder Tool
Rubbing alcohol
Paper towel or rag
Ruler (optional)
Dry erase markers
I started in Design Space to create the label. I first had to choose a specific label image. I found one I liked in 'Images' and inserted it into my Canvas.

The original label was in a square shape, but I wanted to make it more of a rectangle, so I unlocked the dimensions in Design Space and changed the height and width of the label to fit the jar. To unlock the dimensions, just click on the little lock symbol. I usually click on it again after sizing my design, so it stays that way.

The label I chose had two layers, so I selected a star from the 'Shapes' menu on the left panel in Design Space to use as a registration mark. This will allow me to perfectly align the two layers when I apply them to the jar.

I reduced the size of the star using the little arrow at the bottom right corner of the image. I needed it to be a lot smaller. Then I positioned it above the label image.

Next, I grouped the image and the star together using the 'Group' button on the top of the right panel in Design Space. Next step was to duplicate them, as I needed one image for each layer. I just right-clicked on the image and selected 'Duplicate.'

Once I had two copies of the image, I removed one layer from each one. I clicked on the eye symbol in the right panel in Design Space to hide the alternate layer for each one.


Then I changed the color of each star to match the layer beneath it since the star and the label would be cut on one color of vinyl. I made the bigger layer black and the smaller layer gray, as I was using black and white vinyl. I prefer to use gray instead of white on my Canvas for images.

This label would be for the side of the jar. I also wanted to put a label on the top of the jar lid, which was smaller. I inserted the same image into my Canvas again and reduced the size to fit on the lid. If I had thought ahead, I could have just duplicated the image again and reduced the size of one for this purpose before I created my registration marks.
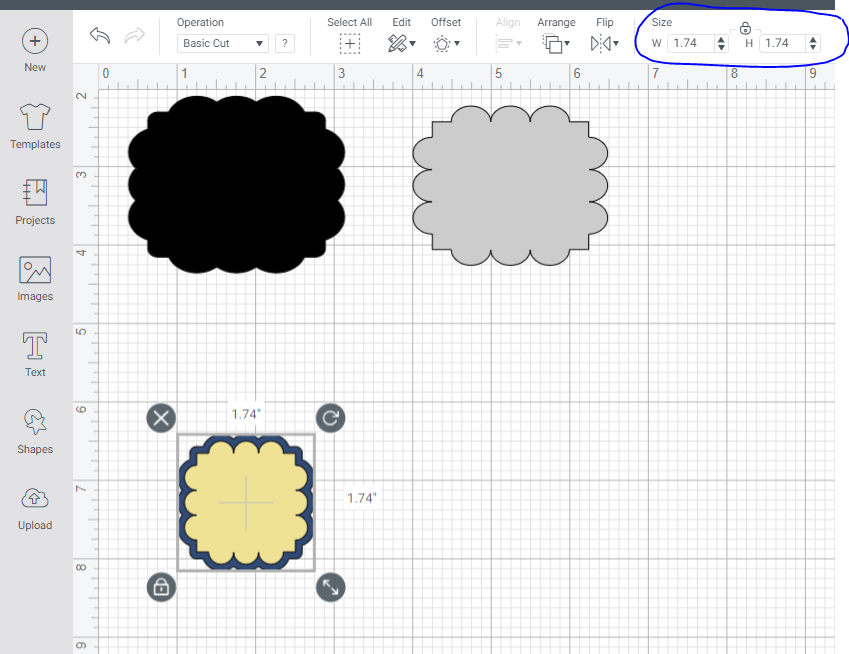
Although I used the same label image as before, I left this one square instead of making it into a rectangle, as I thought it would look better on the lid that way.
Here are both label images with the layers separated, registration marks added and colors changed, so Design Space would know to cut them all out separately. I could have made the two larger images black and both smaller ones gray. Then I would have only needed to use my mat twice instead of four times. I'm not sure why I decided to do it the way I did. I think I had the idea that I would use less vinyl that way.

When I clicked on 'Make It' in Design Space, it showed each layer on a different mat, just how I wanted them.

I loaded my vinyl on the mat for each layer and went ahead and cut out all the layers. I used regular black permanent vinyl for the bottom layer and white Dry Erase Vinyl for the top layer. Once all the layers were cut, I weeded each one. It didn't take long since this was such a simple design. Here are all the different layers and the glass jar.
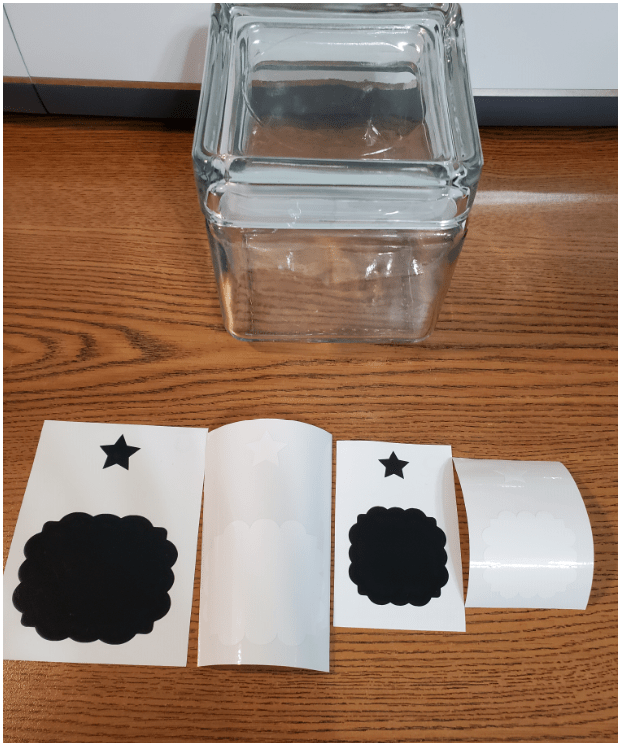
Now I just had to apply them, and I would be done. I decided to adhere the white part of the label to the black part before applying them to the jar. You can see that I used Strong Grip Transfer Tape for this project. The Dry Erase Vinyl would not stick to regular Transfer Tape.

Here is one with the two layers together with transfer tape, ready to apply to the jar.

I laid the jar on its side and placed the combined labels onto it with the transfer tape. I just eyeballed it to get it as even as I could, using the grid lines on the transfer tape as well.
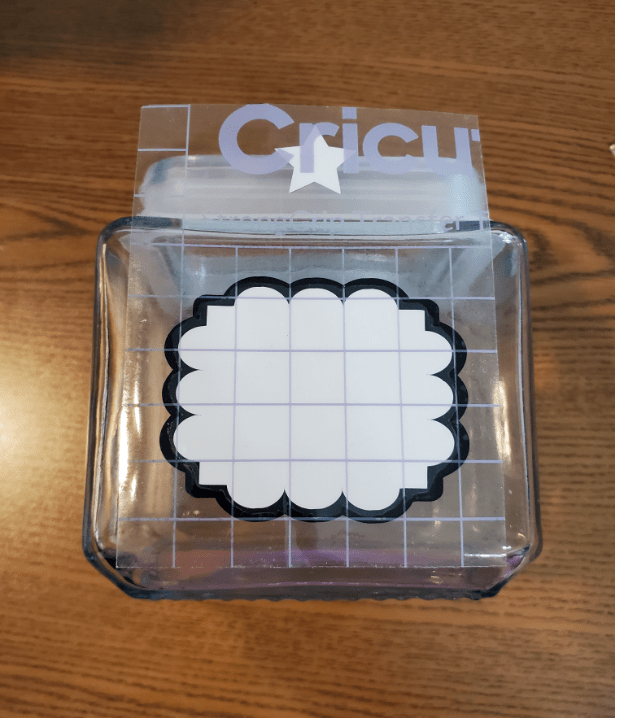
For the square label that would go on the lid of the jar, I trimmed the transfer tape close to all edges of the label for easier positioning on the jar, removing the registration mark stars, as I no longer needed them.

The lid of the jar had a circle on it, and I wanted the label centered inside it. If you look closely, you may be able to see it in the photo below. Or, at least you can see the reflection of it on the desk.

I decided to put some painters tape along each edge of the circle because it was hard to see. I was hoping that would help me center the label more easily. It worked pretty well.

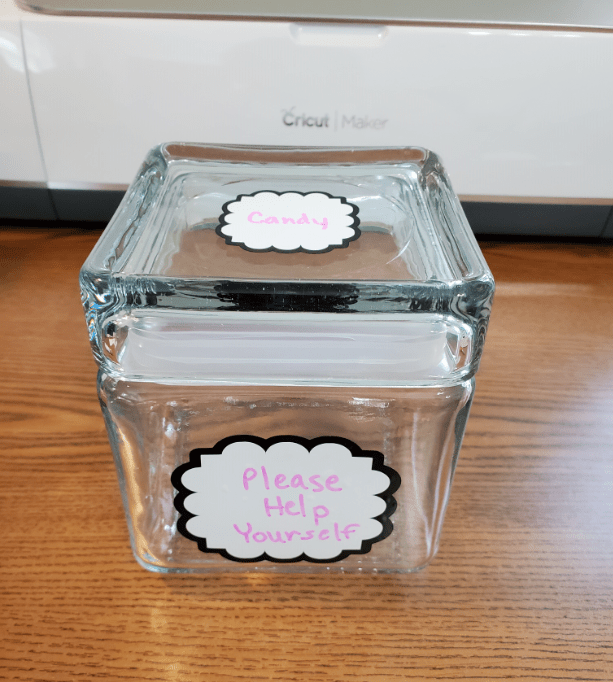
Here is the jar with the top and side labels adhered. Now I just had to try out the Dry Erase Vinyl to make sure it worked.

I wrote on the top and side label with a dry erase marker, then erased those words and wrote something else in a different color. It worked just fine, so I was pleased with that.
I used a tissue to wipe it off the first words, but a paper towel would work just as well. Here is how the label looked after wiping off the words. You cannot see any residue from the markers.
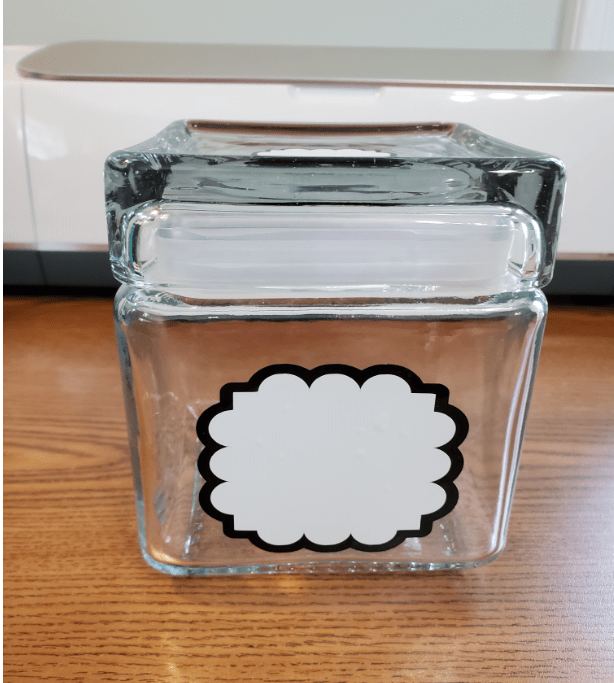
Then I wrote something else on the labels to try it out again. This was a bit sassy, but I was trying to be funny. I could see a teenager with younger siblings writing something like this.

There was one problem with this project, and I am not sure how it happened. After applying the Dry Erase Vinyl to the Permanent Vinyl, there were small bubbles under it. I did my best to remove them, but they would not come out. I circled them in the photo below, but you may not be able to see them.
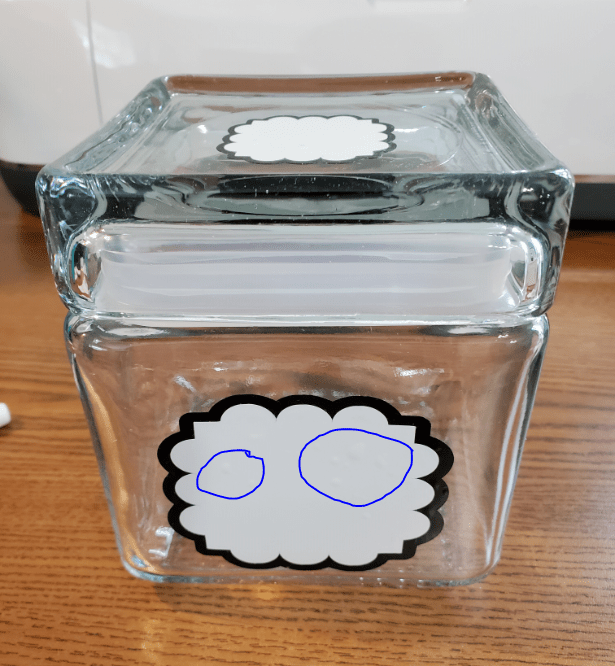
I do not feel this is nice enough to give as a gift now, so I will probably just keep the jar for myself. I really like the shape of it, and it has a rubber seal that helps the lid stay in place snugly. You have to look closely to see the bubbles in the label, so all is not lost. I just had a different purpose in mind for this jar, so I am a little disappointed.
Oh, well. There is nothing to stop me from trying this again. I think I would go very slowly when applying the top layer and try to roll it down onto the bottom layer a tiny bit at at time to prevent the bubbling. Perhaps I'm not being as careful now since I have been using my Cricut for a while. I'd better watch that.
Real life is really starting to interfere with my crafting time.
Leslie
How to Make An Infusible Ink Mug In Your Oven
Leave a comment