
Free Shipping
On Orders $49+
On Orders $49+

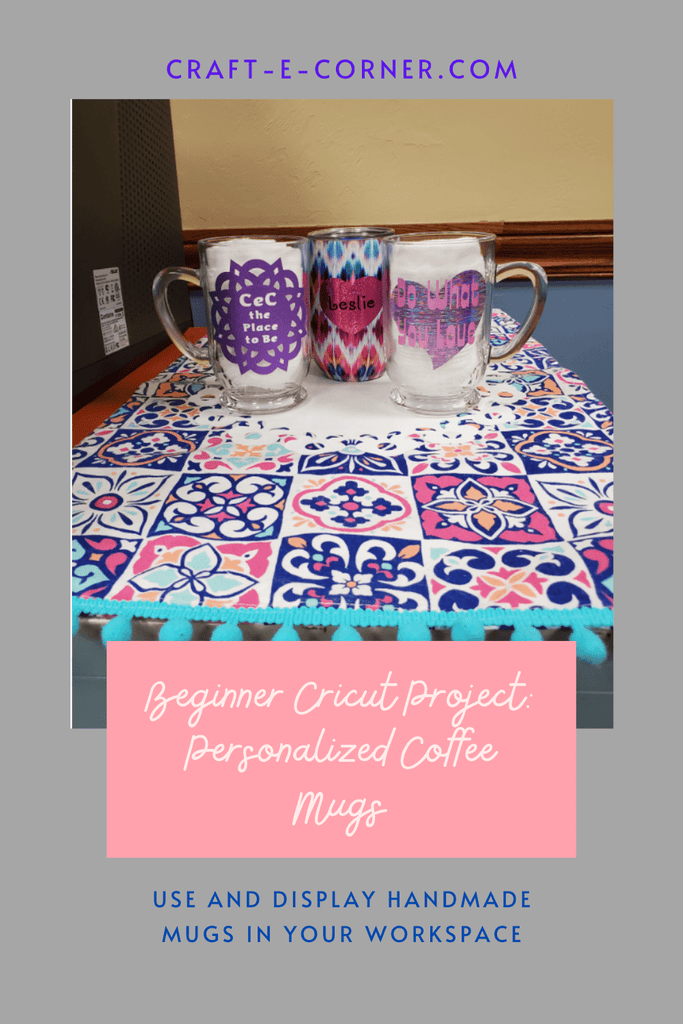
Do you drink coffee and work for a great company? If so, why not personalize a couple mugs to use at work that express your appreciation? That’s what I decided to do when I found some glass mugs I liked. I came up with a couple designs and applied them to my mugs. Not everyone drinks coffee, but mugs can be used for tea or hot chocolate or even for cold drinks. Water, maybe?
I am anxious to get the new Cricut Mug Press, but until that happens, I can still make fantastic coffee mugs using vinyl, and so can you. What I like about doing it this way is that I can use any type of mug I want in any color.
For this project, I wanted to have a different design for each mug. I also wanted the designs on both sides of each mug, and I chose to vary those a bit, too, just because I could.
First, I chose my design for the first mug and gathered my supplies:
Glass Mug
Cricut Permanent Vinyl - Holographic Threads, Huckleberry
Cricut Permanent Vinyl - Shimmer Vinyl, Pink
Cricut Permanent Vinyl - Shimmer Vinyl, Purple
Cricut Transfer Tape and Strong Grip Transfer Tape
Rubbing alcohol
Cricut Brayer
Cricut Scraper and Weeder
Cricut Maker (or Explore or Joy)

First, I decided on the words. I chose "Do What You Love" for one side of the mug and "I Love Craft-e-Corner" for the other side. I typed the text for the first side on my canvas.

Then I searched for a font I liked and chose 'ITC Zipper.'

Then I went ahead and typed the text for the second side with the same font and proceeded to size each set of text into the size I wanted for the mug. I basically held a ruler against the mug on each side to see how big I wanted my designs to be and sized them accordingly on my canvas.

I like to create all the parts of a project before cutting anything, so I moved on to adding an image. I knew I wanted to include a heart as part of the design, but I didn't want a plain heart shape, so I found one I liked in Design Space Images and inserted it into my canvas. Then I sized it to fit on the mug how I wanted it.

I duplicated the heart for the other side of the mug, so I could cut them at the same time. This one I sized a lot smaller to fit behind the "-e-" on that side.

Then I worked on getting the size of the hearts just right by placing them over the text. I had to move the heart to the back so I could see the text in front. I just right-clicked on the heart away from where the text was and selected "Send to back" to do this.

The sizes were pretty close to what I wanted, so I didn't have to do much with those. I just moved the text around to see exactly where I wanted it placed over the hearts.

Once I knew how I wanted it, I moved the hearts away from the text and changed the color of the hearts and the text to match the vinyl colors I was using. This would also signal the Cricut to cut the designs on different mats.

Here is the completed design all ready to be cut.

I started by loading the Holographic Threads vinyl on the mat to cut out the hearts. I used the Light Grip mat for this, but the Standard Grip would also have worked. I burnished it with my brayer to make sure it was adhered well to the mat for cutting. I could also have used a scraper for this.
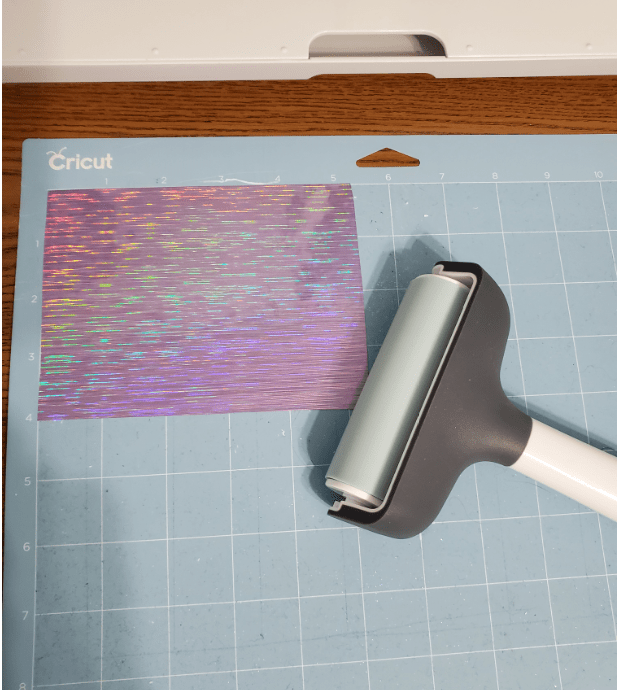
Then I chose the material I needed in Design Space and loaded the mat in the machine. I pressed Go to cut out the hearts. This is how they looked after I weeded them, which was really easy to do since they were simple designs. I actually peeled off the small heart with my fingers and moved it away from the big heart, so I could easily cut them apart to apply to my mug.

Next, I placed the pink Shimmer Vinyl on my mat for cutting and burnished it to adhere well.

I chose my material in Design Space and went ahead and cut out the text on the Cricut. Here is where I ran into a problem. Instead of cutting just the vinyl, the Maker cut right through the backing, too. I couldn't figure out what happened, at first. Here is what it looked like.

I tried using less pressure for the cut in Design Space, and I even changed the fine point blade, thinking the new one I recently installed was maybe too sharp. Then I tried cutting the purple Shimmer Vinyl, but I got the same result.


This is what it looked like. Pretty much the same as the pink shimmer vinyl. Somehow, I finally figured out that I had chosen Shimmer Paper as my material in Design Space instead of Shimmer Vinyl when preparing to cut. I had recently used Shimmer Paper for a project, so I guess I got mixed up. I felt pretty dumb at that point, not to mention that I wasted some of my vinyl.
Tip #1: Always double-check that you chose the correct material in Design Space.....and do a test cut, too.
So now I had to redo both the pink and purple Shimmer Vinyl and cut out the text again. Once that was done, I applied transfer tape to the pink words and burnished it on both sides.


Now I had another problem. I could not get the Shimmer Vinyl to stick to the transfer tape. That's when I remembered that Shimmer Vinyl requires Strong Grip Transfer Tape. In fact, the rolls of Shimmer Vinyl come packaged with Strong Grip Transfer Tape for this reason. I knew that. I had used Shimmer Vinyl before, so I shouldn't have made that mistake.
Tip #2: Make sure to select the correct type of transfer tape needed for your material.
Oh, well. Now I had to stick my designs to the Strong Grip Transfer Tape and burnish it again. It wasn't a huge problem. It just wasted a bit of time.
This project that I thought would be so easy seemed to be plagued with problems. The good news is, there was nothing wrong with my Cricut. It was all me.
Anyway, it was now time to apply my designs to my mug. Before doing that, I wiped the mug all around with some rubbing alcohol on a paper towel and dried it to make sure it was clean and there were no particles of dust or anything else on it, so the vinyl would stick well. I had already washed my mugs after buying them.
Before attaching my design, I needed to stabilize the mug for placement of the vinyl. I rolled up two thick washcloths and put one on each side to accomplish this.

I applied the heart to the mug first. I held it over the front of the mug and centered it as best I could. It was difficult to hold the transfer tape close enough to the mug to see how to place it without actually touching the mug with it. I knew once it touched, I probably wouldn't be able to remove it.
Then I carefully adhered it to the mug, starting in the center of the design and pressing it down with an outward motion.
I then burnished it with my small scraper before removing the transfer tape. You may be able to see in the upper right corner of the heart, there was a bubble that I had a hard time removing. This was my first attempt to applying vinyl to a curved surface, and it certainly wasn't perfect. Luckily, it looked okay at the end.

Now it was time to apply the text over the top of the heart. This would be even trickier than applying the heart, but I just took my time and was very careful. I held the design on the transfer tape over the mug to see where I wanted to place it. Then I carefully and slowly pressed the text down onto the mug.
![]()
Do you see the line on the transfer tape at the top of my design? I used that to help get everything aligned by trying to keep it the same distance from the lip of the cup across the top. I did not pay any attention to those lines on the transfer tape when I first started using my Cricut, but I learned later on how handy they can be.
Tip #3: Use the lines on the transfer tape to apply your designs evenly. Pay attention to how you place the transfer tape onto the design to make this work.
Then I removed the transfer tape, and it was done. Well, at least the first side was done. Here is it without the transfer tape. I thought maybe I should have used a darker color for the text to show up against the heart better, but I still liked how it looked. It was shiny and sparkly, and that made me happy.

Next, it was time to apply the second design to the other side of the mug. My process was a bit different this time. I didn't want to have to figure out where to put the small heart on the mug so that the text could be centered on the mug with the "-e-" over the center of the heart. Instead, I stuck the heart upside down onto the transfer tape with the text applied to it.

To do this, I first adhered the text to the transfer tape and laid it on the desk with the sticky side up. I also secured the transfer tape to the desk with some extra transfer tape pieces, so it wouldn't move around.
Then I peeled the heart off the of its backing with my fingers, flipped it upside down and centered it over the "-e-" the best I could, with the sticky side up again.
![]()
I then put the backing for the transfer tape back over the text and the heart, so I could burnish the heart to the text design. It worked pretty well.
![]()
I removed the transfer tape backing and was ready to apply the design to my mug. I followed the same procedure as the first side by stabilizing the mug, holding the transfer tape with the vinyl over the mug to center it and then slowly sticking it to the mug. A little burnishing, and I was done.

All in all, I was satisfied with the end result.
Now I had to do the other mug. I had chosen text to say, "CeC - the Place to Be" and "CeC - the Place for Me." I typed the text in Design Space, chose a font and colors for the font. I wanted to use patterned vinyl behind the text, but I could only find some I liked in a removable vinyl, so I used that.

I chose colored vinyl for the text in contrasting colors, but they didn't show up well on the background vinyl, so I switched to white text.

However, when it was all done, I wasn't happy with it. It just wasn't special enough. Here are the two sides completed.


I did like the frame shape with text on top, but it wasn't going to work for me. So I started over with a new plan and design. However, I did keep the text with the font I had chosen on my canvas.
My new design would incorporate a doily design for the background with the words cut out of the center. I will share later how I came up with the idea for the doily. This project kind of mushroomed while I was creating it.
The supplies for the second Mug were almost the same:
Glass Mug
Cricut Permanent Vinyl - Shimmer Vinyl, Royal
Cricut Permanent Vinyl - Shimmer Vinyl, Purple
Cricut Permanent Vinyl - White
Cricut Transfer Tape and Strong Grip Transfer Tape
Rubbing alcohol
Cricut Brayer
Cricut Scraper and Weeder
Cricut Maker (or Explore or Joy)
First, I chose a doily from Design Space Images and inserted it onto my canvas.

Then I changed the color of the doily and sized it to fit on the mug.


Then I duplicated the doily to have one for each side. I did this by right-clicking on the doily and selecting 'Duplicate.' Pretty simple, right?

Then I changed the color of the second doily to royal blue because, of course, they had to be different.
Next, I moved the text designs over the doilies and sized them to fit inside the centers.

My plan was to slice the text out of the doilies. However, since the mugs were clear glass, I wanted to have a layer behind the text so it would show up better. I decided to create a circle shape that could be applied behind the doily to cover the text. I added a circle from the Shapes menu on the left of the canvas.

Then I sized the circle to fit behind the doily. I made it slightly smaller than the center of the doily, so it would not be seen around the edges.

I moved the circle over the top of the doily to figure that out.

Once I had the circle sized properly, I duplicated it to have one for each side of the mug. I changed the circle color to black at some point during this process. I don't know why, since I was using white vinyl.

Now I was ready to slice and cut the designs. It seems like every time I try to slice text or an image out of another image, I have to look up how to do it because I can't get it to work. The usual issue is that the Slice function is hidden (not enabled). Most of the time, I have more than two layers, and you can only slice from two.
Tip #4: When using the Slice function, be sure you are only working with two layers, so the Slice function will be available.
This time, Design Space counted the text as more than one layer, which I did not expect because I had attached it all. To make it work, I had to weld each set of text together (I think it had been counting each letter as a separate layer). I made sure to move the text off of the doily design first, or it would have welded everything together, and I didn't want that.

I was then able to move the text back over the doily and slice the text out. I removed the two layers off the doily to get the final design I needed.


I repeated this process for the other doily and rearranged everything on my canvas, so the doilies were on top the text was below. I did not want to completely remove the text in case I ever wanted to use the design again.

I chose to use white vinyl for the circles to show through the doilies for the text. I now had three colors to cut out, so Design Space would cut each color separately on the mat.
I went through the same process as with the first mug to cut the vinyl, weed it, apply transfer tape and adhere it to the mugs. I attached the white circles behind the doilies by hand, just like I did with the small heart on the first mug, making sure the sticky side of the circle was up.

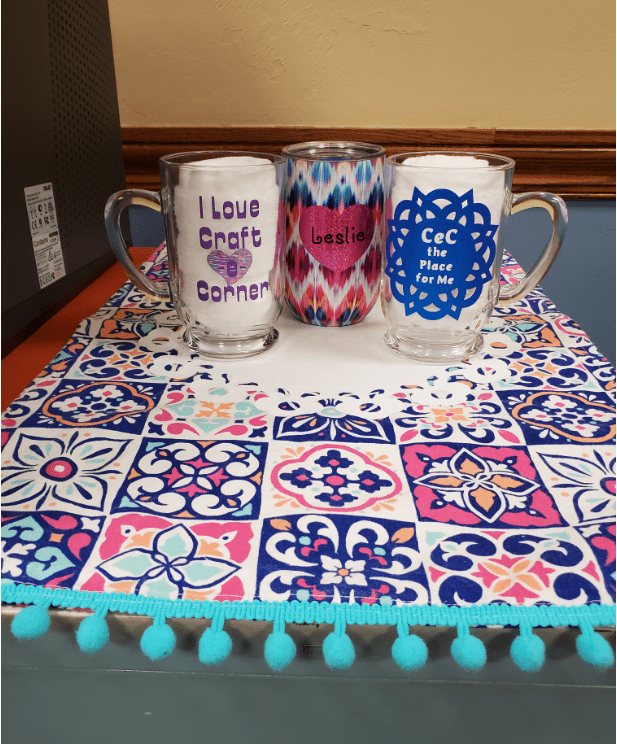
Here are both mugs together from both sides. I liked the second mug this way much better than the one with the patterned removable vinyl. I guess I really am obsessed with bling.


I bet you thought I was done with this project. Nope. No such luck. Read on, if you dare.
I planned to use these mugs at work, but I didn't go to all the trouble of decorating them to just keep them in a drawer. No, sirree. I wanted to display them for all to see (and to admire them myself). I had the perfect spot, but it needed a little help.
I had a short file cabinet next to my desk, but the top of it was not pretty. I found a colorful placemat to put over it that my mugs could sit on. I had already chosen complimentary colors of vinyl for the mugs. Here is the placemat on my file cabinet. It fit just right.

However, just the placemat by itself was not enough. The mugs needed to stand out, so I decided to add a doily design on the top of it using white iron-on vinyl. I found a doily in design space that I thought would fit the placemat design. (That is how I got the idea to use a doily image for one of my mugs). I am not going to include all my instructions for this, as this post is long enough already.
My basic process was to wash and dry the placemat and iron it, create the doily design, cut it out with my Cricut Maker, weed it, and then iron the doily onto the placemat with my Easy Press. Here is the completed placemat on my cabinet.

Another thing I added was a metal mug I had found with colors similar to the placemat. I put a simple heart on it with holographic sparkle vinyl (of course) and my name in black. Now I was ready to showcase my mugs. I put a bit of towel rolled up inside each mug for better viewing of the designs. Here they are all arranged on my file cabinet. I included a photo of each side of the mugs.

Maybe this would be too much color for some of you, but it fits me. Do any of you have a special display for yourself at work? This is my first one, and I like it. It's nice to have a little something to personalize my workspace and showcase my style.
See you next time. I'm off to buy more craft supplies!
Leslie
How to Make A Custom Coffee Mug with Cricut Joy

Leave a comment