
Free Shipping
On Orders $49+
On Orders $49+

Have you tried out the new Printable Iron-On from Cricut? It is sized for the Joy Xtra, but you can use any machine that size or bigger. I am sharing my first time using it here with my Cricut Maker 3.
My granddaughter was having a Super Kitties-themed birthday party, so I was asked to make a shirt for her to wear that day. It was the perfect time to use printable iron-on with the Print Then Cut feature in Design Space.

Materials:
Cricut Machine - Joy Xtra or larger
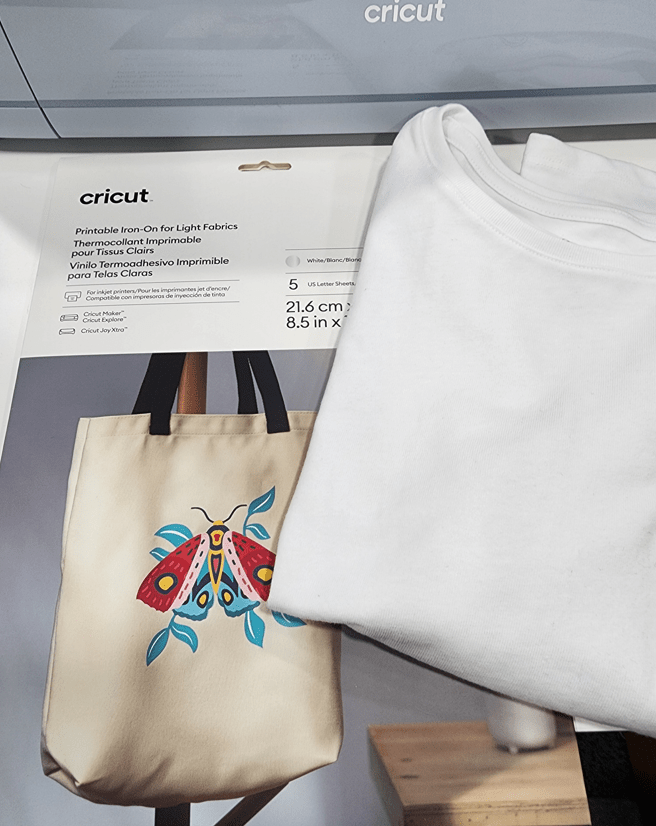
Cricut Printable Iron-On - I used the Light Fabric type
Cutting Mat
Cricut Tools
Cricut EasyPress
Cricut EasyPress Mat
Print Then Cut Design
Protective sheet
T-shirt
Check out our Cricut Printable Iron-On Vinyl for Light Fabric bundle that includes two packages of iron-on plus digital designs OR the similar Cricut Printable Iron-On Vinyl For Dark Fabric bundle for use on colored shirts.
What I Learned #1: There are two types of printable iron-on, one for dark fabrics and one for light fabrics. The dark fabric type is used on colored shirts, and the design adds a white offset around it to show up well on the blank. This type includes 3 sheets plus a sheet of pressing paper.

I selected the light fabric type since I was using a white shirt. No offset is needed for this type, as the colored design will show up well on its own. This type includes 5 sheets plus a sheet of pressing paper.
To start, I found an SVG of Ginny of Super Kitties - my granddaughter's favorite character. The SVG was purchased from a shop called Inspire Uplift. It was so cute and vibrant. I uploaded it to my Design Space canvas, selecting the Print Then Cut Image, so it would work for my project.

The design was quite large on my canvas, so I had to reduce the dimensions to fit on the shirt.

Next, I selected a font and added text to the design. Instead of Super Kitties, I typed Super Gabby. I debated whether to put it above the kitty image or below but ultimately decided on below.

I opted to curve the text and used the Curve feature in Design Space to do that. I reduced the width of the text to make it fit the design better.

Since the text was not part of the original Print Then Cut image, I would cut it out of Everyday Iron-On separately.
Once the entire design was sized, I was ready to print and then cut it. The first step was to print the design onto the iron-on with my regular printer.
What I Learned #2: You can only print on this iron-on with an inkjet printer, not a laser printer.
In Design Space, I clicked Make It and made the necessary selections. I chose the material size of 8 1/2 x 11 inches.

What I Learned #3: Even if the design is smaller than a full sheet of iron-on, you must use a full sheet to to allow the Cricut to read the registration marks for proper cutting. These marks are on each corner of the sheet.

What I Learned #4: DO NOT mirror the image for Printable Iron-On, as you remove the backing before placing it on the shirt. The design is ironed on right side up.
Next, I browsed all materials and searched for "printable" to find this iron-on. I made sure to select the Light Fabric type for my white shirt.

For the Print setup, I left "Add Bleed" on. This provides a bit of extra color around the edges to make sure there is no white between the outline and the other colors. Any extra will be gone once the design is cut out.

I placed the iron-on in my printer drawer upside down, so it would print on the correct side. That may not be the same for everyone, depending on how it is fed into the printer.

I closed the paper drawer and selected Print in Design Space. The design began printing onto the iron-on. Here is how it looked after being printed.

I was surprised to see that the printed image was lighter in color than the original design. The pink was more of a pastel. It was still cute, so I chose not to redo it. However, Cricut's website indicated it may be a printer issue.
What I Learned #5: It may help to set your printer to "high quality," "best quality," or "photo paper" to achieve the brightest and crispest images. This will cause the printer to use more ink and print more slowly. I have not tested this out yet.
Now that my design was printed, I placed the sheet onto a blue Light Grip cutting mat, as suggested, with the printed side up, and I loaded it into my Cricut Maker 3 for cutting.

The Cricut has a small light close to the cutting blade. This light came on when the machine started cutting, so it could read the registration marks.

Here is the design fully cut out. Now I was ready to weed out the extra material around the image.

I ended up peeling the design off the rest of the sheet of iron-on because it seemed easier. I had to take my time and be careful so as not to tear the design. I did not want to start over.

The iron-on was very thin but surprisingly sturdy. I lost a little bit of the whiskers during weeding because they were just too thin, but I was not concerned about that.
Now that I had the Printable Iron-On ready to apply to my shirt, I prepared to cut out the text out of Everyday Iron-On. This part I did have to mirror to make sure it would be in the correct direction when applied to the shirt.
Unfortunately, the font I selected had some very thin lines, which came off when I tried to weed it. I did not pay attention to that when choosing the font.

I selected a different font and recut it. This time the weeding went fine, and I had both parts of my design ready to apply. I laid them on the shirt to check proper placement.

I used the Cricut Heat Guide to determine the correct time and temperature for application, which was 315 degrees F for 30 seconds. I was able to heat both parts of the design at the same time since they required the same time and temperature.
What I Learned #6: Printable Iron-On uses the same temperature and time period as Everyday Iron-On for heat application with an Easy Press, at least for 100% cotton or cotton/poly blend fabrics.
I preheated my shirt for 5 seconds with the Easy Press 2 (I used a 12 x 10 size to get it all ironed on at once).
Then I placed my design elements on the shirt where I wanted them. I placed the pressing sheet included with the iron-on over the design before applying the heat.
What I Learned #7: You MUST use an Iron-On Protective Sheet over the Printable Iron-On before heating it. The heat would be too much for it without a barrier.
Here is the shirt with the design applied. The color of the design came out even lighter. It appears that the white of the shirt came through and reduced the color. Next time, I may try using the dark fabric type, even on white shirts, to avoid this.

What I Learned #8: Printable Iron-On for Light Fabric is somewhat see-through, so the color of the shirt will come through and may change the design color slightly.
I knew the birthday girl would still like the shirt and probably wouldn't know the difference. I got a picture of her wearing it before her party. She loved it, and she looks so happy in front of her kitty cake.

Care Instructions per the Cricut Heat Guide
Wait 48 hours after application before washing the shirt.
Wash the shirt inside out in cold water and hang dry.
Do not bleach.
Do you have an idea of what to make with Cricut Printable Iron-On? Go ahead and try it out. It's not hard at all.
How do pickles celebrate their birthday? They relish every moment. May you live every moment of your life like a pickle.
Leslie
How to Use Cricut Printable Iron-On with the Cricut Joy Xtra

Leave a comment