
Free Shipping
On Orders $49+
On Orders $49+


I absolutely love being able to personalized gifts. Baby showers are no different! Here are 3 different things that I did for an upcoming baby shower gift that I did with my Cricut.
Onesies
Materials:
Cricut
Cricut tools
Standard Grip Mat
Easy Press
Iron-On Vinyl
Plain Onesies

I started with creating my designs in Design Space. I measured the space I had to work with on the onesies and made sure that the designs fit inside that space.

I placed the iron-on vinyl face down on my standard grip mat. I selected the material and had my Cricut cut out the design. When it was down cutting I weeded the designs.

I used my EasyPress to transfer the vinyl onto the onesies. I follow the Cricut Heat Guide to know how long to press and at what temperature. I press the front, allow it to cool, remove the transfer sheet, and then press the back of the onesie.

Personalized Baby Bottle
Materials:
Cricut
Cricut tools
Standard Grip Mat
Premium Vinyl
Transfer Tape
Bottle

I started in Design Space with finding the text I liked for the first name. I then ungrouped the name so that I could change the color for each letter.

I then added the middle name and choose a font I liked for that. I changed that name to a different color. I placed the middle name under the first name where I wanted it.

With both the first and middle name selected I clicked on the offset button up on top. I played around with the spacing for the offset to where I liked it and clicked apply.

It will be black at first but you can change the color.

Then I had the Cricut cut out all the pieces. It was a lot of mat changes because of all the different colors.

I used my weeder tool to get ride of the access vinyl.

I used transfer tape to place all the letters onto the white offset.

Then I used the same transfer tape to move the whole layered image over to the bottle.

Baby Bibs
Materials:
Cricut
Cricut tools
Standard Grip Mat
Iron-On Vinyl
Easy Press
Bibs
SVG files:
Alarm Clock
Cape
Airplane
Bottle

I uploaded each design into Design Space. I sized them to fit on the bibs.

I placed the Iron-On vinyl on my Standard Grip mat, shiny side down.

I selected my material (Don't forget to mirror!) and had the Cricut cut it out. When it was done cutting I weeded each design.
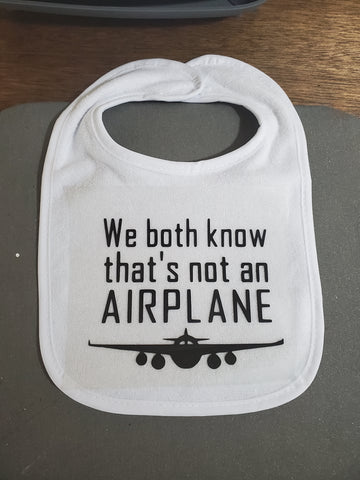
I centered the cut image onto the bib.

I used my Easy Press to transfer. Again, check with Cricut Heat Guide to know for how long and what temp.
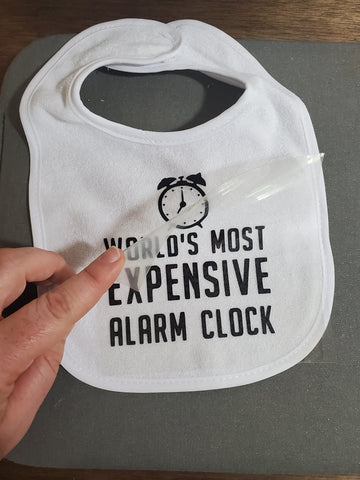
After it was cool, I peeled off the transfer sheet. And pressed again from the back of the bib.

I am so excited to be able to give these homemade personalized gifts to the new addition. What other baby items have you used your Cricut to personalize.
*Sometimes the smallest things take up the most room in your heart.
~Beth
Cricut EasyPress Mini Project: Baby Bibs

Leave a comment