
Free Shipping
On Orders $49+
On Orders $49+
Making T-shirts with my Cricut is my favorite thing! They are so fun and easy to do. It seems that most people use black or white iron-on for their t-shirts, but I like things a bit more colorful, so today I made a t-shirt with patterned iron-on, and I would absolutely do it again.

Materials:
T-shirt
Cricut
EasyPress
Cricut Patterned Iron-On
Cricut Tools
EasyPress Mat
Cricut Portable Trimmer
If you have never made a t-shirt with your Cricut, check out this post that includes instructions by video: How to Make a T-Shirt with a Cricut.
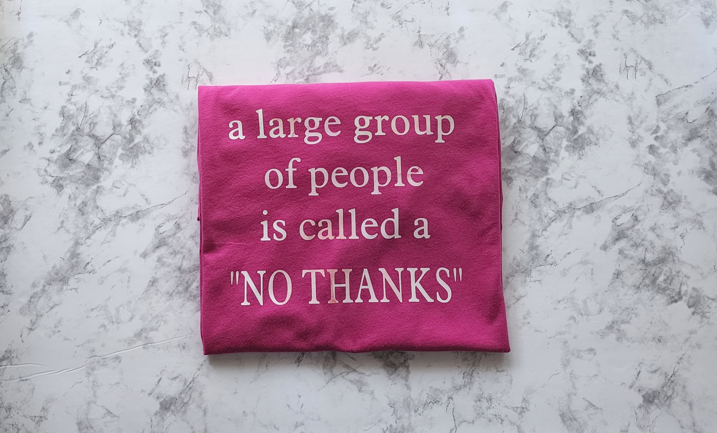
When choosing a design for a project, I often find quotes I like and recreate the design in Design Space, using either a similar font or finding one I like better. Here is my design all typed with a font chosen. This one is called Aldine 721BT.

When using patterned iron-on, I make sure it will show up well on the t-shirt (light colors on dark shirts or dark colors on light shirts). For this project, I used a fuchsia t-shirt, and the patterned iron-on was from the Cricut Iron-On Sampler Natalie Malan Sunset Blossom. Here is the sheet of iron-on I chose from the sampler. I cut it to size with my Cricut Portable Trimmer.

The Cricut patterned iron-on is a bit different because the backing is textured and seems thinner than everyday iron-on. I have also noticed it is extremely easy to weed, which makes it even more fun to work with. Here it is on the mat ready to cut.

The iron-on facing up on the mat is not the same color as the patterned side. It's more of a cream color. Usually, the color of the iron-on shows through to the back.
I cut out and weeded the design, which took almost no time at all. Here it is almost completely weeded. I still needed to weed out the insides of the letters at this point.

After I finished weeding, I placed the design on top of the shirt to make sure the color would show up well. I was satisfied with how it would look.

Now it was time to apply heat to adhere the design to my t-shirt. I used my Cricut EasyPress 2 for this. Click here for a post that explains how to use the Cricut Heat Guide with an EasyPress.
I used the Heat Guide to determine what time and temperature to use with my EasyPress 2. It said to heat the iron-on at 340 degrees F for 30 seconds on the front side and 15 seconds on the back side using firm pressure.

I preheated the shirt for 5 seconds before placing the cut design on it and then heated the front and the back of the shirt and let it cool before peeling off the carrier sheet.

That's all there is to it. Now my shirt was done. You can see that the iron-on isn't white, but it's hard to see the variations in the pattern. I was happy with it but could have used a brighter pattern of iron-on or something a bit busier. It will still be fun to wear it, though.

One of the iron-on projects I did when I first got my Cricut Maker are some adorable baby socks. I included very specific instructions in that post, if you want to take a look at it: Cricut Beginner Project - Baby Socks with Iron-On Vinyl.
I like making things that reflect my personality or the things that are important to me. That's the beauty of personalization. When giving a gift like this to someone, it shows that we know and care about their unique qualities. What would you put on a t-shirt for yourself or a loved one?
Be yourself; everyone else is already taken. (Oscar Wilde)
Leslie

Leave a comment