
Free Shipping
On Orders $49+
On Orders $49+
Have you heard of Smart Paper Sticker Cardstock before? It's a medium-weight paper that has an adhesive back to it. It's basically sticker paper! It's newer material that's available to use with the Cricut Explore 3 and the Cricut Maker 3. There are versions available to use with the Cricut Joy as well. Since it's a Smart Material, you can use it on your machine without a cutting mat. But don't worry — if you don't have a Joy, Explore 3 or Maker 3, you can put this on a cutting mat and use it with your machine too!
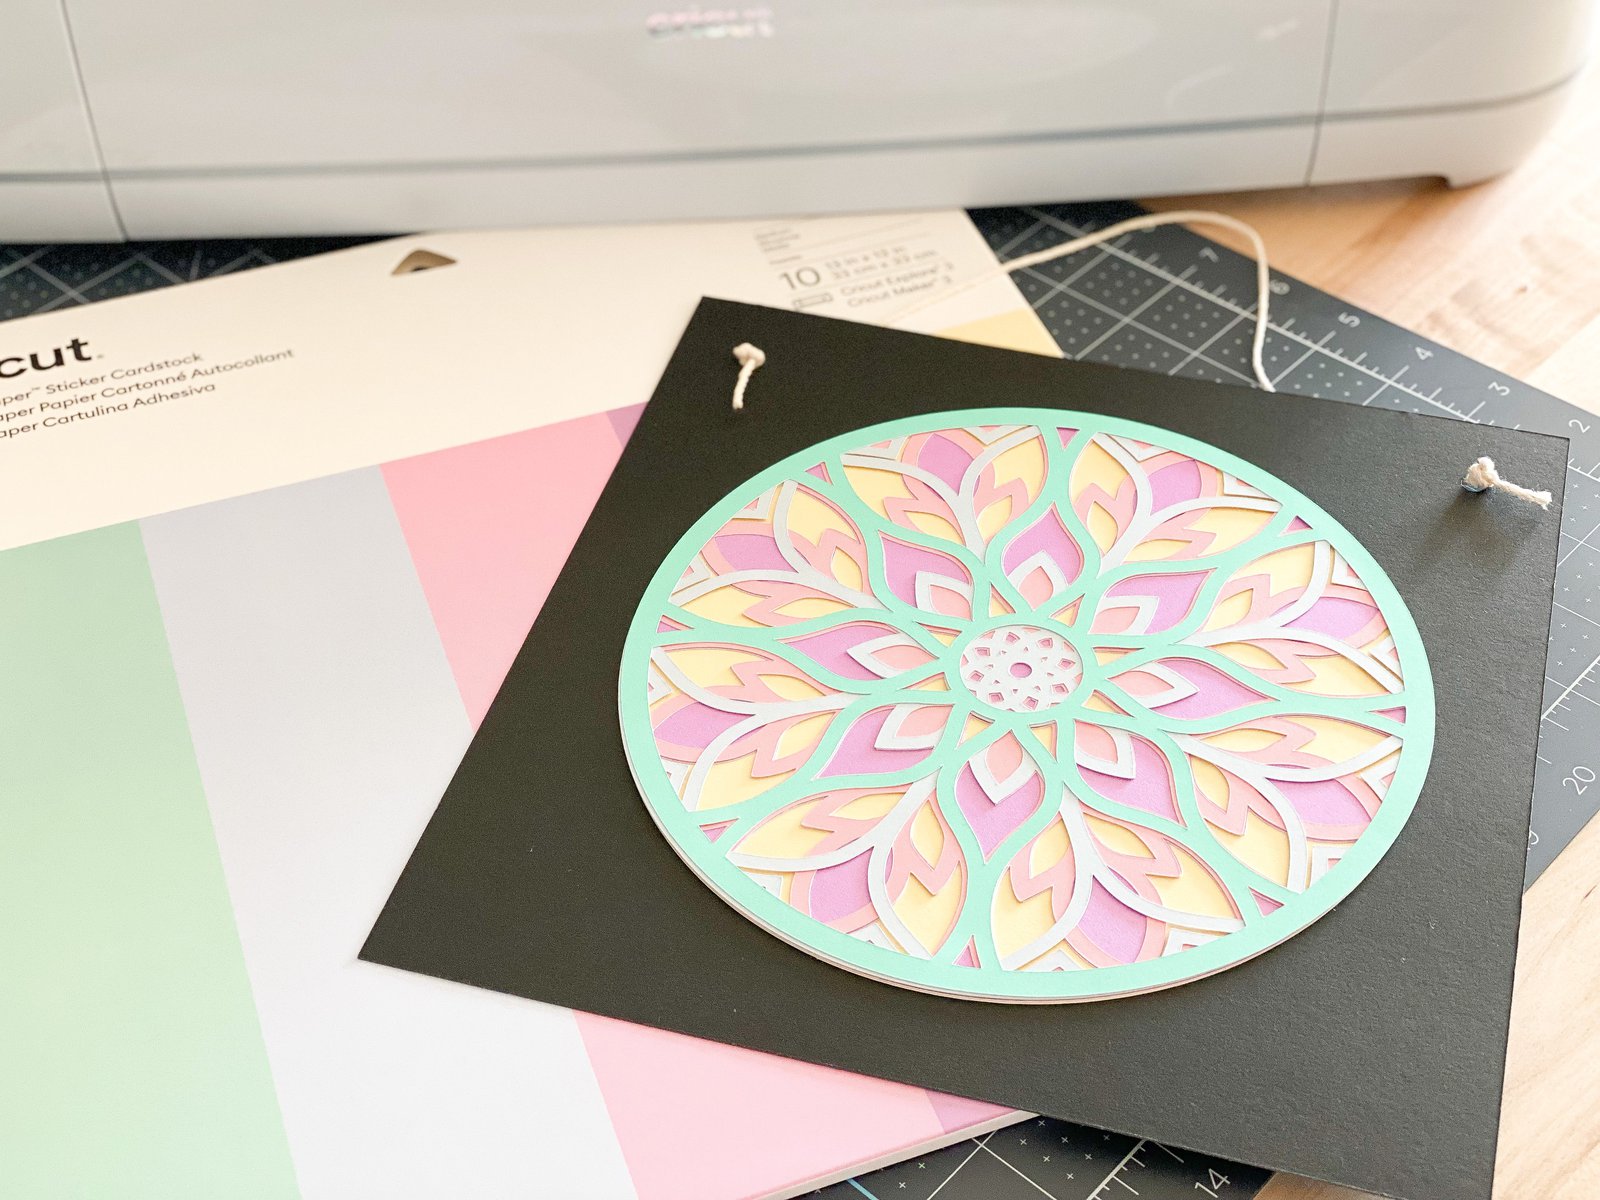
I have never used it before, so this project today is my first attempt. I'm going to be making a mandala to hang in our office. I learned a lot along the way — I'll be unpacking a lot of what I learned in the video below. I really enjoyed this material and can't wait to try it out more!
To learn how to make this project, check out the video or the written instructions below.
Materials:


I found the mandala design searching in the Cricut Image Library. The tag for the mandala is #M183B53F2 if you're interested in searching for it. I inserted it on the canvas and then adjusted the colors of the layers to the colors of the paper I am working with. Then I added a square onto my canvas, sliced two circles out for the twine to go through and then sized the square to 10x10". Lastly, I sized the mandala to fit the dimensions of the square. My mandala is about 8". Since there are a lot of intricate and small cuts on this, I wouldn't recommend going any smaller.

Let's click on "Make It" to get cutting. From here, we will be greeted by this window. We are going to select "Multiple Ways" since we are working with both Smart Materials and non Smart Materials.

If you look on the left, you'll see this column that has a preview of our mat and materials. Adjust the material load type underneath each design preview. For the Kraft board, we are going to select "On Mat". For all of the Smart Paper Sticker Cardstock, we can cut that paper without a mat.

Next, let's cut the paper. I am going to start by cutting the Kraft board since I need to put it on a cutting mat. I will be cutting it on a StandardGrip mat. Once it's finished cutting, we can load in our Smart Paper and get cutting those. To load those into your Cricut, align the material up against the guide on the left and push it underneath the roller bar. Then hit the flashing "Load/Unload" button and then hit the "Go" button.

This next step is going to be the trickiest because we are going to layer all five pieces of the Smart Paper together. I'm going to start by weeding my paper — or basically just removing the excess pieces of paper that I don't need. I found the easiest way to do this was to use a weeder tool to remove the excess paper.
Once it's weeded, to remove the paper from the paper backing, flip the material over and bend the paper backing back while you hold your sticker paper straight. This will prevent your Smart Paper from bending or cupping. Make sure to watch the video above to learn more. Then place your layers in the center of the kraft board. After you set them down, make sure to press them well so that they're fully adhered to the paper.
The last thing to do is to add twine through the holes. I simply used twine or jute but you could use any kind of ribbon too! Whatever you have on hand will work.

That's all there is to it! Check out the dimension on this project — I absolutely love how it turned out. I thought the Smart Paper Sticker Cardstock was going to be a little challenging to work with, but I actually thought it was very user-friendly and I'm very excited to try future projects with it. Happy crafting!
-Courteney
How to Make Stickers with a Cricut Explore or Maker

Leave a comment