
Free Shipping
On Orders $49+
On Orders $49+


Over the next few weeks, we are going to walk through some specific features in Design Space! I know that it can be a little overwhelming when you first get your Cricut – not only do you have to learn a new machine, but now you have to learn a new program too! Not to fear, we are here to help! So today, I’m going to show you how to use the weld feature in Cricut’s Design Space.
What does weld mean?
The weld tool allows you to join shapes together to create one single shape by removing any overlapping cut lines. Maybe you have two separate images and you want them to just be one — then you’d weld! Or maybe you have some script text and you want all of the letters to be connected together – that’s when you would use weld.
I’m going to split up how to weld into two parts – text and image!
Welding Text
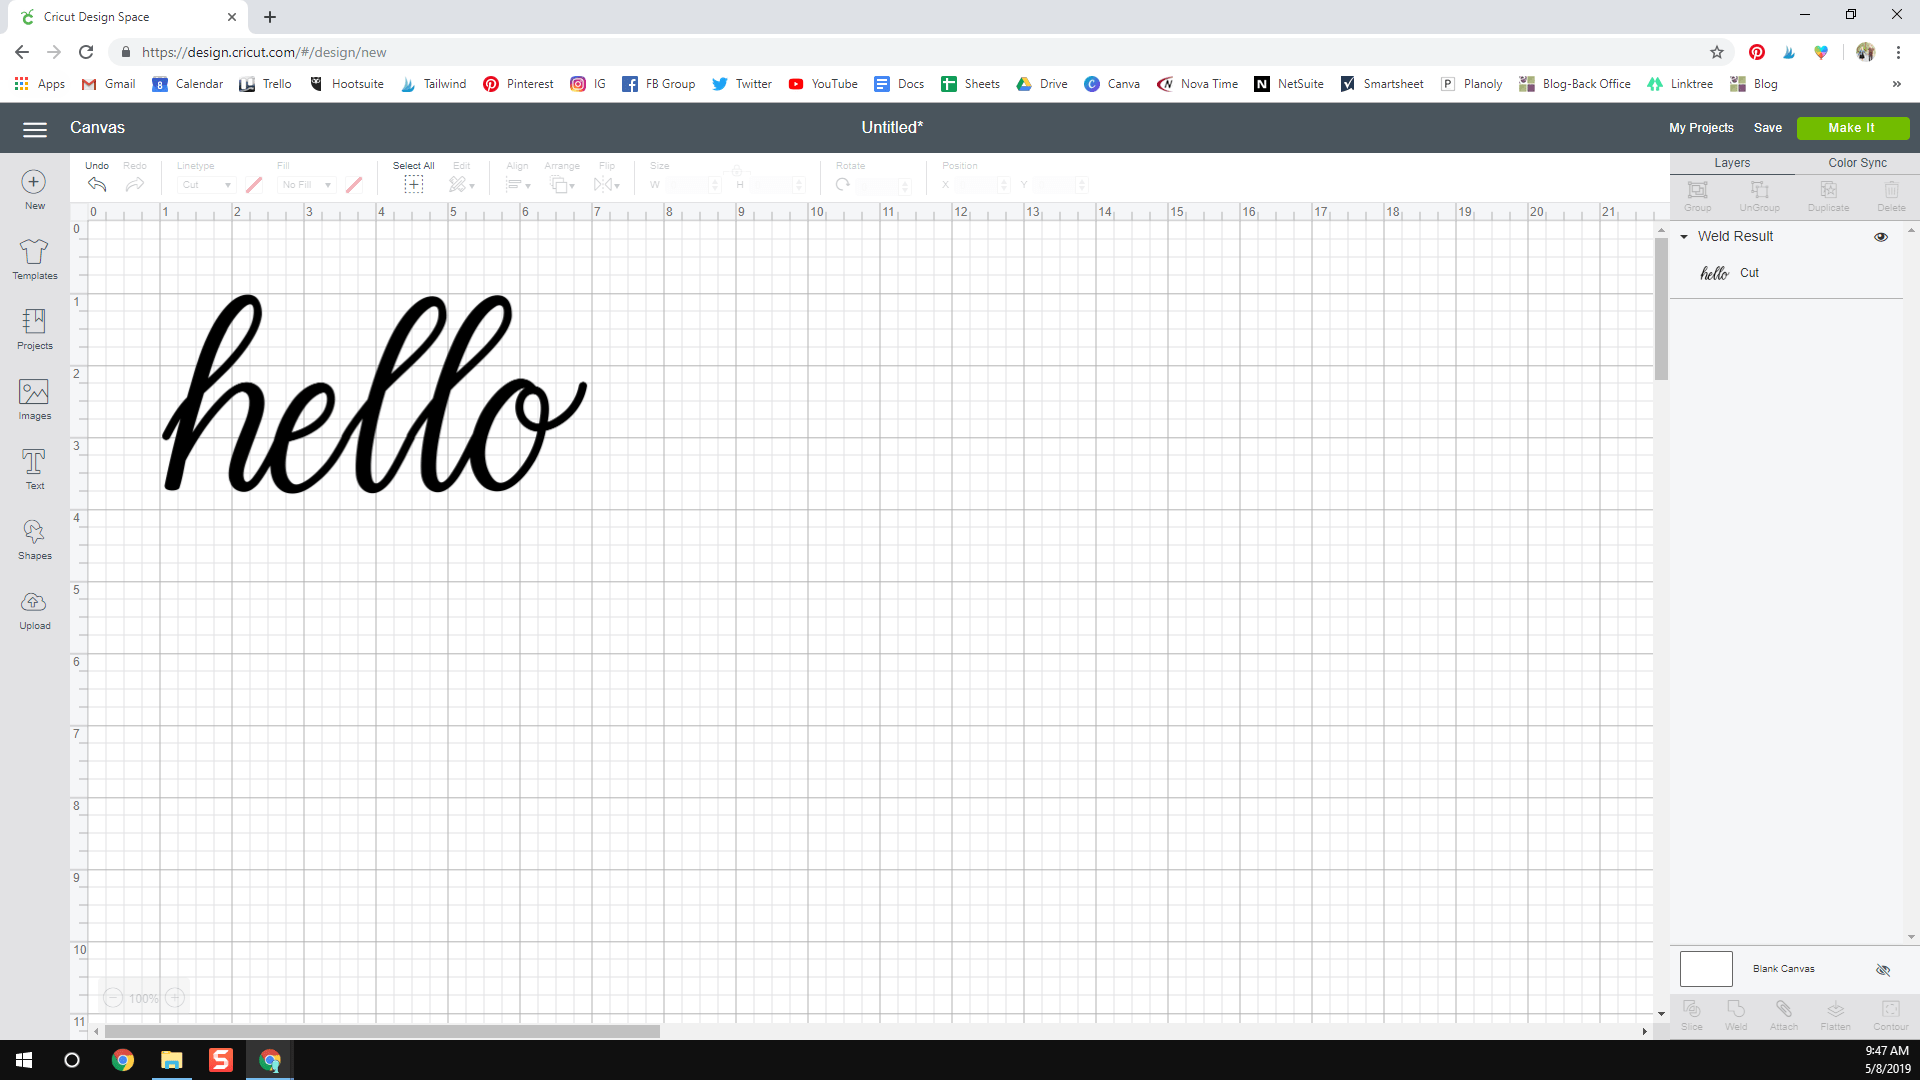
When you’re writing text in Design Space, sometimes the writing might not appear like you want it too – or maybe you just want to customize where your letters are. I have noticed that when I type with a script/cursive font, the letters all separate, unlike when you might be typing in Microsoft Word or Adobe Illustrator and they automatically appear together. I typed “Hello” into Design Space and chose a cursive font. This is what it turned out like:

Like I previously mentioned, all of the letters are separated. I don’t want them to appear like that in my project, so I need to weld them together so that it’s one fluid word and everything is connected. There are two ways to approach this. First, we need to click on our text so that it’s highlighted. You’ll know you have it selected when there is a light blue rectangle around your text. Then look at the top of the screen and find where it says “Letter Space”. We are going to decrease the spacing so that the letters get closer together. You can also use this feature if you want to increase space between letters. I just kept clicking down until the letters got to where I wanted them to be.

This tool is a great place to start to get your letters closer together, but I’ve found it usually doesn’t make it perfect for me. As you can see below, this is as far as I was able to get my letters together before some letters start overlapping other ones. As you can see, the spacing is weird, so now we need to manually adjust the spacing.

To do this, we are going to need to ungroup our text. Select your text again so that the blue box appears around it again. Once you have it selected, click on “Ungroup” in the top right hand corner underneath “Layers”.

Once you have ungrouped it, all of the letters will be separated and on their own. We will be able to move them one by one. Now we are going to manually move our letters so that they are slightly overlapping. To be able to be welded together, they need to be touching slightly. You can move your letters over by tapping the left and right key on your keyboard. You can also just click and drag and move your letters over – just make sure that you are being careful so that everything is still lined up correctly. Get your letters lined up how you want them to appear. This is how mine looks:
 As you can tell from the layer screen on the right-hand side, all of my letters are still individually separated. If we go to cut this project, all of the letters will cut on their own and won’t be connected. It would appear like this on the preview mat:

Clearly, that’s not what we are going for! So to prevent this, we need to highlight all of our letters and re-group them. Just like we ungrouped the letters, we are going to use the same principle to re-group them. Highlight all of your letters by clicking on them one-by-one or clicking and dragging so that they are all covered in the blue triangle. Then hit “Group” in the layer screen on the top-right side of the screen. (*TIP: you can actually skip the “group” step and just go straight to weld. I always like grouping first just because once you hit weld and make your project, you can’t go back and un-weld. You can hit undo in the top left-hand side of the screen to undo the weld BEFORE you make your project – but once you weld and make your project, you can’t go back. So just know you’re 100% committed to welding the text together before you weld! The group step helps me to see what it looks like on a project and then when I’m ready, I hit weld.)

We’re almost there! Once they are grouped together, click on weld in the bottom right-hand side of the screen.Then once you’re finished, it will look like this:

 That’s it – now you’ve successfully welded text together!
Welding Images
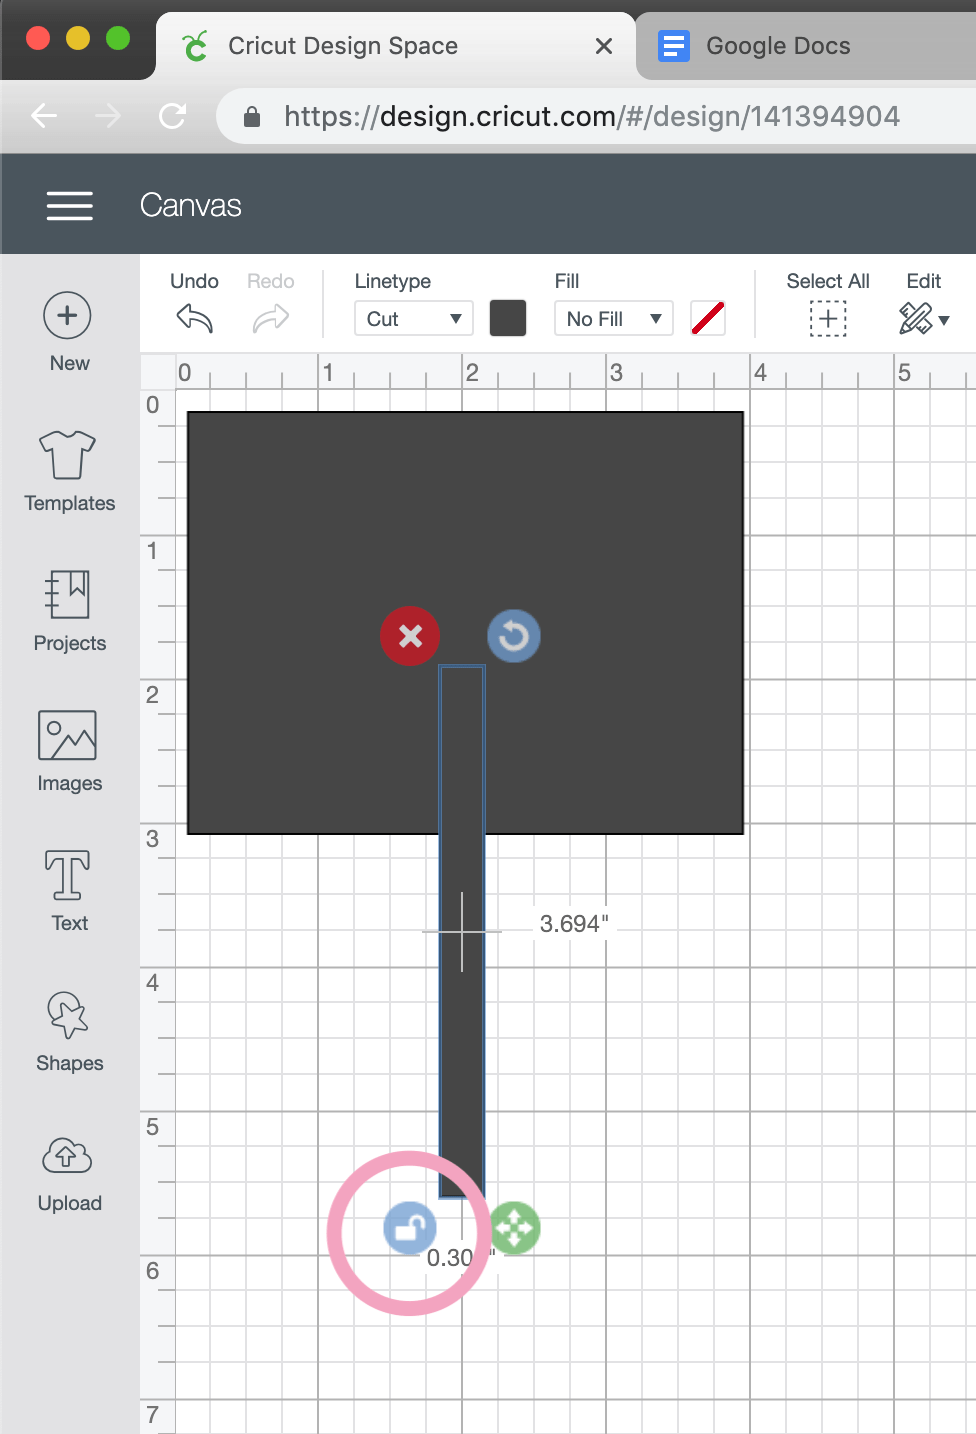
Welding images is super similar to welding text. I’m going to make a cake topper in Design Space to show you how to weld images together. To start, I’m going to insert two squares into Design Space – I’ve colored them pink and purple just to help me see the differences between them when I am going to overlap them.
Then I’m going to reshape them so that I can turn this into a cake topper. As you can see from the image above, when you click on an image you can use the arrow in the bottom right hand corner to reshape. If you unlock it (bottom left-hand corner), then you can transform it however you want. I am going to unlock one of them to make a skinny rectangle and another one a rectangle for the top.
Next, place your two images on top of each other (see below). You have to have your images overlapping in order for the weld to work. 
Once you have them overlapped, you will need to group them together. To do this, you can either click on them individually while holding control down on your keyboard or you can click and drag your mouse until a blue square appears and then drag it over all the items you want welded together.
Once they are grouped together, it’s time to weld! In the bottom right-hand corner of the screen, click “Weld”. TIP! Once you hit weld and then make your project, you cannot unweld! There is not a button to unweld your images. If you need to un-weld them (before you make your project), you can click the “undo” button at the top left-hand side of the screen. However, like I just mentioned – once you make your project and then come back to your canvas, you will not be able to click undo or un-weld anymore. If you aren’t sure if you’re committed to weld just yet, I would suggest just simply grouping them together.
Here is what my cake topper looks like now after it’s been welded. As you can see, there’s no longer two images – but rather one. That’s all there is to welding! There you have it! Now you know how to successfully weld together text and images in Cricut’s Design Space. Now that you’ve read through a tutorial, it’s not as scary as it seems, is it? Let us know if you have any questions – we love to help! You can also join our Facebook group for more Cricut tips, tricks and projects.
-Courteney

How to Use Contour Feature in Cricut Design Space

Comments
Leave a comment