
Free Shipping
On Orders $49+
On Orders $49+
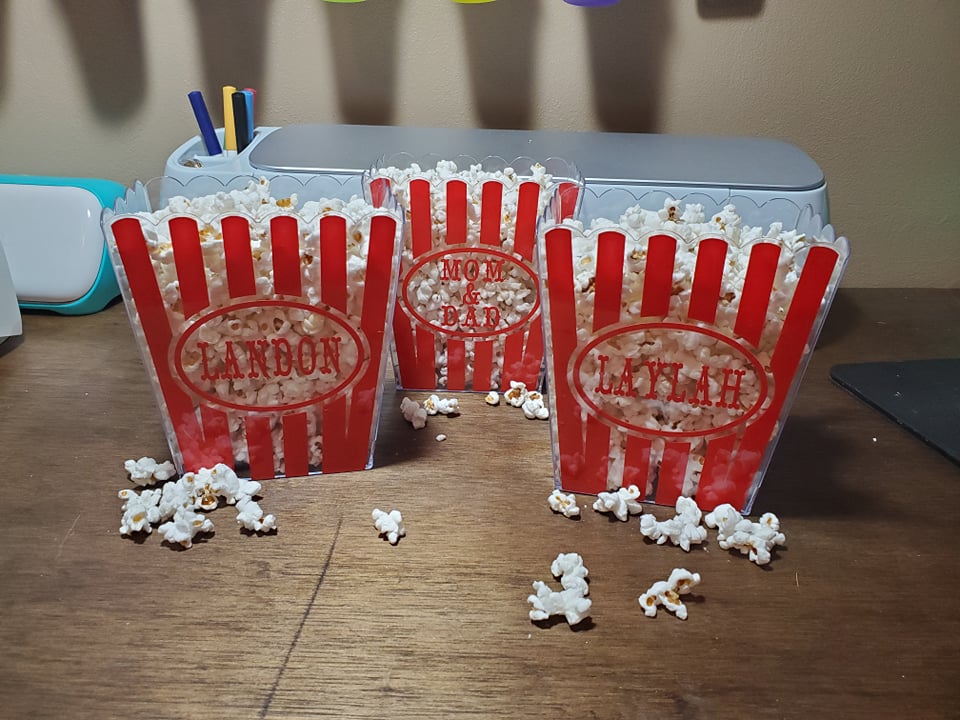


I had these cute little scalloped top buckets sitting around. They were one of those “I know I can do something with that” buys. Do you ever have that? I buy things all the time because they are cute but I have no idea what I am going to do with them at the time. When I decided I wanted some personalized buckets for popcorn for our fun family movie nights I thought these would be perfect!
Materials:
Cricut
Cricut Tools
Standard Grip Mat
Premium Vinyl
Transfer Tape
Buckets

I started in Design Space. I wanted to create a template for my bucket as closely as possible so that I knew I was making the design to fit the bucket. I started with a triangle and flipped it upside down. I measured the top and bottom of my bucket. I made the width of my triangle the same width as the top of the bucket. I then took a square that had the same width as my bucket and placed it over the triangle. I placed it the same length down on my triangle as my bucket was tall. I then sliced the two images.


This left me with a trapezoid shape the same size as my bucket. I still wanted to add the scalloped top so I knew where the lines were going to go. I created a line of 6 circles and aligned them so that they were centered horizontally and distributed evenly. I played around with the size of the circles so that they were exactly spaced next to each other across the top of my template.

After this was done, I welded the image all together. This made it easy then to create my design. I used a rectangle to make the lines. And I found the oval in images. I used the offset feature to cut a shadow out of the lines to fit the oval. Lastly, I added the text. When I was done I welded the design together.

Then I cut the design out of Permanent Vinyl with my Cricut. If you are using the new Maker 3 or Explore 3 you can used Smart Vinyl for this as well and then you wouldn’t need the mat.

When it was done cutting, I weeded each design.

Using Transfer Tape, I placed the design onto the bucket. I place the transfer tape and burnish with a scraper both the front and the back and then remove the backing of the Vinyl.

Again I use the scraper tool to burnish the design to the bucket. And then I peel the transfer tape off.


And then we were ready for our next movie night with our personalized popcorn buckets.

*Imagine what's possible once you stop doubting yourself.
~Beth
Cricut DIY: Vinyl Kitchen Labels - Layering Vinyl
Leave a comment