
Free Shipping
On Orders $49+
On Orders $49+

There are plenty of wonderful stencils, stamps, and masks on the market. They present terrific opportunities for making repetitive patterns to enhance your art and adding focal point imagery without needing to draw. And, if for some reason you can’t find something that is just right for your project, you can make your own. Using your original stencils, stamps and masks for creating prints and patterns makes artwork uniquely your own. Plus, it’s easy and fun!

Most of us are familiar with stencils. Stencils are typically created by cutting an image from a thin plastic sheet. Stencils create a positive shape. Paint is applied inside the stencil to reveal the painted image.

Masks are the opposite of stencils. A mask results in a negative shape. You lay the mask on your paper or canvas and paint around it. The image is revealed in the absence of paint.

Stamps also create a positive shape. Paint or ink is applied to raised areas on the stamp and pressed to a surface to reveal the image.

All 3 tools are used widely with acrylic paint or ink. In addition, they work with acrylic mediums like modeling paste or spackling compound. They can be incorporated into watercolor painting using masking and resist techniques. You can trace stencils as part of a colored pencil, marker, or pastel project. Simple rubber or linoleum stamps can even be used to emboss clay or thin metal.


Stencils, stamps and masks are exceptional for adding visual or actual texture to your artwork, depending on the paint or other material used. They can create repetitive patterns that serve to unify a piece of art. You can use all 3 to manufacture your own unique paper collage materials or add focal imagery to your work.
Stencil Tips
The trick to creating a crisp stencil image is not to use too much or too watery paint. You can use a stencil brush, sponge applicator, or ordinary triangular make-up sponge to apply the paint. First squeeze some paint onto your palette paper. Dab your sponge into the paint and then pounce the sponge on the palette paper several times, removing most of the paint. Hold the stencil securely against your surface and pounce the loaded sponge in the stencil.


Whether – or how well – to clean stencils is a matter of personal preference. Many artists do not clean their stencils at all. I like to wipe most of the paint from my stencils using a baby wipe or damp paper towel. Sturdy stencils, without small or delicate pieces, can go into the sink and be cleaned with a sponge.
Inexpensive plastic sheet protectors from the office supply store work well to store your smaller stencils. Larger 12 x 12 in. scrapbooking sleeves will accommodate the largest stencils and keep delicate stencils from becoming tangled together in your storage box.
Cut your own stencils from plastic stencil film. Print or draw your design on a sheet of paper. Tape the stencil film to the paper design. Place the film on a cutting mat or scrap of mat board to protect your table. Cut out the design using a sharp craft knife, turning the film as needed.

Masks Tips
A temporary mask can be nothing more than a silhouette cut from a magazine or coloring page. Cover the silhouette with packing tape or contact paper or cut the mask from stencil film for a more durable product.
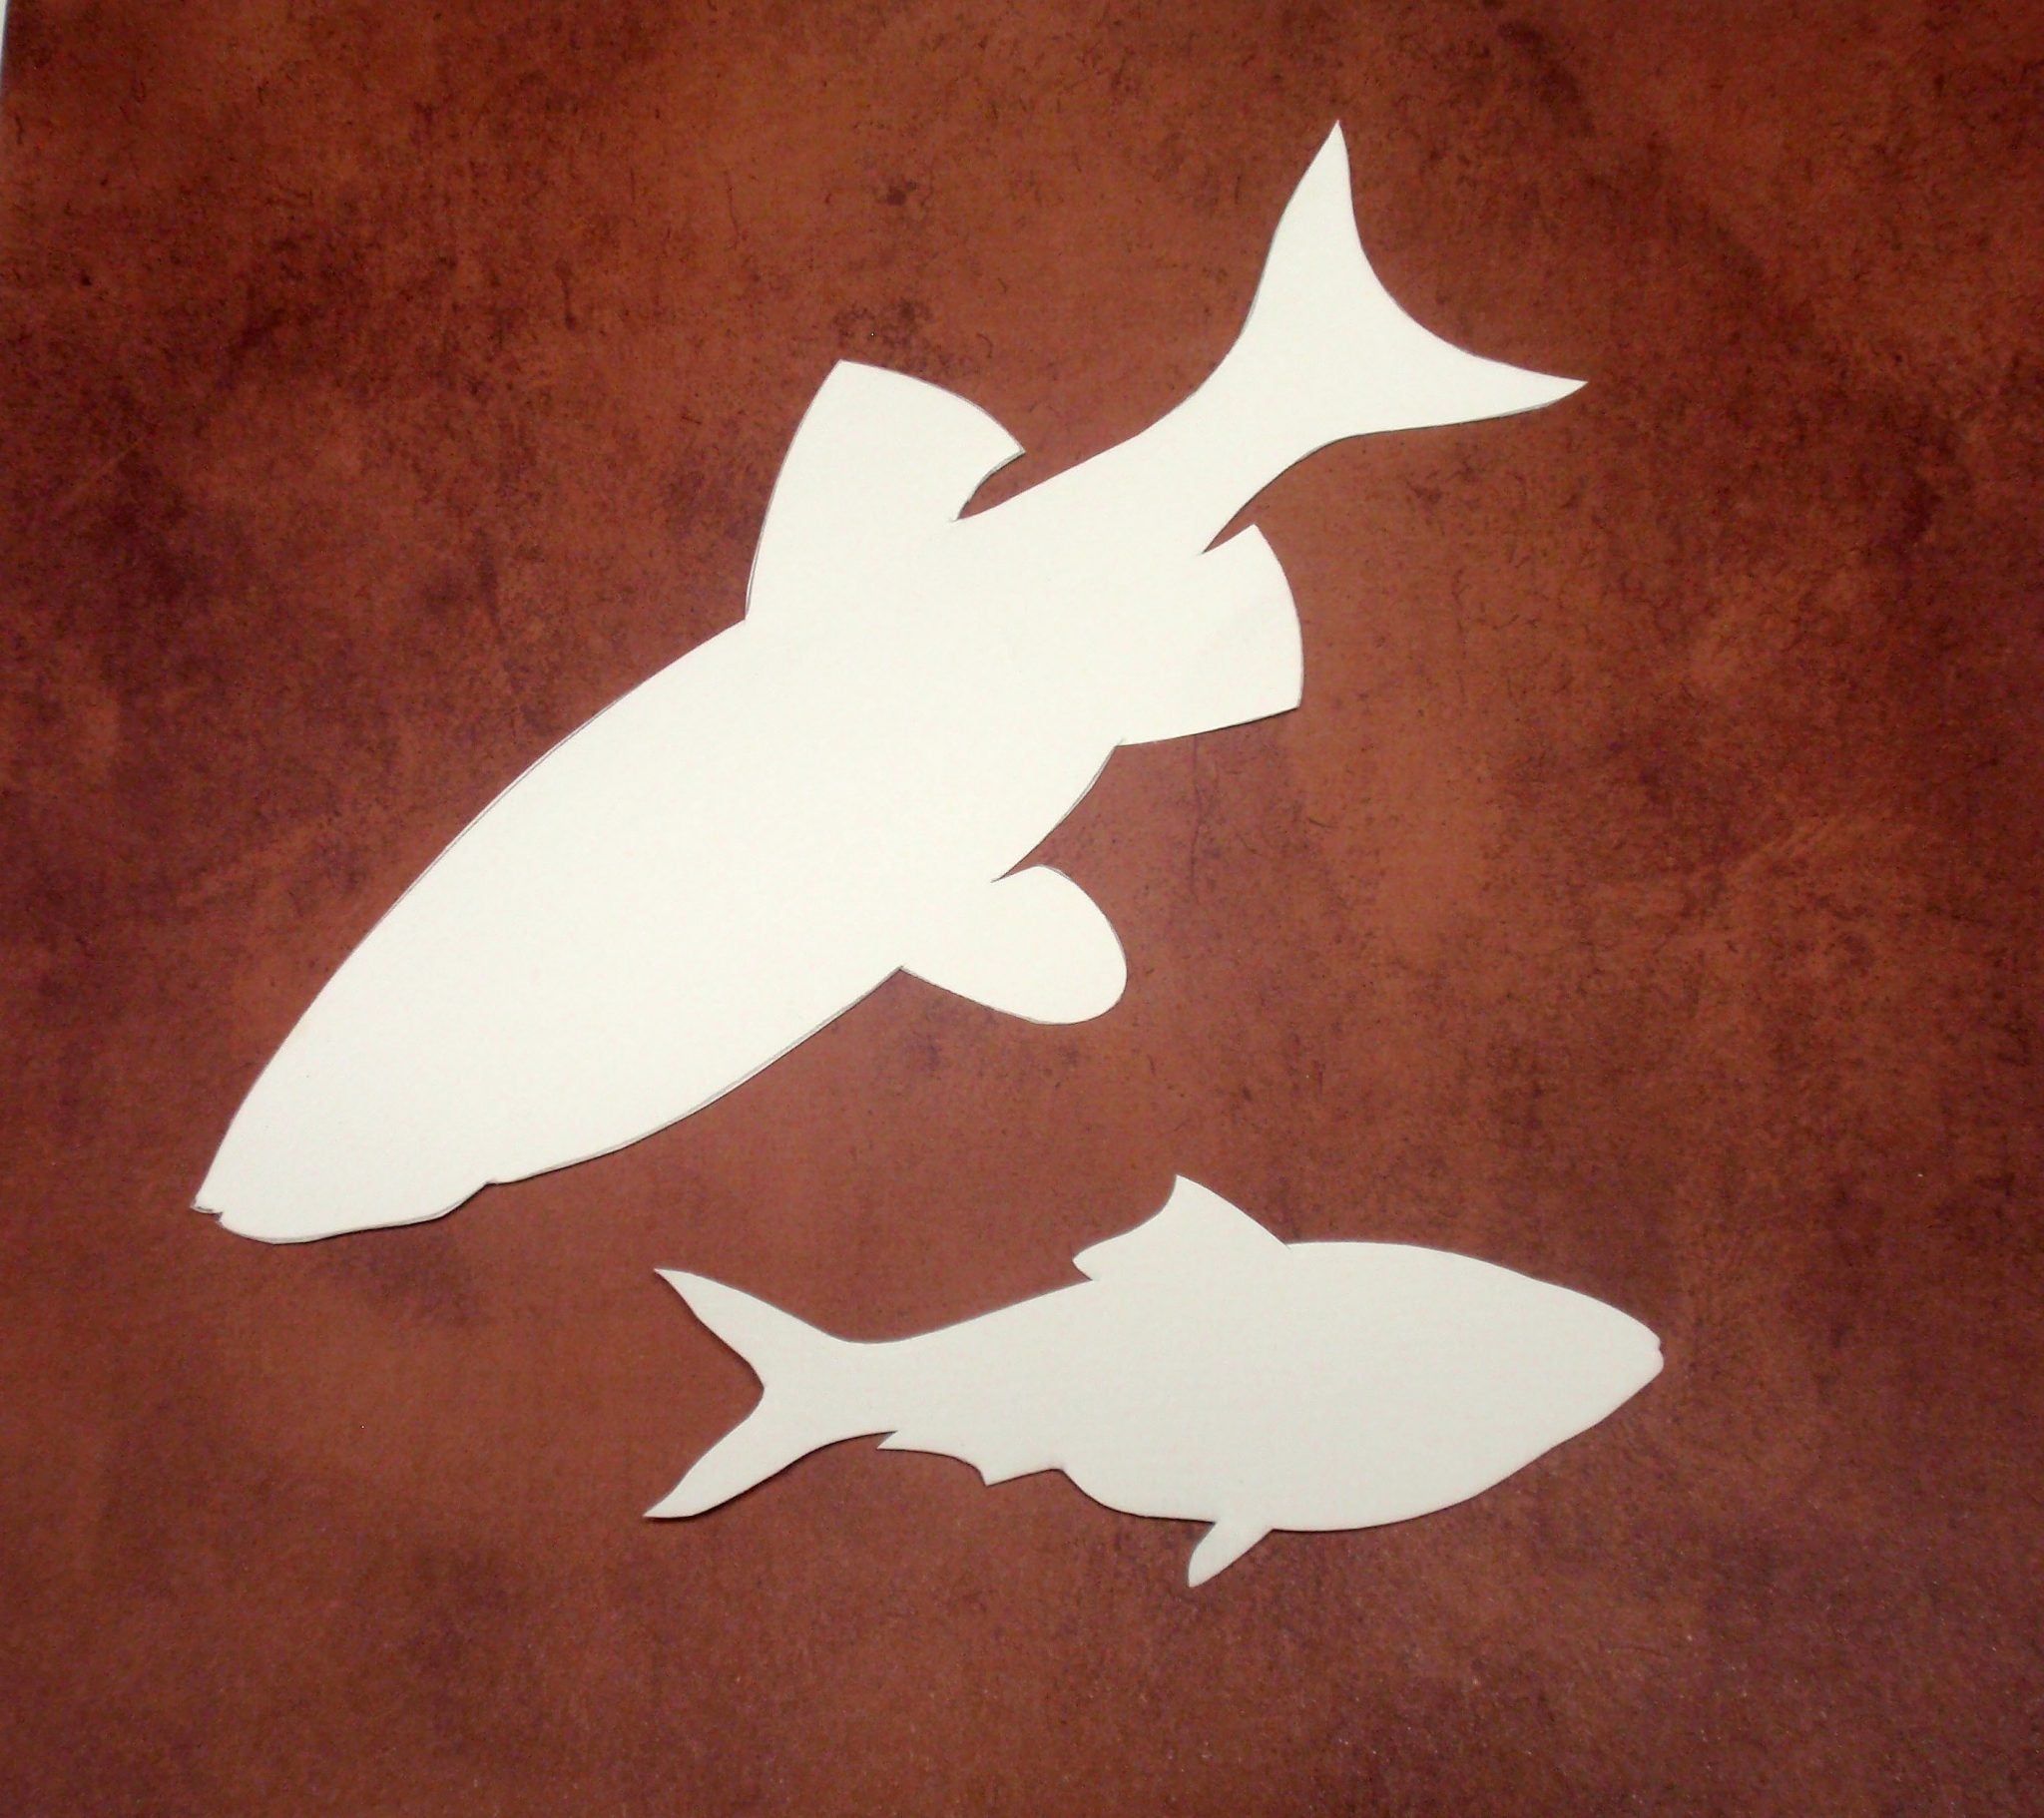
Temporary masks can also be created from commercial stickers. Apply the sticker to a piece of fabric first and pull it up to reduce its ‘stickiness’ before using the sticker on paper as a mask.
Hot glue can make some unusual masks. Create the mask by drawing using hot glue on a non-stick surface like a silicon craft or cooking mat. Practice does lead to smoother lines and greater precision, but don’t expect perfection when drawing with hot glue. Wobbly lines and extra glue blobs are par for the course and part of the charm. After the hot glue has cooled, just peel the masks from the silicon mat and they are ready to use.


Stamp Tips
Create your own chunky stamps from 2mm craft foam. Transfer your design to the foam and cut out using sharp scissors (and a sharp craft knife if needed). Glue the cut-out foam to a firm surface. Larger designs can be glued to foam core board or wood while small designs can be attached to a base created from a couple layers of craft foam (even the foam base from an inexpensive flip flop).

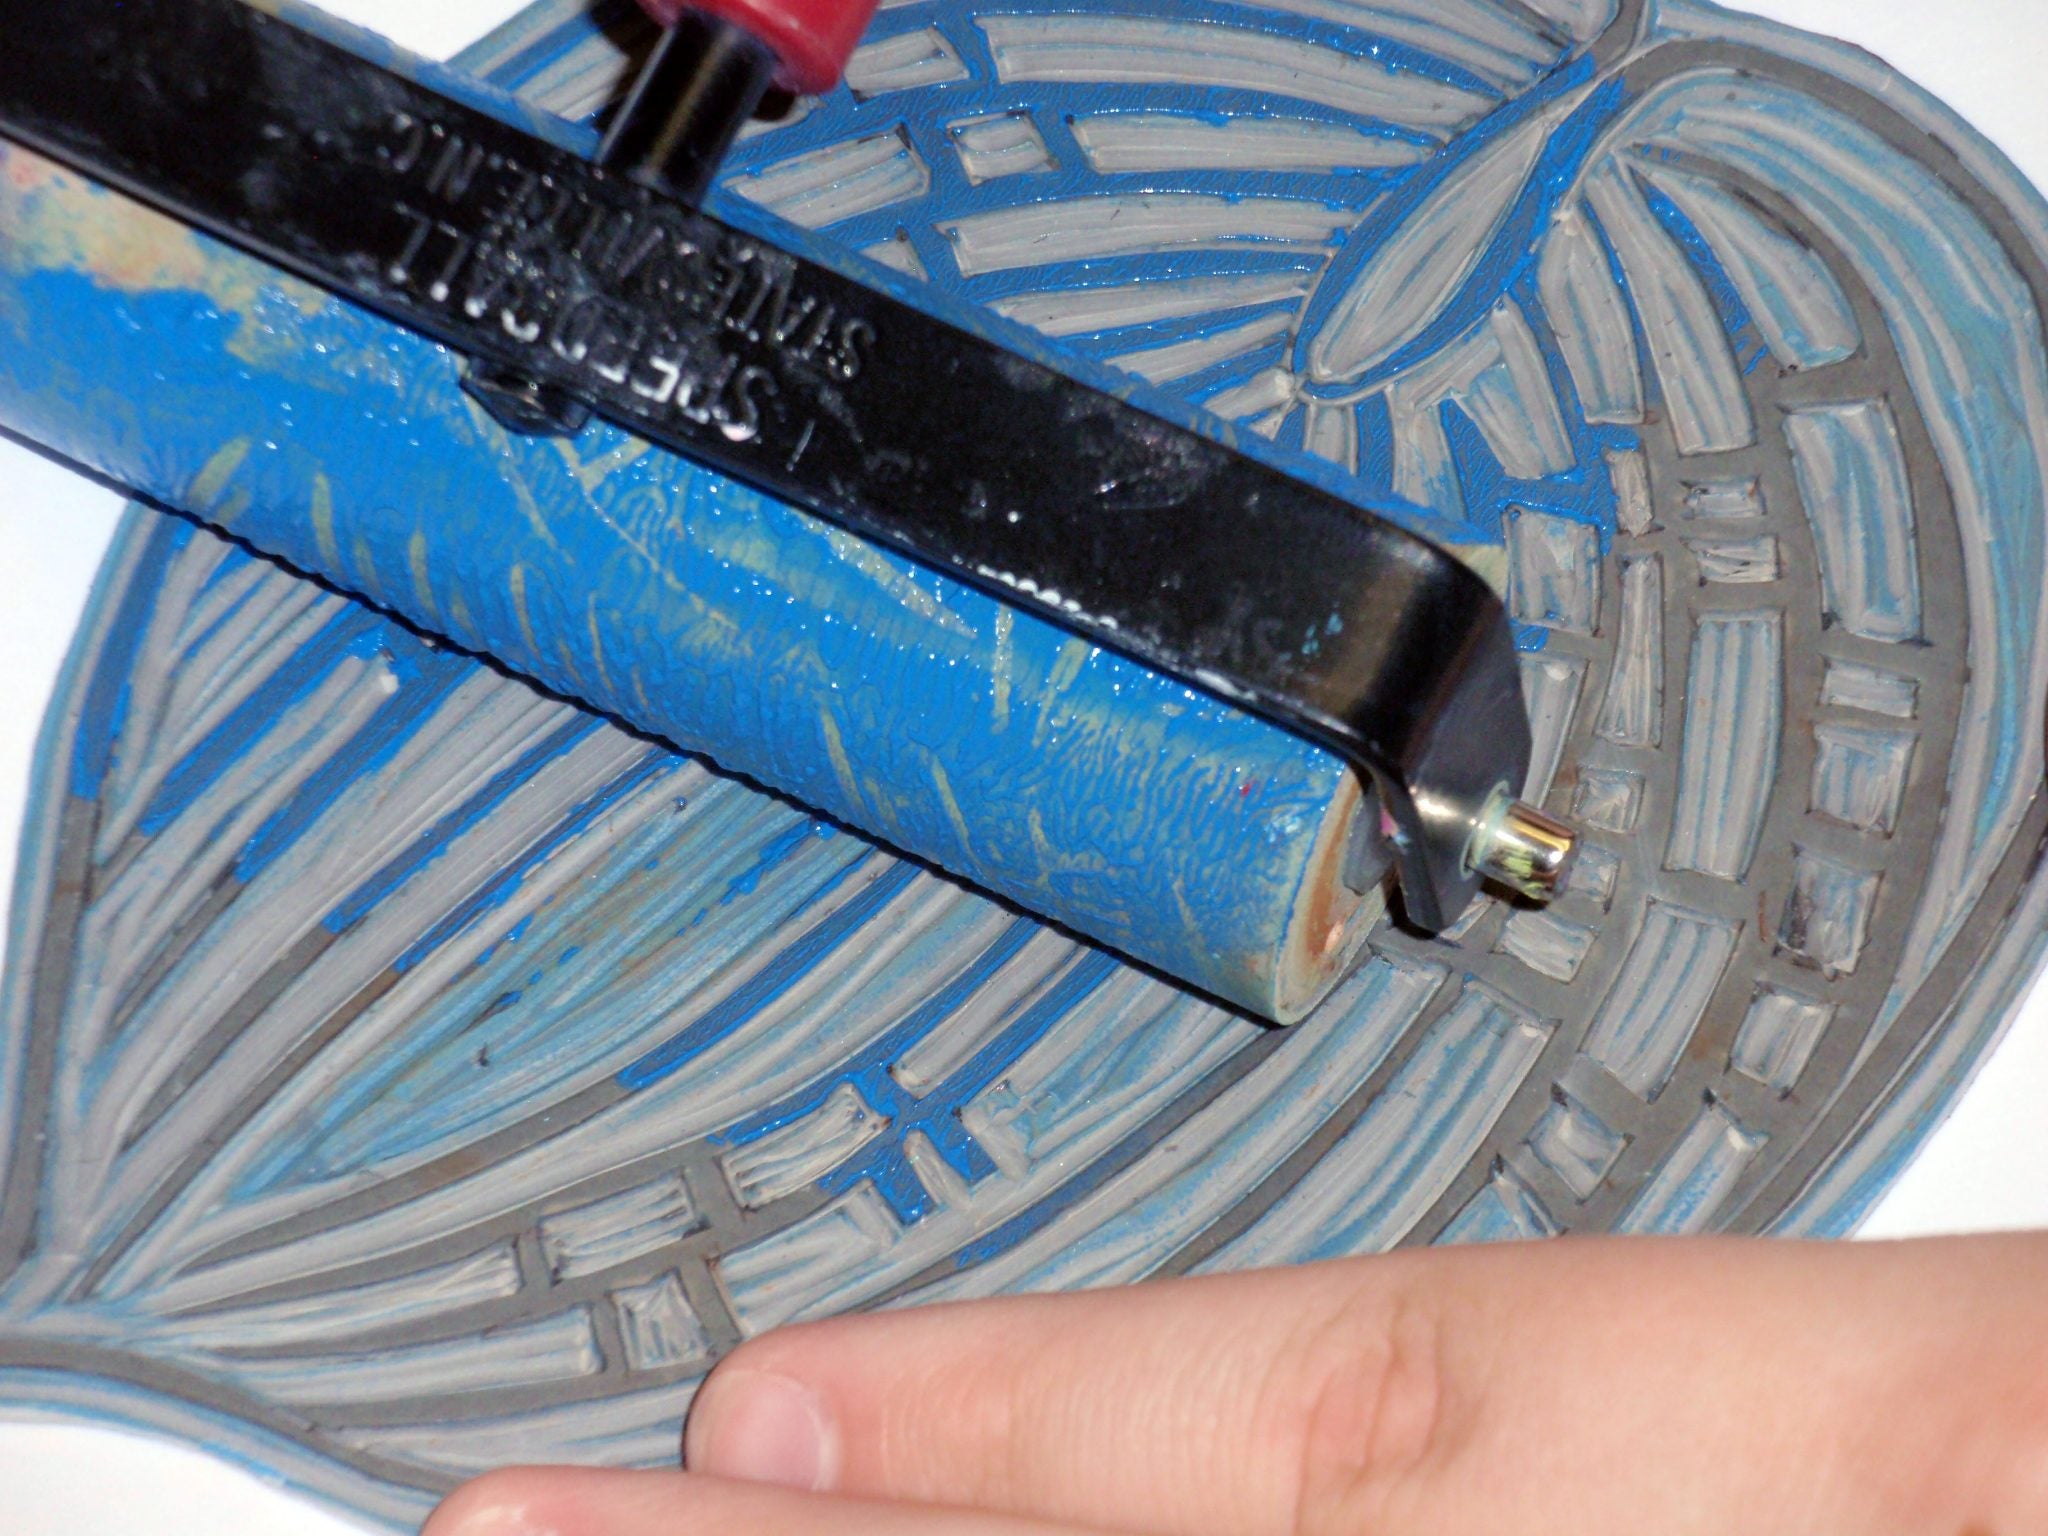
More detailed stamps can be carved from a linoleum block using a linoleum cutter. Take some time to plan your design, remembering that what remains after you carve material away is what will print on your paper. Draw or transfer your design to the linoleum block. Carve your details first and then remove excess linoleum from the background of the stamp.


I like to apply paint to stamps using a brayer. Squeeze some paint on your palette paper. Roll the brayer several times through the paint until it is evenly distributed on the brayer. Ordinary acrylic paint can be used if you work quickly and clean the stamp immediately after use. For a longer working time, use an open acrylic paint or add acrylic retarder to the paint to slow the drying time. Or, you can use other inks especially labeled for block printing; just note that if the printing ink is oil-based, you likely will not be able to apply additional acrylic paints on top.

Sometimes it’s helpful to use a soft surface for printing. The soft surface offers a bit of give that can help the paint transfer to the surface.

Go Your Own Way: Using Stamps, Stencils, and Masks

Leave a comment