
Free Shipping
On Orders $49+
On Orders $49+

Hey there! Have you ever wanted to create a custom yard sign but didn't know where to start? Well, we have some good news for you! Cricut vinyl is an awesome material that can help bring your sign ideas to life. Whether you're advertising a garage sale or just want to show off your favorite sports team, Cricut vinyl can help you make a statement.
One of the best things about Cricut vinyl is its durability. It's designed to withstand harsh weather conditions, like rain, wind, and sunlight. This means that your yard sign will last longer and continue to look great no matter what. Plus, vinyl is waterproof, making it an excellent choice for outdoor use. So, your message or design won't be washed away by the rain!
Cricut vinyl also comes in a wide range of colors and finishes, allowing you to create a sign that fits your style and needs. Whether you want to go bold with bright colors and graphics or keep it simple and understated, there's a Cricut vinyl that's perfect for you. You can choose from glossy, matte, metallic, or even glitter vinyl to make your sign stand out.
And the best part? Using Cricut vinyl for your yard sign is super easy! With a Cricut cutting machine and some vinyl, you can create a custom sign in just a few simple steps. So, don't wait any longer. Let's get started on creating the perfect yard sign to showcase your message or design!
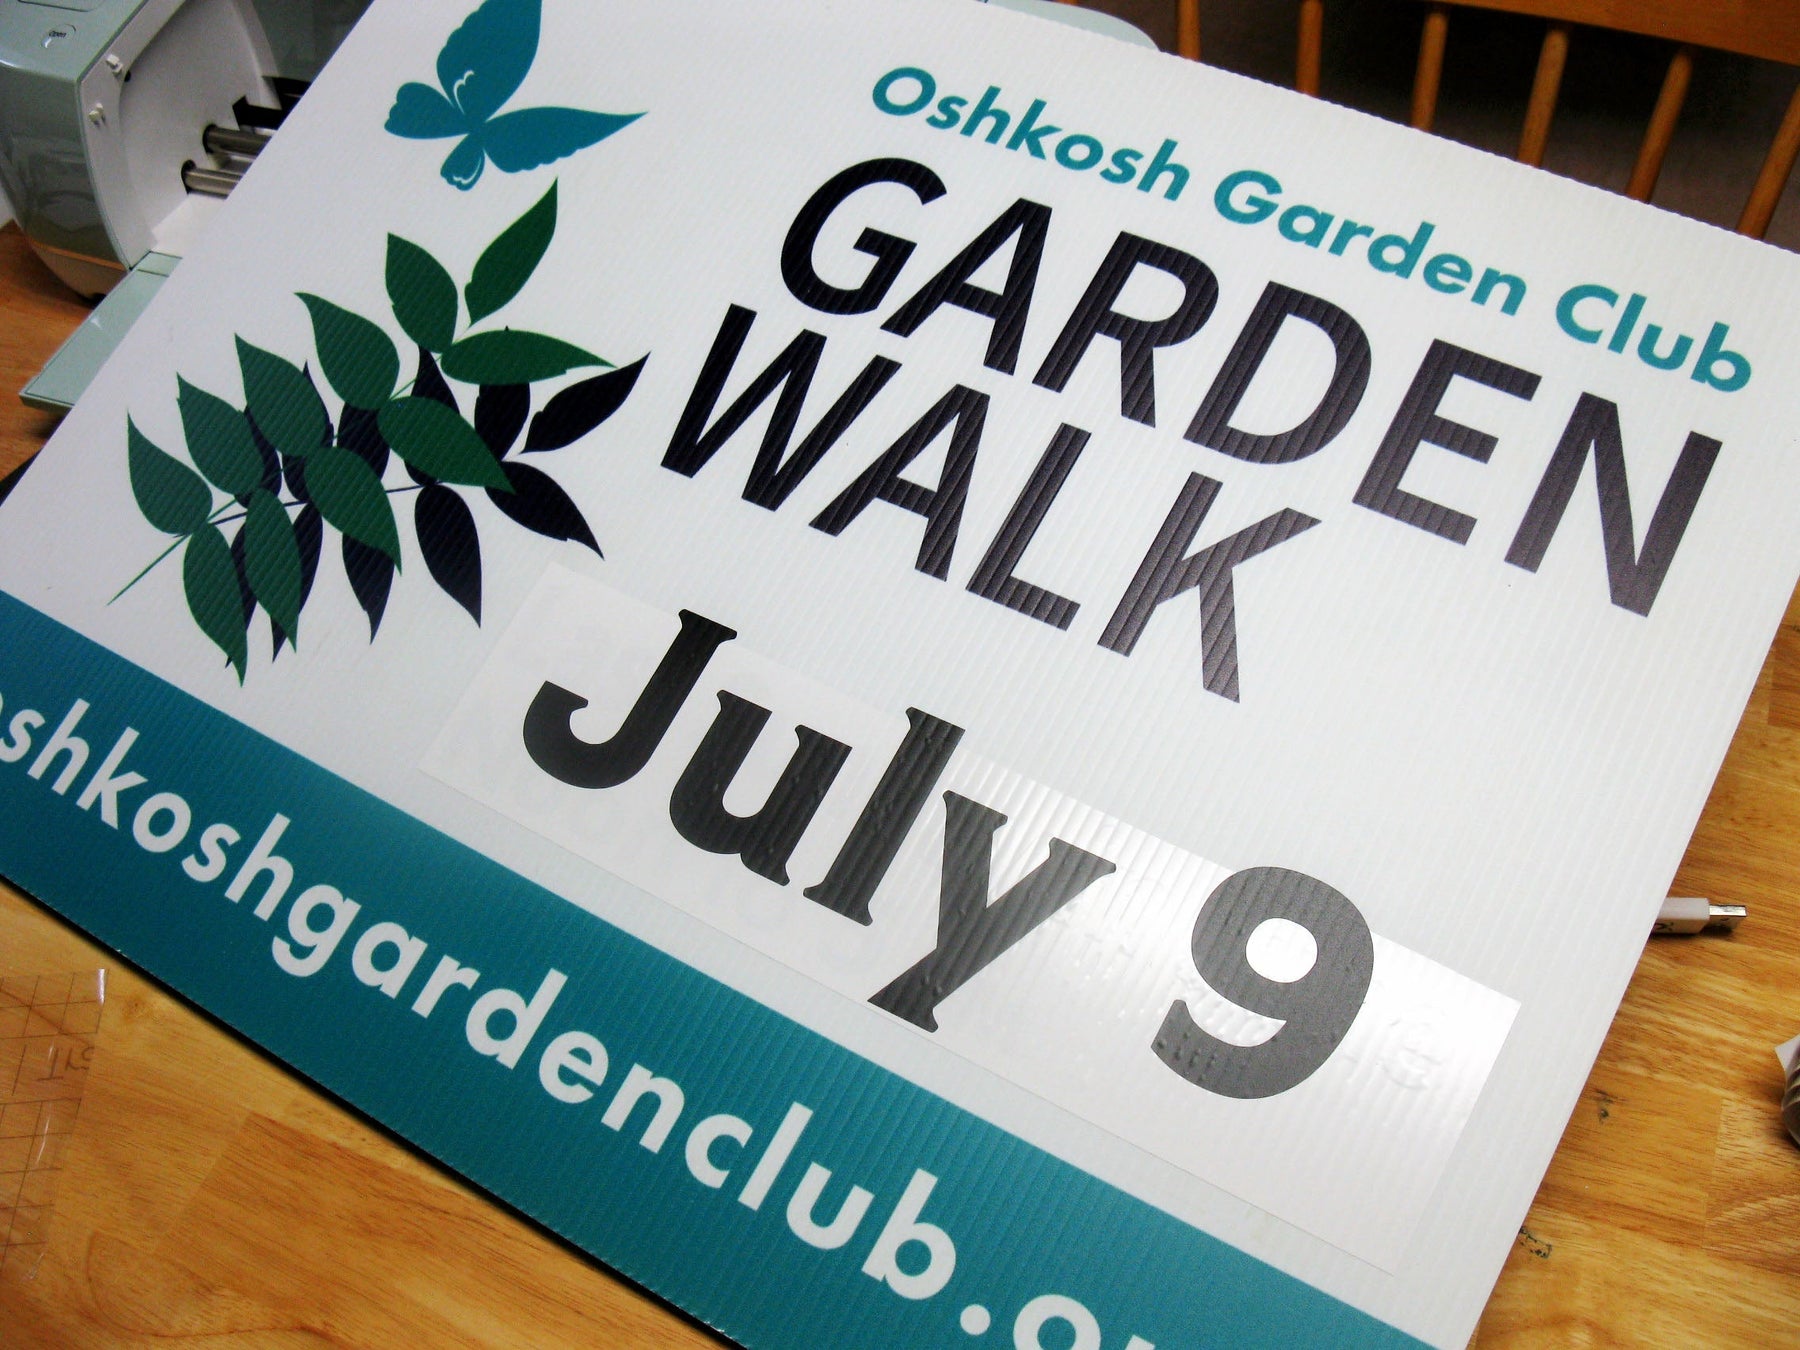
Before you begin, you'll need to decide on the design for your yard sign. You can create your design using Cricut Design Space or another design software of your choice. Consider the size and shape of your sign, the colors and finishes of your vinyl, and the text or images you want to include. I'm just updating the date on a preprinted sign, so I created text with a new date for my signs.

But! Design Space includes some wonderful images like these below that you can use to jumpstart a yard sign for any number of occasions.

Once you have your design, you'll need to choose the appropriate type of vinyl for your sign. Outdoor vinyl, such as Cricut Premium Permanent Vinyl, is recommended for yard signs as it is weather-resistant and durable. However, my personal experience is that Cricut Removable Vinyl will also withstand summer weather for a month or so. If you expect to reuse your sign - and want to change dates from year to year for example - consider removable vinyl for those design elements.
Load your vinyl onto the cutting mat and insert it into your Cricut machine. Follow the prompts in Cricut Design Space to cut your vinyl to the desired size and shape.

Once your vinyl is cut, use a weeding tool to remove any excess vinyl around your design. This will leave only your desired design on the backing paper.

Use transfer tape to transfer your vinyl design onto your sign material, such as corrugated plastic or foam board. Use the grid printed on the clear transfer tape to help you align your design and make sure to smooth out any bubbles or wrinkles in the vinyl as you go. A scraper tool is perfect for this purpose!

To ensure your yard sign lasts as long as possible, avoid exposing it to below freezing weather conditions or harsh chemicals. Clean your sign with a gentle soap and water solution and store it in a dry place when not in use.
Overall, Cricut vinyl is a great material for making yard signs because of its durability, versatility, and ease of use. Whether you're promoting a business, advertising a garage sale, or showing support for your favorite team, Cricut vinyl makes it easy to create custom signs that stand out and get noticed. So why settle for a generic sign when you can create something unique and eye-catching with Cricut vinyl?
New to Cricut Vinyl? Check out these tips and tricks from our design team to help you get started with this super versatile product.
If you're new to working with vinyl and the Cricut machine, you might have heard about transfer tape but have no idea what it is or how to use it. Don't worry; you're not alone! Transfer tape is an essential tool for any vinyl crafter, and in this blog post, we're going to cover everything you need to know about it. From the basics of what transfer tape is to tips and tricks for using it, we've got you covered. Whether you're a beginner or a seasoned pro, this post will help you master the art of using transfer tape with your Cricut.

Vinyl can be a versatile material that can transform just about anything, but it can also be intimidating to work with, especially for beginners. In this step-by-step tutorial, we will walk you through a simple vinyl project using adhesive-backed vinyl. You will learn how to cut, weed, and transfer vinyl designs onto a surface, along with some common vinyl terms. By the end of this tutorial, you will have the skills to add vinyl to just about anything and transform it into a customized masterpiece.

If you're new to using a Cricut machine, it can be overwhelming to navigate through all the tools and accessories available. Fear not, as we've got you covered! In this post, we'll introduce you to five essential tools for Cricut beginners that you'll use again and again in your crafting projects. From weeding to scoring, we'll walk you through how to use each tool and include links for where to purchase them. Plus, we'll share some handy tips for organizing your tools, so you can keep them close at hand. Let's get started and take your Cricut crafting to the next level!


Leave a comment