
Free Shipping
On Orders $49+
On Orders $49+


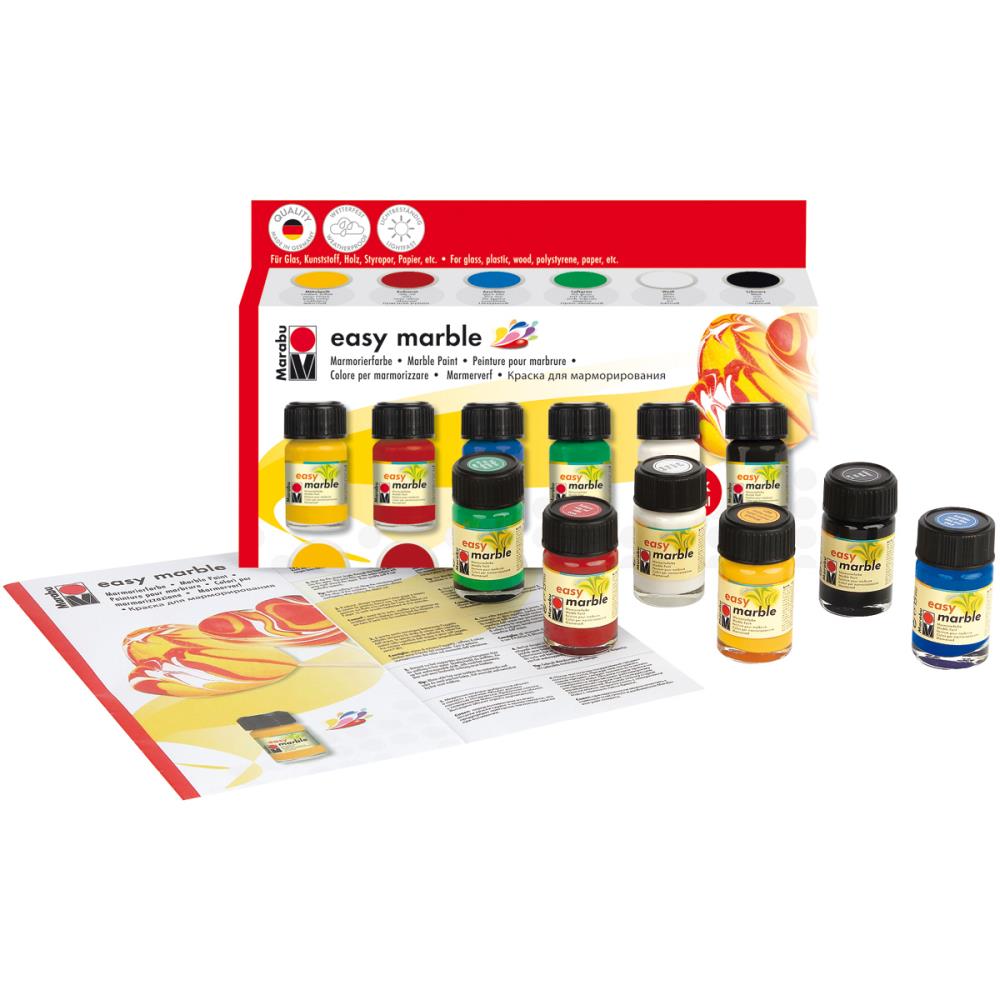
Easy Marble is a solvent-based marbling paint that requires only water to work its magic. It comes in 19 colors plus 2 metallic colors as well as crystal clear for one-color marbling.
The starter set includes six 15-ml paint colors: ruby red, azure blue, rich green, medium yellow, white, and black. The manufacturer’s website indicates the paint will adhere to a wide variety of surfaces including paper, glass, plastic, metal, wax, wood, paper maché, and smooth foam. It can be applied to fabric that will be used for decorative purposes only. View their product brochure at https://www.marabucreative-usa.com/wp-content/uploads/2018/07/EasyMarble_brochure.pdf.
Supplies:
Easy Marble Paints
Water container
Disposable gloves
Wooden skewers or toothpicks
Papers and other objects for marbling
Directions:
Select a water container based on the type of objects you plan to marble. Choose a wide, relatively shallow container for flat objects like papers, mats, and canvas boards. The lid from a grocery store cake is being repurposed here, but an old or disposable 9 in. by 13 in. cake pan would also work well.

If you plan to marble three-dimensionally, select a container than is deep enough for you to submerge your objects completely below the surface of the water. Turn to your recycling bin again for a large cottage cheese or similar container. Or consider a Dollar Store bucket for marbling very large objects.
Fill your container with water. The manufacturer suggests room temperature water and distilled water if your tap water is hard. If your large container is thin or flexible, place it on top of an old pan to move it from the sink to your covered work table.
In addition to working on a covered surface, I suggest you set up in a well-ventilated area. I found the paints to have a strong odor and it seems possible the odor may bother sensitive individuals. However, there are no manufacturer chemical or vapor warnings on the product.
Shake the containers of Easy Marble before use. Open the outer lids of the jars so the paints are quickly accessible. Speed is a factor because the paints have a limited “open” or working time. The exact working time can vary based on the temperature of the water and the room in which you are working. I found the working time to be less than a minute.
Easy Marble containers are equipped with special inner caps that allow you to drip the paints directly from the jar. Drip enough of a first color to cover the entire surface of the water.


Drip several additional colors onto the water. Two or 3 colors are suggested by the manufacturer, but you can use as many colors as you’d like provided you work quickly. The colors do not mix on the water surface, so you can drip complementary colors together without fear of creating muddy blends.

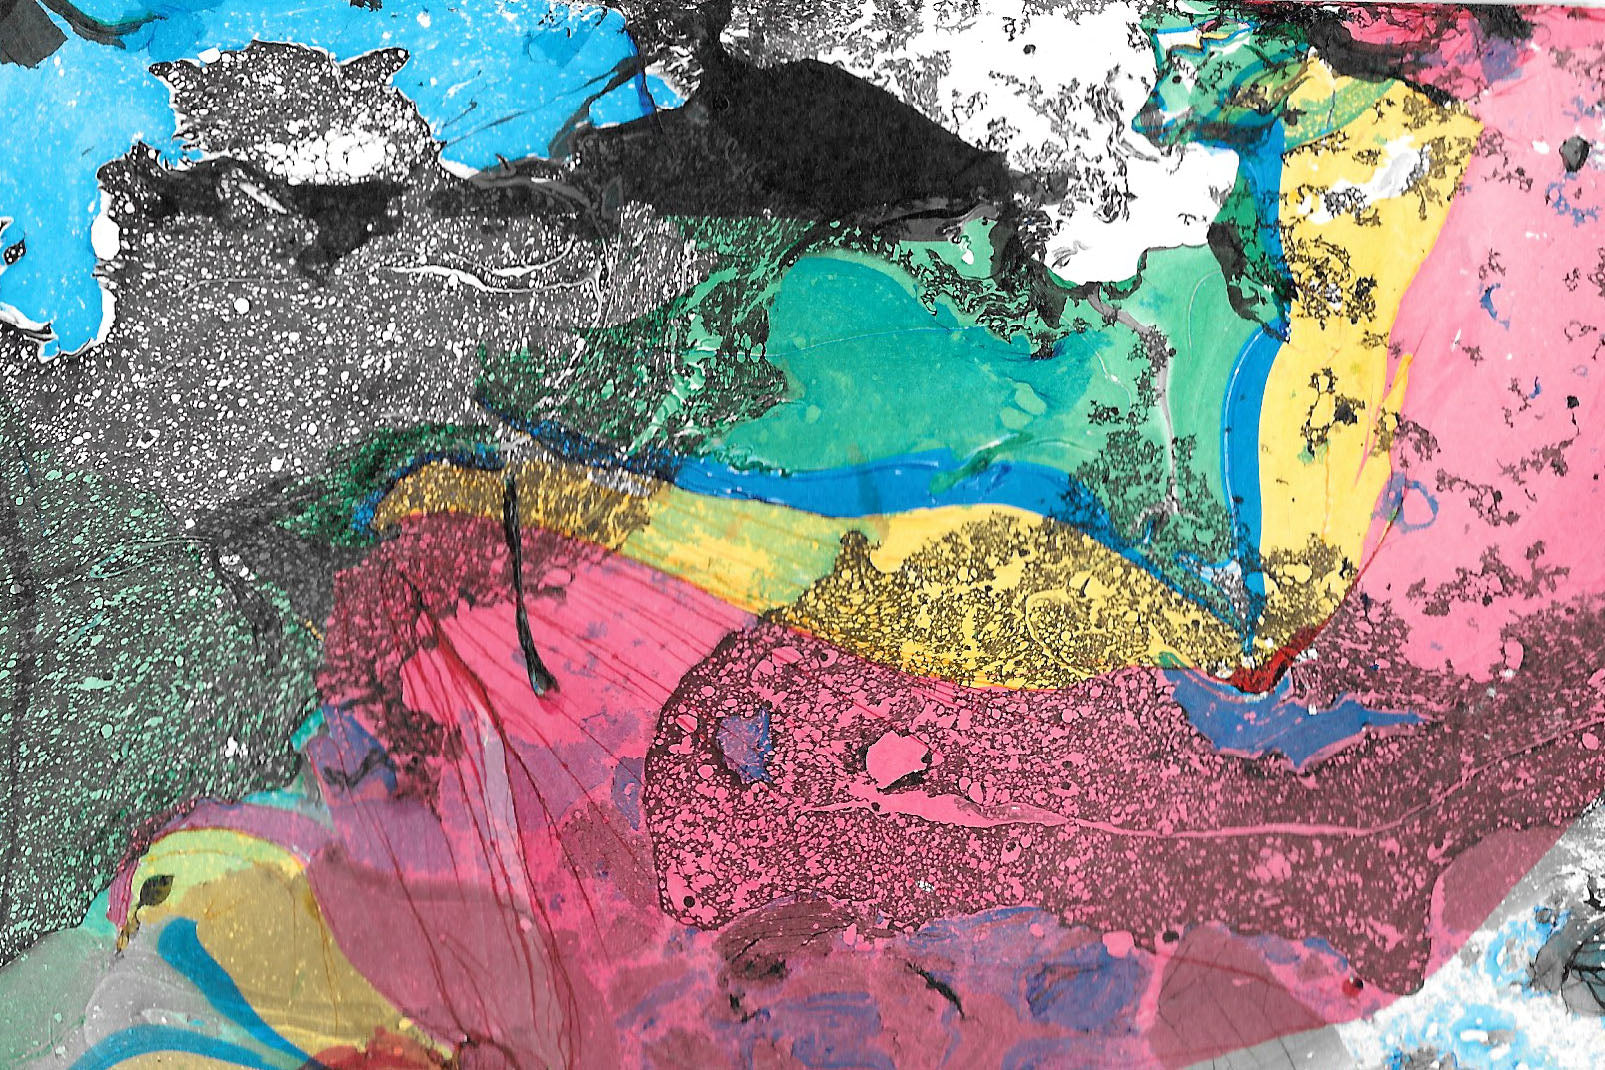
Swirl the paint using a wooden skewer or similar object. The manufacturer cautions against over stirring because it can create bubbles and air pockets in the water. I found it best to work in short gentle movements, rather than dragging the skewer through the water in a long continuous swirling motion. The skewer tended to attract the paint as it was moved through the water. For me, a long swirling movement created clumps of paint on the marbled papers (note the dark lines in the image below) or pulled most of the paint from the water and onto the stick.

Lay your paper on the surface of the water, making sure the entire paper makes good contact with the water. Thin papers like deli sheets are especially easy to handle due to their flexibility. In addition, their translucent nature allows you to view any air bubbles present between the water and the paper and adjust if needed. Lift the paper off the water and set it aside to dry.

Alternately, the manufacturer recommends dipping your paper vertically to color both sides at once and minimize problems due to air bubbles. This would, of course, require a water container of sufficient depth to allow the paper to be fully submerged. Remove any color left on the water surface using a piece of scrap paper before pulling the sheet of paper from the water bath.
Clean any paint residue from the water surface using a scrap piece of paper before marbling additional items. It’s possible that the interesting paint effects on your cleaning paper may be one of your very favorite painted pieces!

It takes little time for the paints to be “set” sufficiently on the paper before you can dip them in another marbling paint bath. By the time you can clean the water and prepare the paint, the papers can be dipped again.
This kind of “overmarbling” is one way to create new blended colors on the paper. For example, paper layered with red paint on top of yellow paint will appear orange. White paint used in a second layer can lighten the appearance of the underlying color to a tint or pastel version of the color. Overmarbling has the disadvantage, however, of obscuring the original swirled design. This is not necessarily a bad thing but keep it in mind when deciding whether to overmarble one of your favorite patterned pieces.

Marbled deli papers can also be layered extensively after they have dried. Layer the papers using matte medium or decoupage glue on a canvas or canvas board as you would any other collage paper. A surface created using 2 or more layered marbled sheets is interesting and rich, though no longer possesses the traditional marbled look.

The manufacturer advises that wet product can be cleaned up from hard surfaces using isopropyl alcohol. Not surprisingly, then, paint sprayed with alcohol breaks into small pieces. For a different look, spritz alcohol onto the paint while it is floating on the surface of the water before dipping your papers.
The manufacturer reports that the paint is fully cured in 24 hours. The paint does not require sealing. However, if you want to apply finish to any artwork including the marbled items, the manufacturer recommends a brush-on water-based product.

Painted Cactus Table Runner: Easy Southwestern Stripes

Leave a comment