
Free Shipping
On Orders $49+
On Orders $49+

Materials:
Sign Prep:
To prep the sign before use, it’s essential to sand the wood and use a tack cloth to remove any excess wood shavings. Use Minwax Walnut Stain and apply it with a rag. You can use a sponge brush too, but the rag is easier to spread the stain on the flat surface of the sign. Use the sponge brush on the edges of the round in the creases.
For best results, let the sign sit for 2-3 days before applying the sealant and vinyl. This way, the sign will be completely dry, and the sign will have absorbed the stain, so the vinyl properly adheres to the wood. After the stain has settled, apply Acrylic Satin sealant with a sponge brush and let the sign sit for 24 hours. This process secures the vinyl a little more when applied.
Step 1:
Go to the Shapes tab in Design Space and select the Circle. Changing the color of the Circle, similar to the stain of the sign, can be beneficial to give you an idea of how the sign will look with the yellow and white vinyl is optional. Change the shape size to 15” x 15”, the same as the sign.


Step 2:
The image used is from Cricut Design Space. The image width is 11.591 and the height is 4.837.


Step 3:
Now it’s time to cut and weed! Since there are two different colors, there will be two different cuts. I selected Smart Material for the white piece, and for the Pressure, I selected more. For the yellow vinyl, I selected Premium Vinyl and also chose more pressure.
Step 4:
Placement of the vinyl can be a little tricky and time-consuming. Start from the bottom of the sign and work your way up. You can use a measuring tape to ensure the spacing on each side is even. Be sure to leave space at the top for the floral arrangements. First place the fall vinyl in the location you want and remove the transfer tape after applied. Then do the same for the hello vinyl piece.


Step 5:
Apply the Acrylic Matte Sealant Spray to seal the vinyl on the sign. Let the sign sit overnight for the sealant to dry.

Step 6:
Once the sign is dry, flip it over and use measuring tape two inches from each end of the sign to mark where to drill. Drill just a little bit into the sign in both places and place the D-Hooks and screws in each spot. Once placed, grab the twine and double knot the ends. The length of the twine is per preference, for this sign I chose the length to be a little longer.


Step 7:
To make the bow, you will need to cut three 26 inch pieces of burlap, one 20 inch piece of burlap, and one 6 inch piece. Fold the three 26 inch pieces so they each meet in the middle then stack them. Pinch the middle of the three pieces and begin to wrap the six inch piece with the 20 inch piece folded on the bottom since that will be the tail of the bow. Glue these pieces together and then cut the tail in a triangle cut.


Step 8:
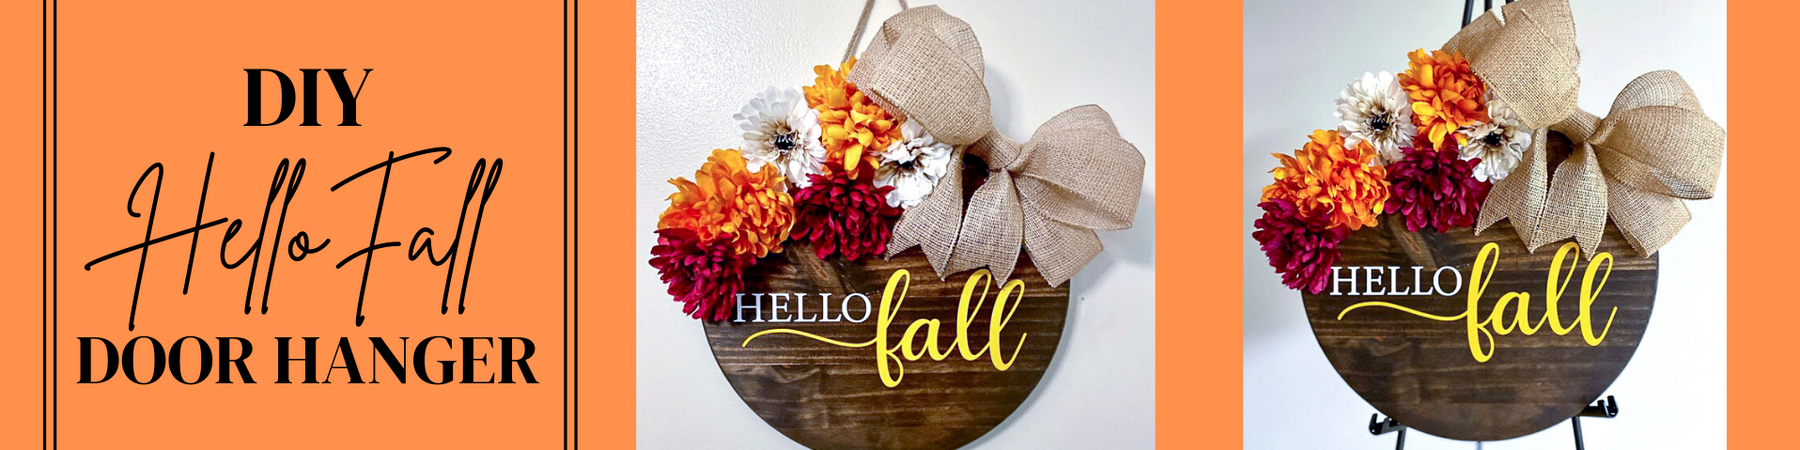
Next is time for the floral! For this step, you will need a hot glue gun. Laying out the floral first to see how it will roughly look helps with knowing which piece to glue first. When finished with the gluing, lay the sign down on the backside for it to dry overnight.

After drying, your sign is all set! You are ready to hang your sign on your door, or even your wall! Don't forget to fluff your bow as needed, happy fall!


Leave a comment