
Free Shipping
On Orders $49+
On Orders $49+

My first T-shirt made with my Cricut Maker was a success! I had another T-shirt project planned, and I wanted to practice by making myself a shirt first. I was nervous about trying this because it seemed like it would be difficult and time-consuming, and my perfectionist tendencies didn’t help, either. However, I found out that making a T-shirt with Cricut Iron-on is quite easy!
Materials:
Cricut
Cricut Brayer or Scraper
Cricut Easy Press
Cricut Weeder
Iron-On Vinyl (I used Everyday Iron-on Mesh)
T-shirt
I already knew what words I wanted on my shirt. I had decided to do something related to my grandchildren because they bring me so much joy.

I started in Design Space by selecting the Text icon on the left of the screen, and I typed in the words I wanted.

Then I centered the text using 'Alignment' above the canvas and choosing the 'Center' option.

Then I made the design bigger, so I could see it more easily. I just used the arrow at the bottom right corner of the design to enlarge it.

Next, I chose the font, which took the longest out of the whole project. I narrowed it down to about 15 different ones I liked and then had to choose just one from there. The one I settled on was 'LeBeau'.

Then I needed to figure out what size I wanted my design to be. My Easy Press is 9" x 9", and I wanted the design to fit within that so I could press it only once, so I chose to make it 8.5" x 8.5." Very scientific, I know.

In order to make my design size a perfect square, I had to unlock the dimensions. I went to the 'Size' section above the canvas and clicked on the small lock icon. Then I changed the width and height to 8.5" each. This did not seem to distort my text in any way.

Tip #1 - It is usually recommended to keep the dimensions of your design locked so it remains proportional.
Now I was ready to cut my design out of the Iron-on vinyl with my Cricut. I wanted to make sure I did everything correctly, so I watched a couple of YouTube videos and found a step by step tutorial that I left on my computer screen to follow along with. Having two monitors allowed me to keep Design Space up at the same time.
The tutorial recommended using the T-shirt Template in Cricut Design to see how the shirt will look when done, so I tried that out. I just clicked on 'Templates' on the left side of Design Space and chose a scoop neck shirt. An outline of a shirt showed up on my project canvas. Then I moved my design around to try out different positions. It was nice to see how the shirt would look, but I don’t know how often I would use that function in the future. It doesn't change how the design is cut, not to mention the fact that I couldn’t figure out how to get back to the main design screen after that.

Tip #2 - The T-Shirt Template can be quite helpful if you are not sure where you want to place your design on your shirt.
Next, I clicked on ‘Make It’ in Design Space to get started cutting out my design from the Iron-on. The instructions made it so easy. They led me through every step.
First, I browsed all materials. There was a setting for Everyday Iron-On, and I tried choosing that one but decided I should browse all materials to see if there was anything more specific. I'm glad I did because there was a setting for Everyday Iron-On Mesh, which I was using. I selected the correct material from the list.


Tip #3 - If you don't give the Cricut specific enough instructions for your project, it may not turn out, or you may waste your materials or your blank.
After that, Design Space reminded me to mirror my image, so I did that. All it took was a click of a button.


Tip #4 - Without mirroring your image with an Iron-on project, the words will end up being ironed on backwards. Do not forget that step.
Now I was ready to cut. Design Space instructions said to place the shiny side of the Iron-On down onto my mat, so I did that (I used a Light Grip Mat for this project, but a Standard Grip Mat would also work).
Tip #5 - I used a brayer to smooth out the Iron-on vinyl on the mat, so there would not be any wrinkles to cause issues. I could have used a scraper to do this if I didn’t have a brayer.
I loaded the mat into the Cricut and pressed the arrow button on the machine as instructed. There were even pictures in Design Space to show which button to press on the Cricut. I really could not fail with these specific instructions. The machine pulled in the mat and started doing its job.

I am so impressed with the Cricut and how it is set up to know exactly how deeply to cut for each type of material. You just have to choose your materials, and it does the rest.
Tip #6 - For instance, the Iron-on has two layers - the shiny side, called the carrier, and the actual Iron-on, which sticks to the shirt. The Cricut is smart enough to only cut through the Iron-on and not the carrier. I find that so amazing.
Now it was time to weed the excess Iron-On away from the design I had just cut. I started in the corner and pulled the Iron-on layer down away from the carrier layer in a 45-degree angle. I had a bit of trouble separating the two layers to get started, but my weeding tool helped. I’m sure I’ll get better at that with practice. It's hard to see the carrier layer on the mat because it's clear, but if you look closely, you can see the tiny holes.


I realized I should have trimmed the Iron-On more because I ended up wasting 3-4 inches of it. I cut about 10 inches off the roll for the width, as my design was 8.5 inches square, and I wanted a little leeway, but I did not do that with the length, which was 12 inches.

Tip #7 - Some people don’t actually cut the length of the Iron-on or vinyl but leave it on the roll during the cutting process. Then they cut it off close to their cut design at the end to eliminate waste. That would have worked, too. I guess I’ll know for next time.
I chose to use Iron-on mesh because it looked like polka dots to me, which are cute and fun. After weeding, I noticed a tiny bit of Iron-on between two letters, and I didn’t want that on my shirt. I tried to get it off with my weeder, but it got underneath the carrier sheet through one of the mesh holes. I had to dig around in the little hole (carefully) in order to remove it, but I did get it out eventually.

Tip #8 - Remember, any Iron-on vinyl on the carrier layer will transfer to your shirt upon heat being applied, so watch carefully for anything out of place beforehand.
Once I finished weeding my design, I pulled the carrier sheet off the mat, flipped it over, and placed it on my shirt, holding it a bit above the shirt to get the words right where I wanted them before pressing it down. Some people measure everything to make it even, but I didn’t do that, at least not this time. I just eyeballed it, and it looked good to me. Of course, if I was making a gift for someone, I would probably be more careful.

Last step was to press the Iron-on onto my shirt, and I used my Easy Press for this.
Tip #9 - I found the Cricut Heat Guide recommended in another project post, which made things even easier.
I just had to choose the type of Easy Press I have, the type of fabric I was going to use, the type of Iron-on I would apply, and whether I would use a mat or a towel underneath. Then it told me what temperature to heat the Easy Press to and how long to press it on the shirt. After preheating the Easy Press, it only took 30 seconds to iron the design onto the shirt front and then another 15 minutes on the back side of the shirt. Super easy.


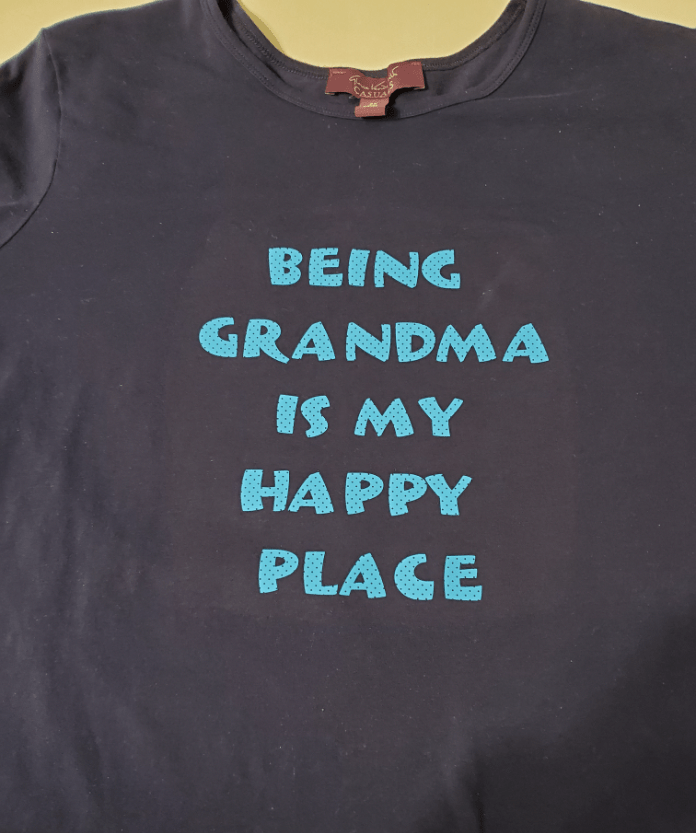
Then I just peeled off the carrier sheet and I was done! The shirt turned out so cute, if I do say so myself. I already wore it once when my grandchildren came over. It seemed like the perfect time to display it and let them know how awesome they are.
I never had a personalized shirt made for me, and this one I did myself. It was so much fun, and now I can’t wait to make something else, or, let’s be honest, a lot of something else's (is that even a word?). I knew this would happen once I started using my Cricut. Oh, well, there are certainly worse things I could do with my time.
What's the one thing you can't stop making with your Cricut? I'll bet there's more than one.
Faux Leather Mother's Day Keychain with Cricut

Comments
Leave a comment