
Free Shipping
On Orders $49+
On Orders $49+


Have you ever thought about decorating your Cricut? I've seen so many different ideas but when I came across this cheetah pattern in Design Space, I instantly knew I wanted to decorate my machine with it. If cheetah isn't your thing, you could use any other image or pattern to customize this project! That's the best part about owning a Cricut, right? You can customize it to you!

Materials:

Here's a preview of the design that I created in Design Space. The white part is our cheetah layer — the actual design we will be cutting. The mint layer is the machine template, so we won't actually be cutting it but rather just using it as a template to help us create our design.
Start by adding the machine template to the canvas. The tag for that is #M28407974. You could also make this project with your Maker or Joy machine. The image set name is "Cricut Machine Decoration Guides". Then add the cheetah pattern to the canvas as well. Like I mentioned above, I found the cheetah pattern in Design Space and was inspired by it. This exact design is actually free — if you search for #M40D23 it will come up in the search bar.
I'm only decorating the top of my machine, so I hid the bottom portion of the template. Then I placed my pattern on top, sized it large enough to fit over the top and then sliced the cheetah pattern with the template. You can also use the contour tool to hide any portions of your design you may not want.
Place your vinyl on a cutting mat and cut it on your Cricut. When I'm working with adhesive vinyl, I like to use a LightGrip mat but you could use a StandardGrip as well. In addition to this, I am working with permanent vinyl but you could definitely use removable as well. With Cricut vinyl, the permanent vinyl is a glossy finish and removable is a matte finish, if that makes any difference to you!
Next up, I'm going to weed. This is a pretty detailed design, so I'm going to make sure I go a little slower than normal. I used a weeder tool to remove the excess vinyl. I also like to trim off the excess vinyl as I'm weeding with some scissors, so you may want to try that too.
Next, cut a piece of transfer tape to fit over your vinyl. Then apply the vinyl on top of your transfer tape. Be sure to watch the video to see how I'm applying the transfer tape – I started at the left hand side and worked my way over in small chunks.
Lastly, apply the vinyl to your machine. I put a piece of parchment paper underneath the vinyl/transfer tape to help align it onto my machine. If you haven't tried using parchment paper trick yet, you're in for a real treat! Your vinyl/transfer tape will not stick to the parchment paper, so it allows you to move it while you're getting it aligned perfectly on your machine.
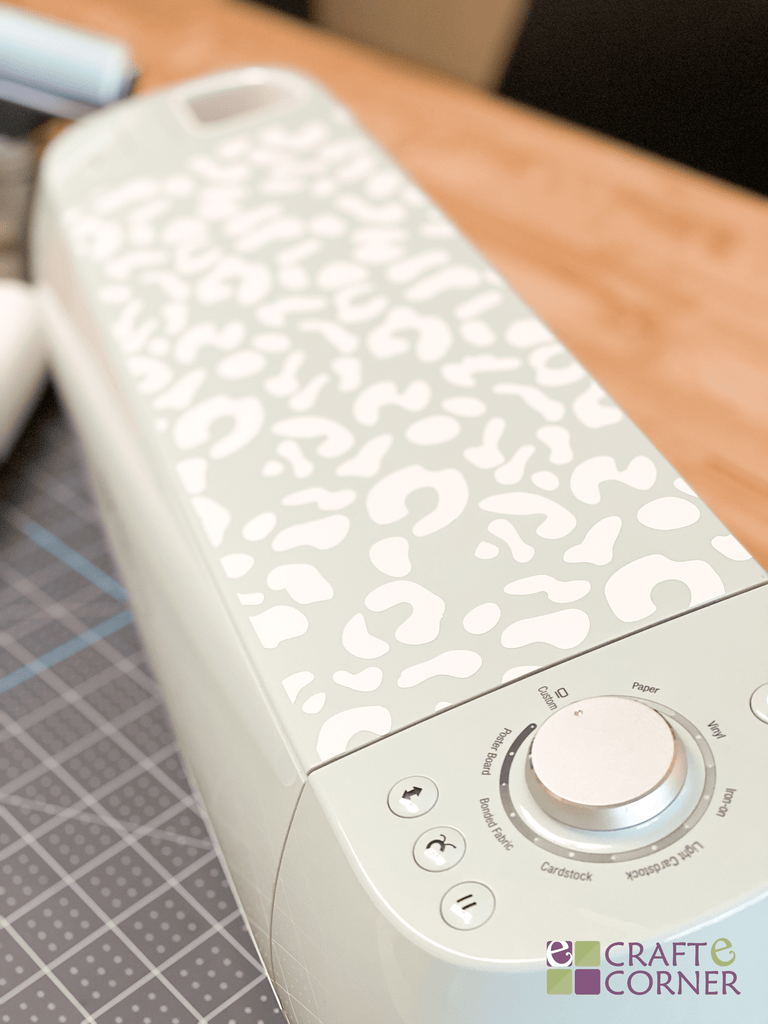
What do you guys think? I really love the mint color with the white. I love how it turned out. If you make your own, make sure you join our Craft-e-Corner Facebook group so we can see your creation! Happy crafting.
-Courteney
One Week Till the Launch of the New Cricut Explore 3 and the new Cricut Maker 3

Leave a comment