
Free Shipping
On Orders $49+
On Orders $49+


Planning a grown-up birthday bash and want to kick it up a notch? Well, guess what? We've got some easy-peasy ideas to make your celebration stand out with a Casino or Poker Night twist. Imagine this: Cool foam visors with casino decals for you and your friends. Fancy glasses that make your drinks look Instagram-ready. And don't forget the snacks - picture them in cute boxes with playing cards.
Get ready for a DIY party upgrade with some help from Cricut. We're here to guide you through turning your birthday into a memorable night without breaking the bank. Let's make this celebration one for the books!
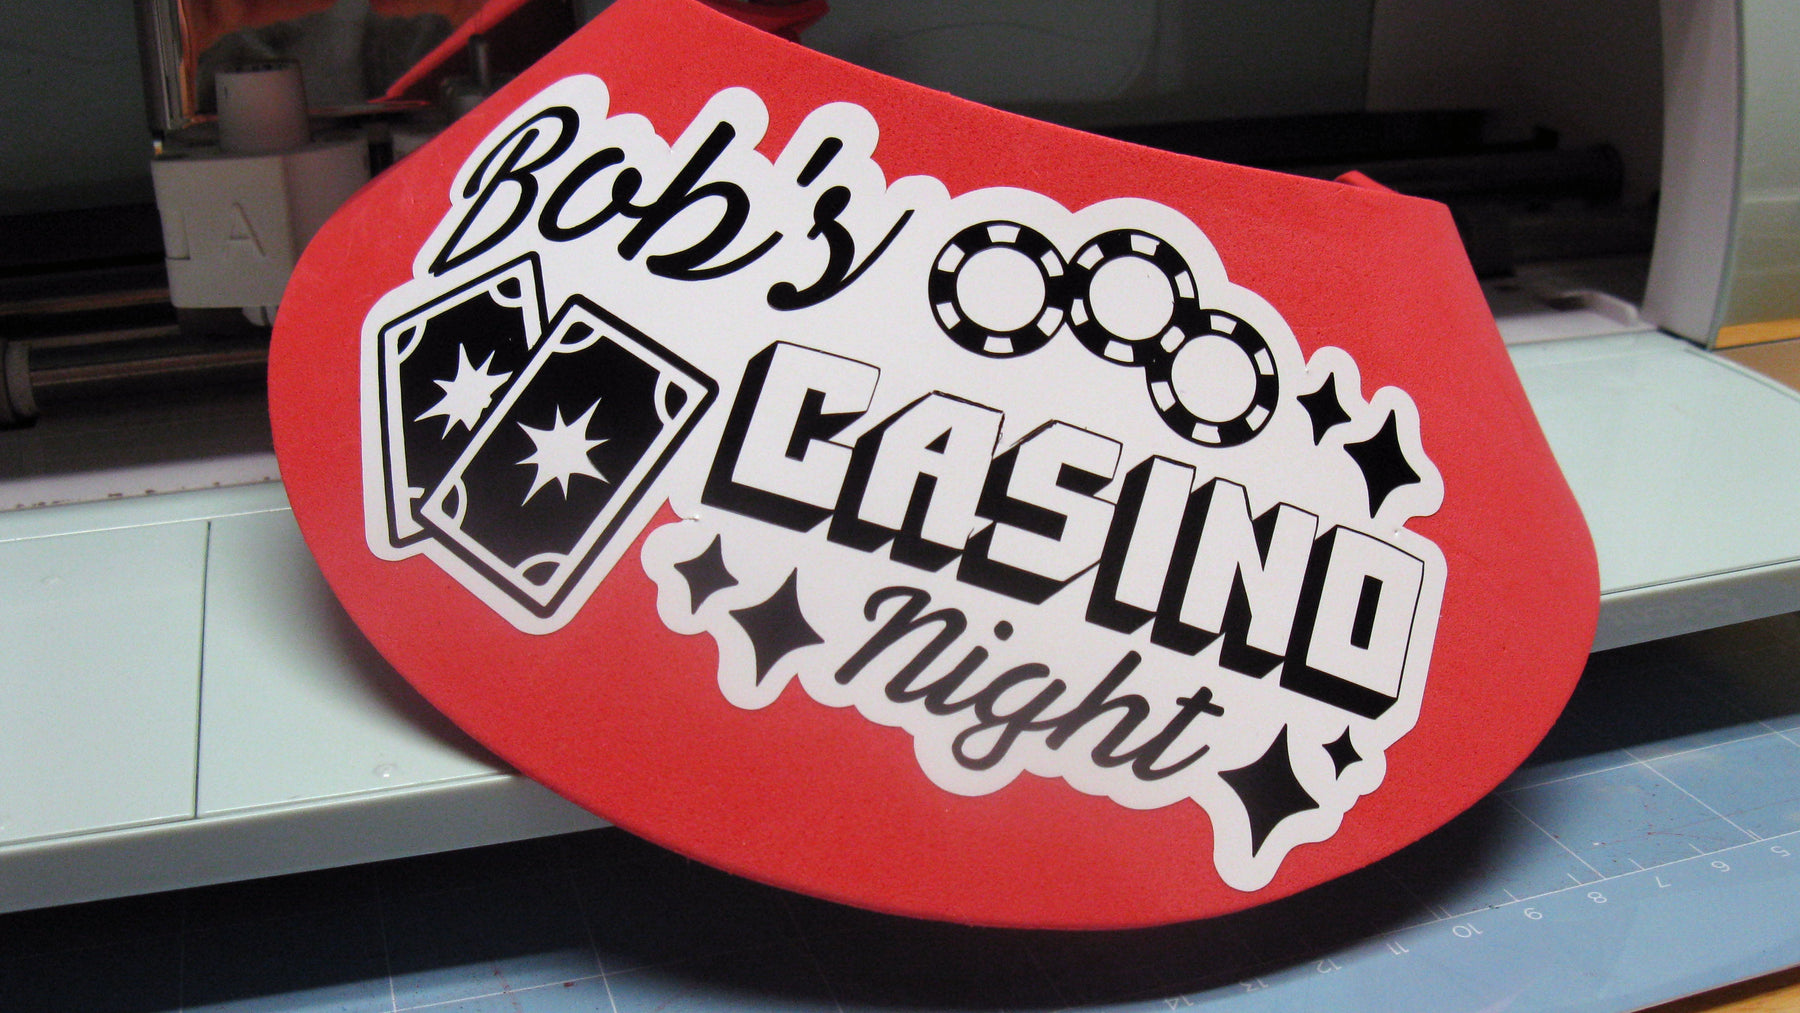
If cutting your own visors, download the free template and cut the visors from red, white or black craft foam using your Cricut Maker Series Cutting Machine with a Knife Blade, or by hand using scissors.

Using a hole punch, punch a hole at each end of the foam visor. Thread a 10-12 inch length of curly lacing material or thin elastic through each hole and secure with an overhand knot to create the "band" for the visor.
Find the Casino Night cut design provided in Cricut Design Space. Delete and replace the name included on the design with the name of your birthday person. I am using the font - Letteria Pro - included free with Cricut Access.

Cut the design from Cricut Smart Vinyl using any of Cricut's Smart Cutting Machines (Maker 3, Explore 3, Joy, or Joy Extra), or load standard Cricut Vinyl in a contrasting color on a LightGrip Cricut Cutting Mat and make the project. Carefully remove the excess vinyl around your design using your favorite weeding tool.
Cut a piece of Cricut Transfer Tape slightly larger than your design. Place the transfer tape over the vinyl design and use a scraper tool to smooth out any bubbles.

Peel off the backing from the vinyl, leaving the design on the transfer tape. Center the design on the front of the visor and press it down firmly. Gently rub over the transfer tape to ensure the vinyl adheres well to the visor. Slowly peel off the transfer tape, leaving the vinyl design securely on the visor.
Choose flat-sided glass glasses or disposable cups. Ensure they are clean and dry. In Cricut Design Space, use the provided cut design. As with the visor, customize as desired and size to fit your glasses.

Load your vinyl on a LightGrip Cricut Cutting Mat and make the project. Using a weeding tool, carefully remove the excess vinyl around your design, leaving only the desired pattern.
NOTE: If you opted for glass glasses and would like to send the drinking glasses home with your guests as party keepsakes, use Cricut Permanent Vinyl for your cut design. If you'd like to save glass glasses for another occasion, make the project using Cricut Removable Vinyl for reuse.
As with the visor, cut a piece of Cricut Transfer Tape slightly larger than your design. Place the transfer tape over the vinyl and use a scraper tool to smooth out any bubbles. Peel off the backing from the vinyl, leaving the design on the transfer tape. Align the design on the glass or cup, making sure it's centered, and press it down firmly. Smooth out any air bubbles or wrinkles with your fingers.
NEED MORE HELP APPLYING CUT VINYL TO CUPS? See this blog post for tips on applying vinyl to a curved surface. Or watch our video about using the hinge method to apply vinyl to a bottle surface.
Opt for heavy white cardstock or lightweight posterboard for sturdy snack boxes. Head to Cricut Design Space and grab the provided design.

Load your paper onto the Cricut cutting mat. Follow the instructions in Cricut Design Space to cut and draw. Use red and black Cricut Pens to create the fun playing card design on the sides of the box.

Fold along the designated lines to shape the box. Use white glue or adhesive tape to secure the edges and corners, creating a sturdy snack box. Once the glue is dry, fill your DIY snack boxes with your favorite treats - chips (of course!), nuts, popcorn, or any snack that suits your taste.

Turning your birthday bash into a grown-up Casino or Poker Night is a breeze with these cool DIY ideas. Thanks to Cricut, you can easily amp up your party game without going broke. Grab some Cricut Vinyl, foam visors, and heavy cardstock, and let the crafting magic begin.

Imagine your pals rocking personalized foam visors with the birthday person's name in a cool Casino Night design. Plus, those glasses and snack boxes with playing card vibes will make your celebration a hit. You've got options - go glossy with Cricut Permanent Vinyl or keep it flexible with Cricut Matte Removable Vinyl. It's all about making it yours.

And swapping out generic designs for the birthday person's name? Total game-changer! Cricut's got tons of cut designs in their Design Space. Mix, match, and let your creativity run wild. With materials that match your vibe and a personal touch, you'll throw a birthday bash that's unforgettable.
How to Apply Cricut Vinyl to Libbey Can Glasses
Leave a comment